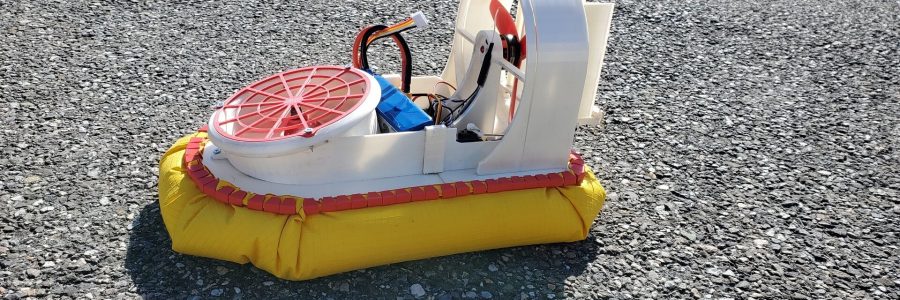
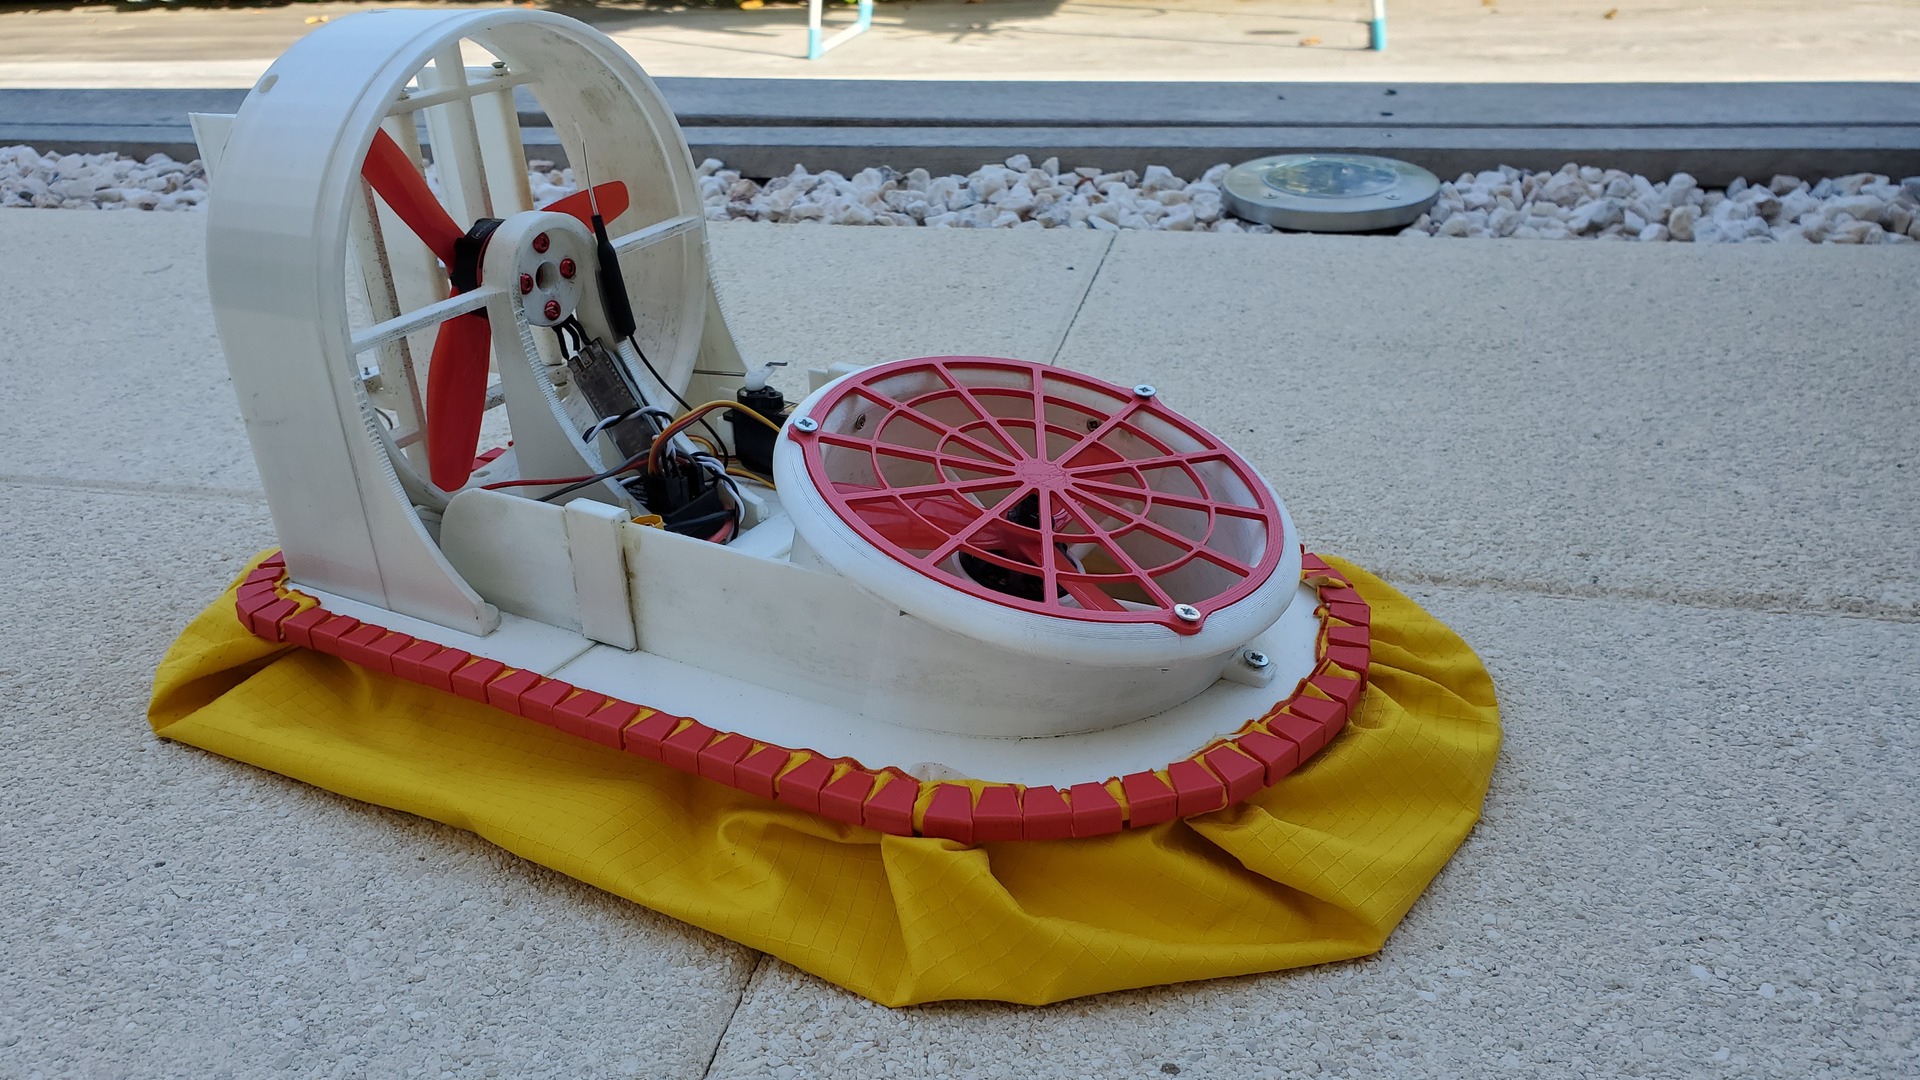
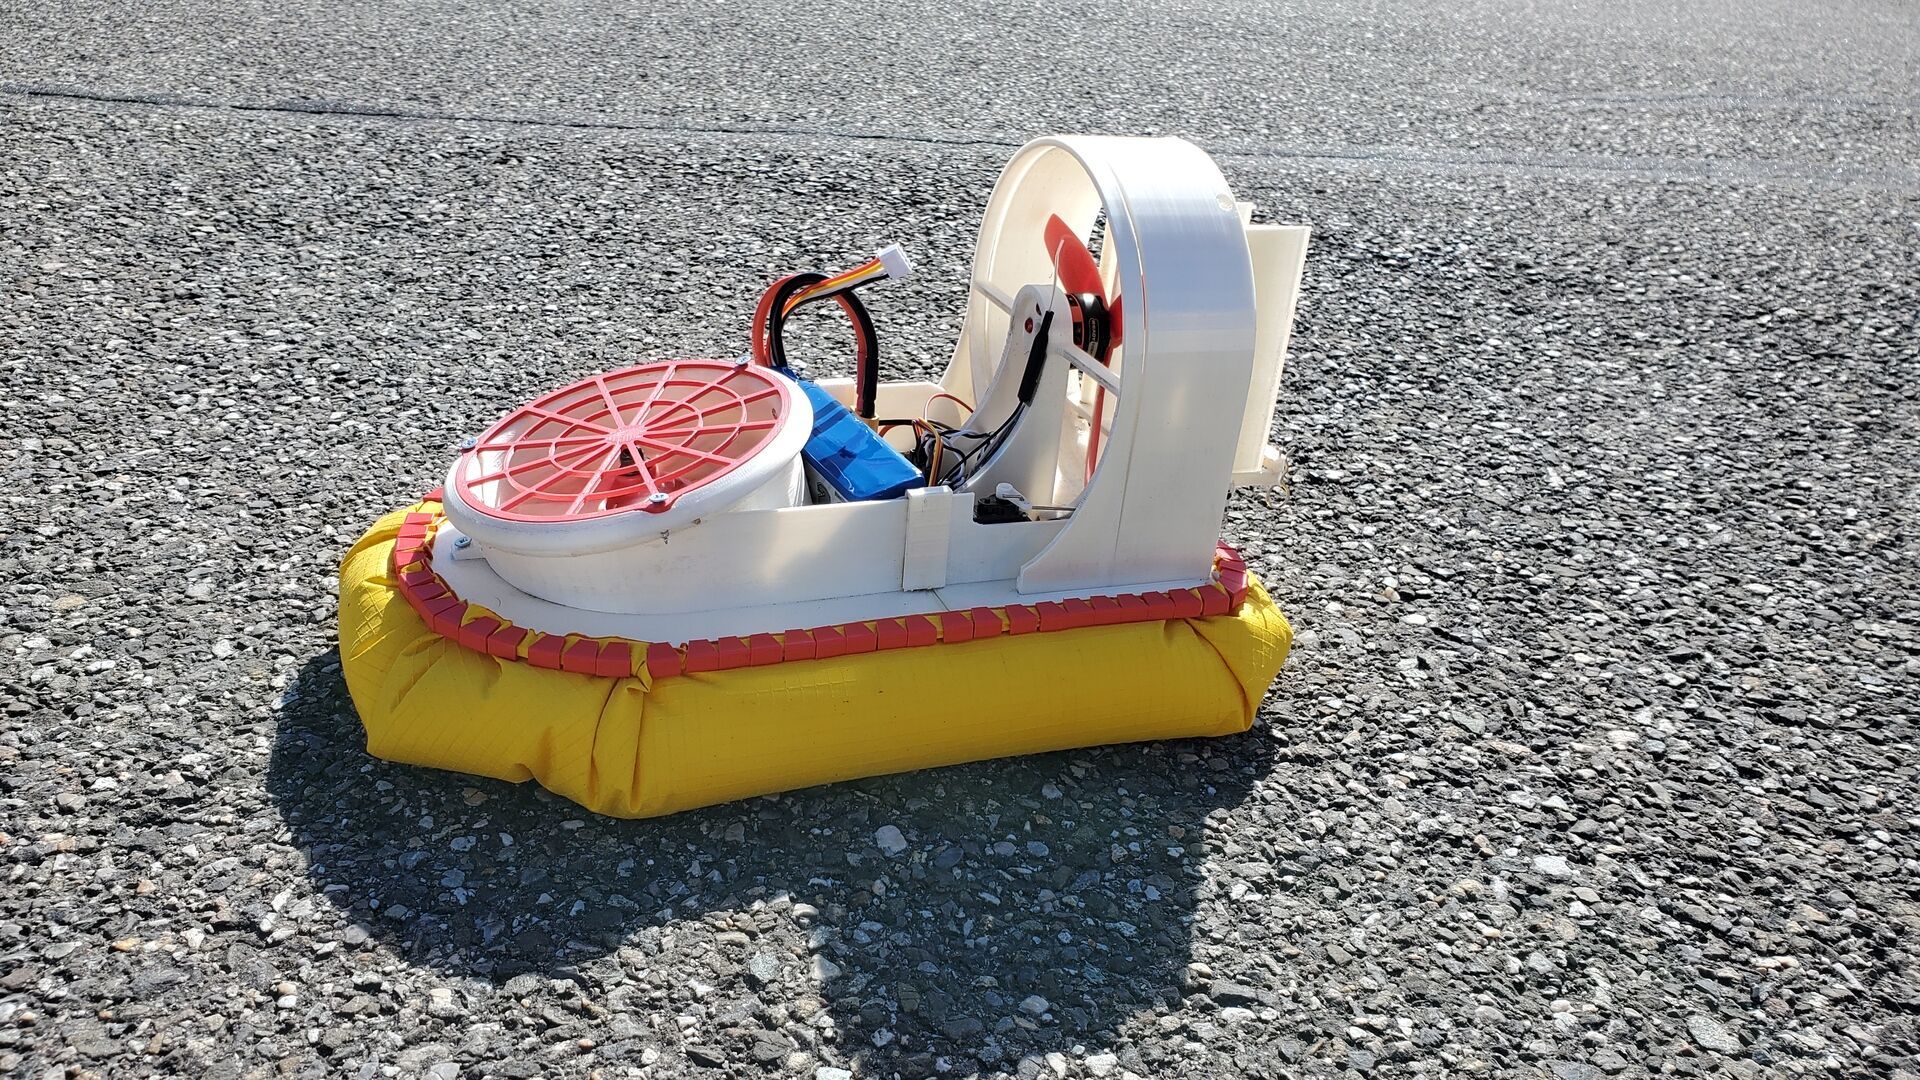
3d printed RC Hovercraft
The idea emerged from a fantastic Thingiverse project http://thingiverse.com/thing:2700850. I’m fan of RC hovercraft since my childhood, but it seems that we are too few in that case to have good industrial response 😉
I did not create anything here, but I found it not that easy to find a true complete requirement list and what parts from original project’s remixes I should take.
So this article is the story of my build with, I hope, enough informations to make this fun project more accessible !
Requirements
3d print parts
I used part from the original project and the following remixes:
- http://thingiverse.com/thing:4158803
- http://thingiverse.com/thing:2719984
I printed all parts in PLA with my Anycubic i3 Mega (20×20 print surface): 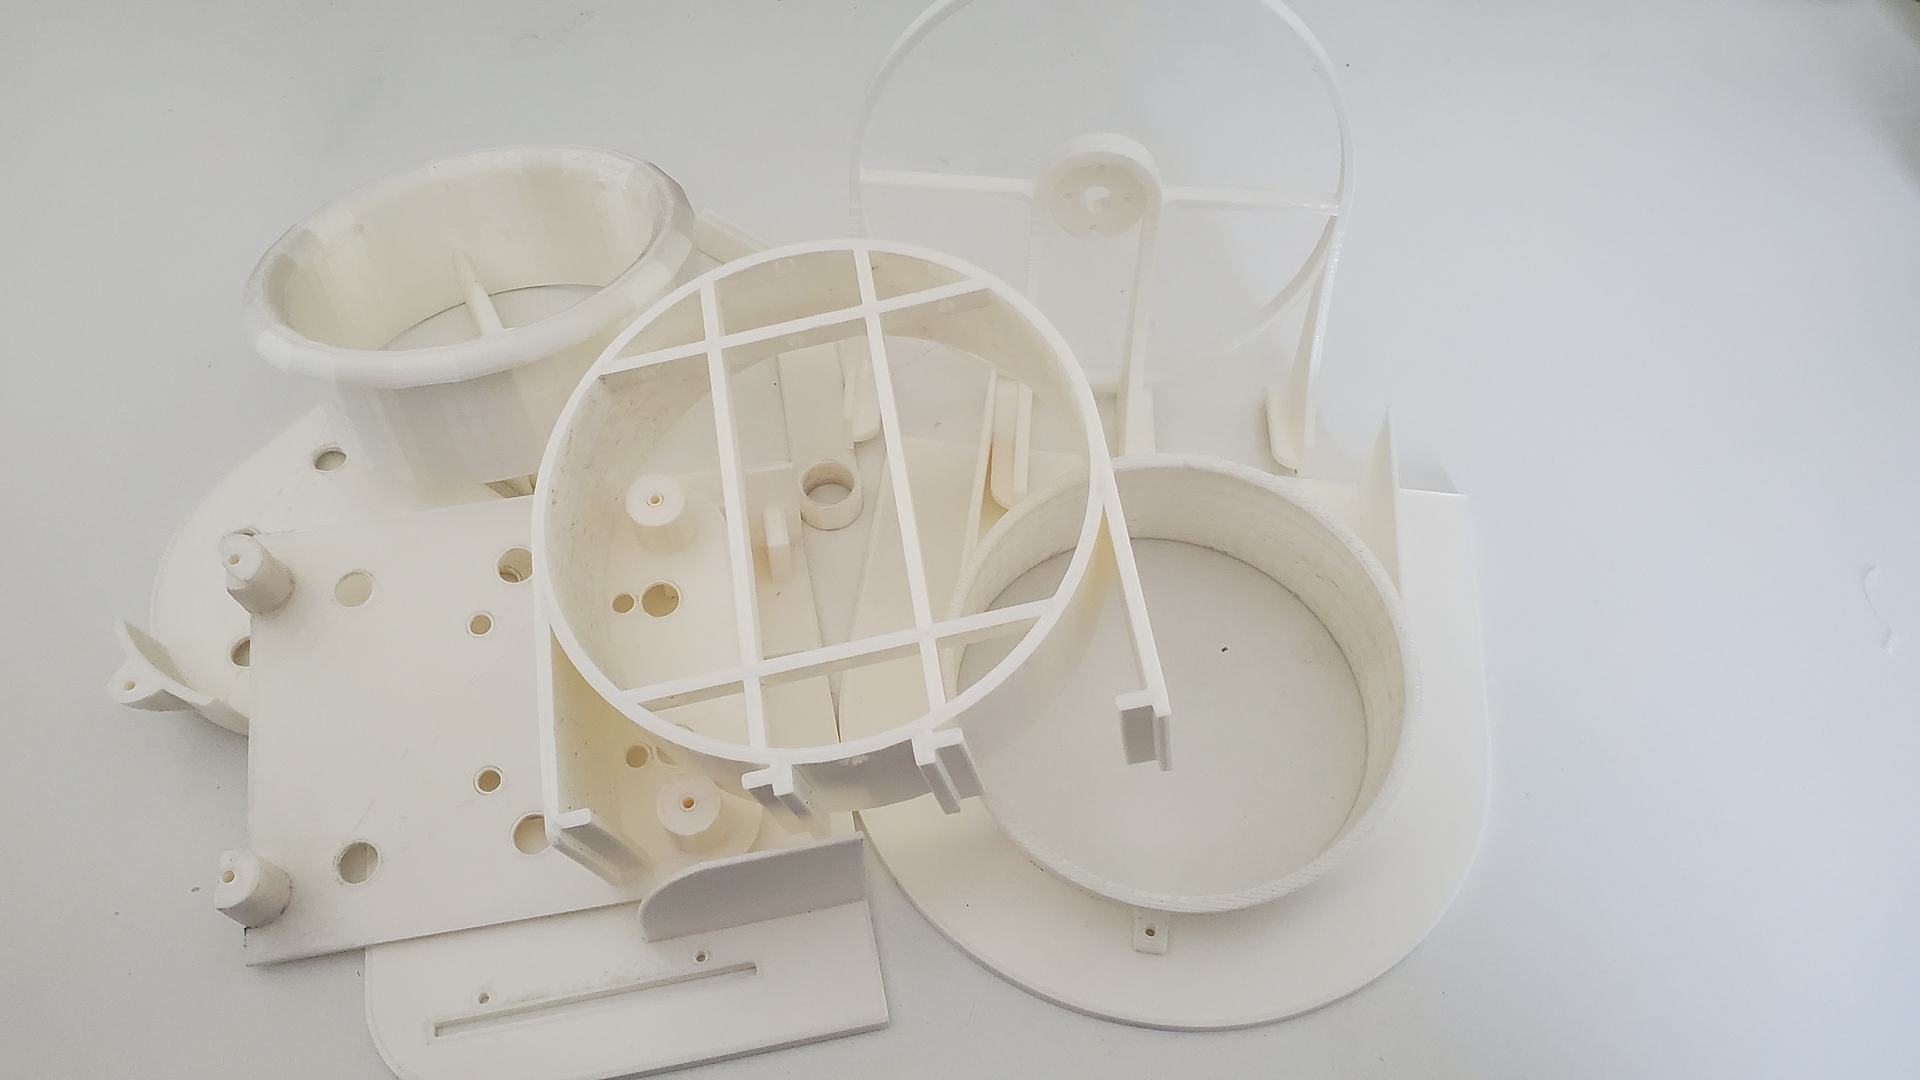
- 0.4 mm nozzle
- first layer 0.3
- layer height 0.2
- 15% infill
- supports everywhere on all but the lower hull, skirt ring and skirt clips
- print speed : 40
Note that the biggest part must be printed in diagonal on the print bed. Cumulated total print time is around 75 hours, with the longest part to print that took 13h40.
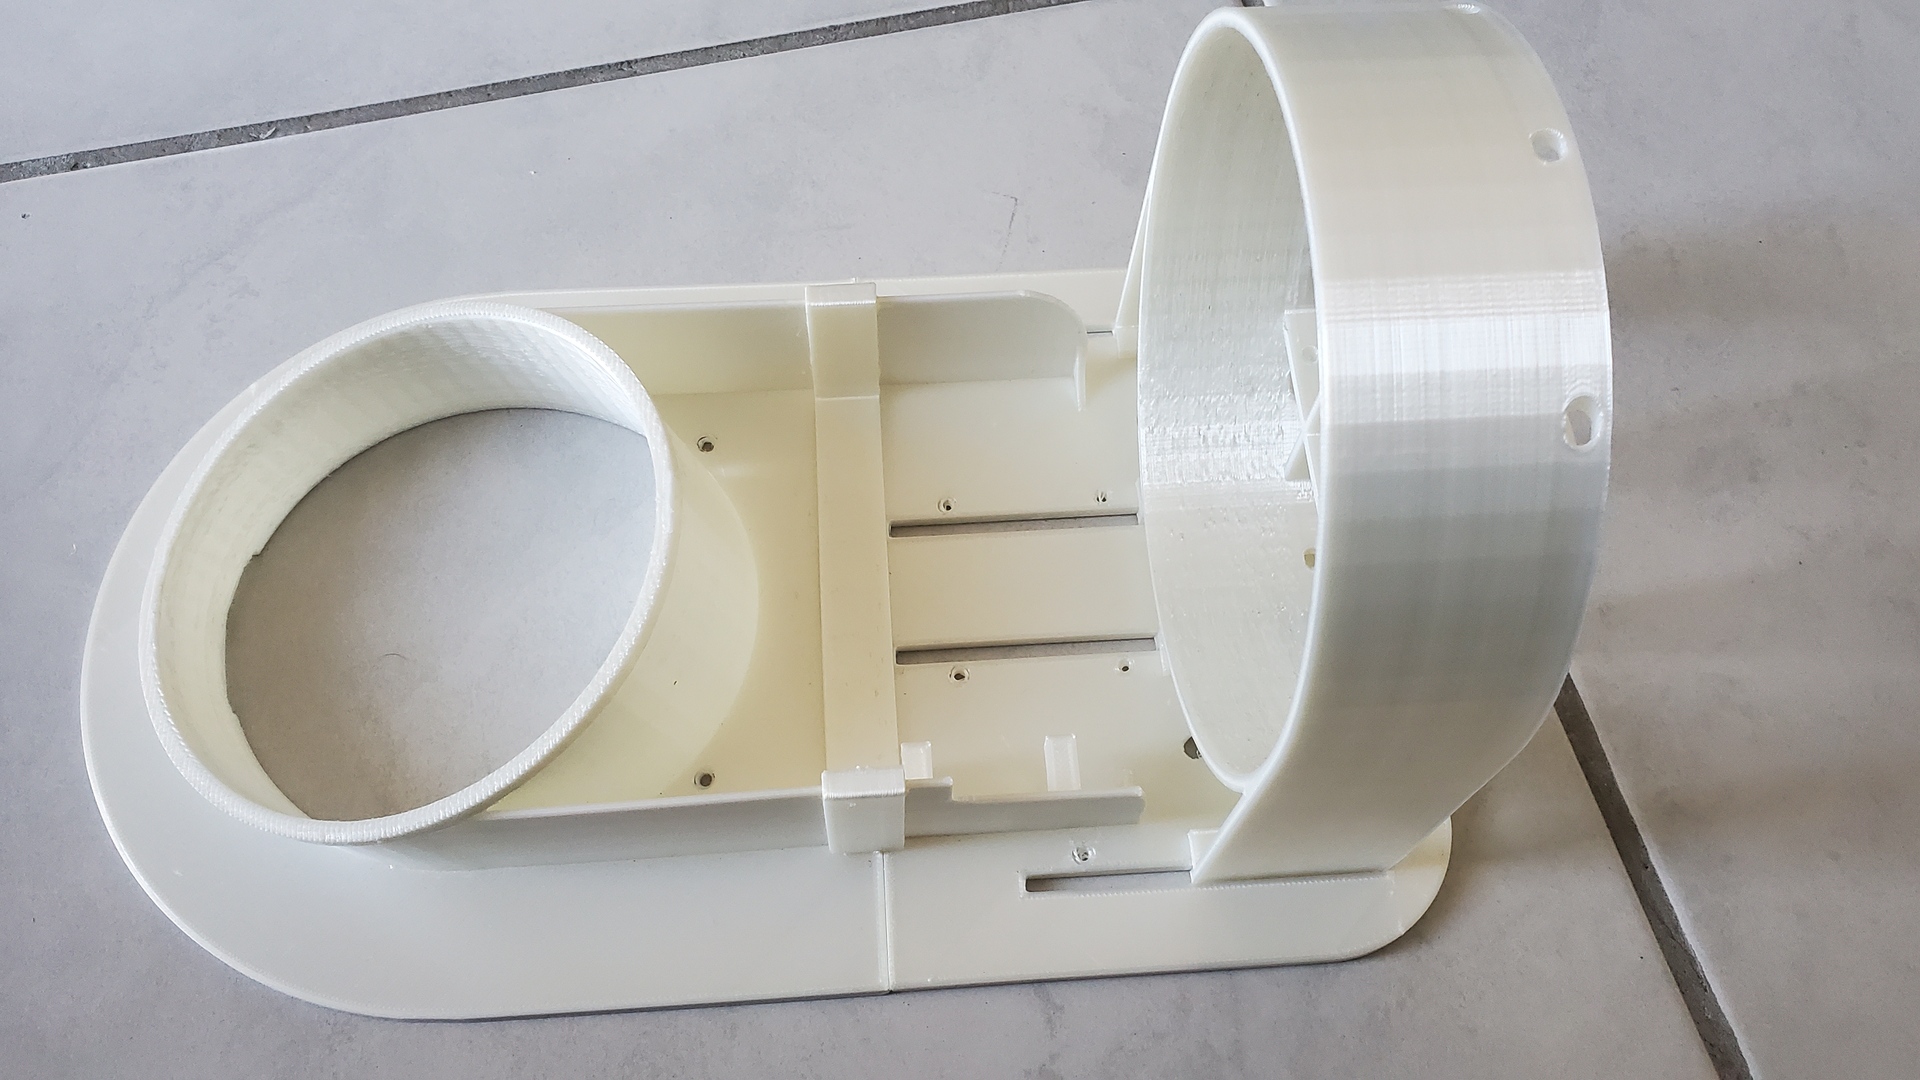
The lower hull, upper hull and thrust duct have been glued with with Araldite Standard (epoxy based glue). This is a really good glue for this king of job, as it takes severals hours to fix, so you have time to adjust the parts.
Electronic parts
This is were it can be difficult to understand what is exhaustively needed if you are not familiar with R/C. You will find below all parts I really used, where I found them and their cost in euros :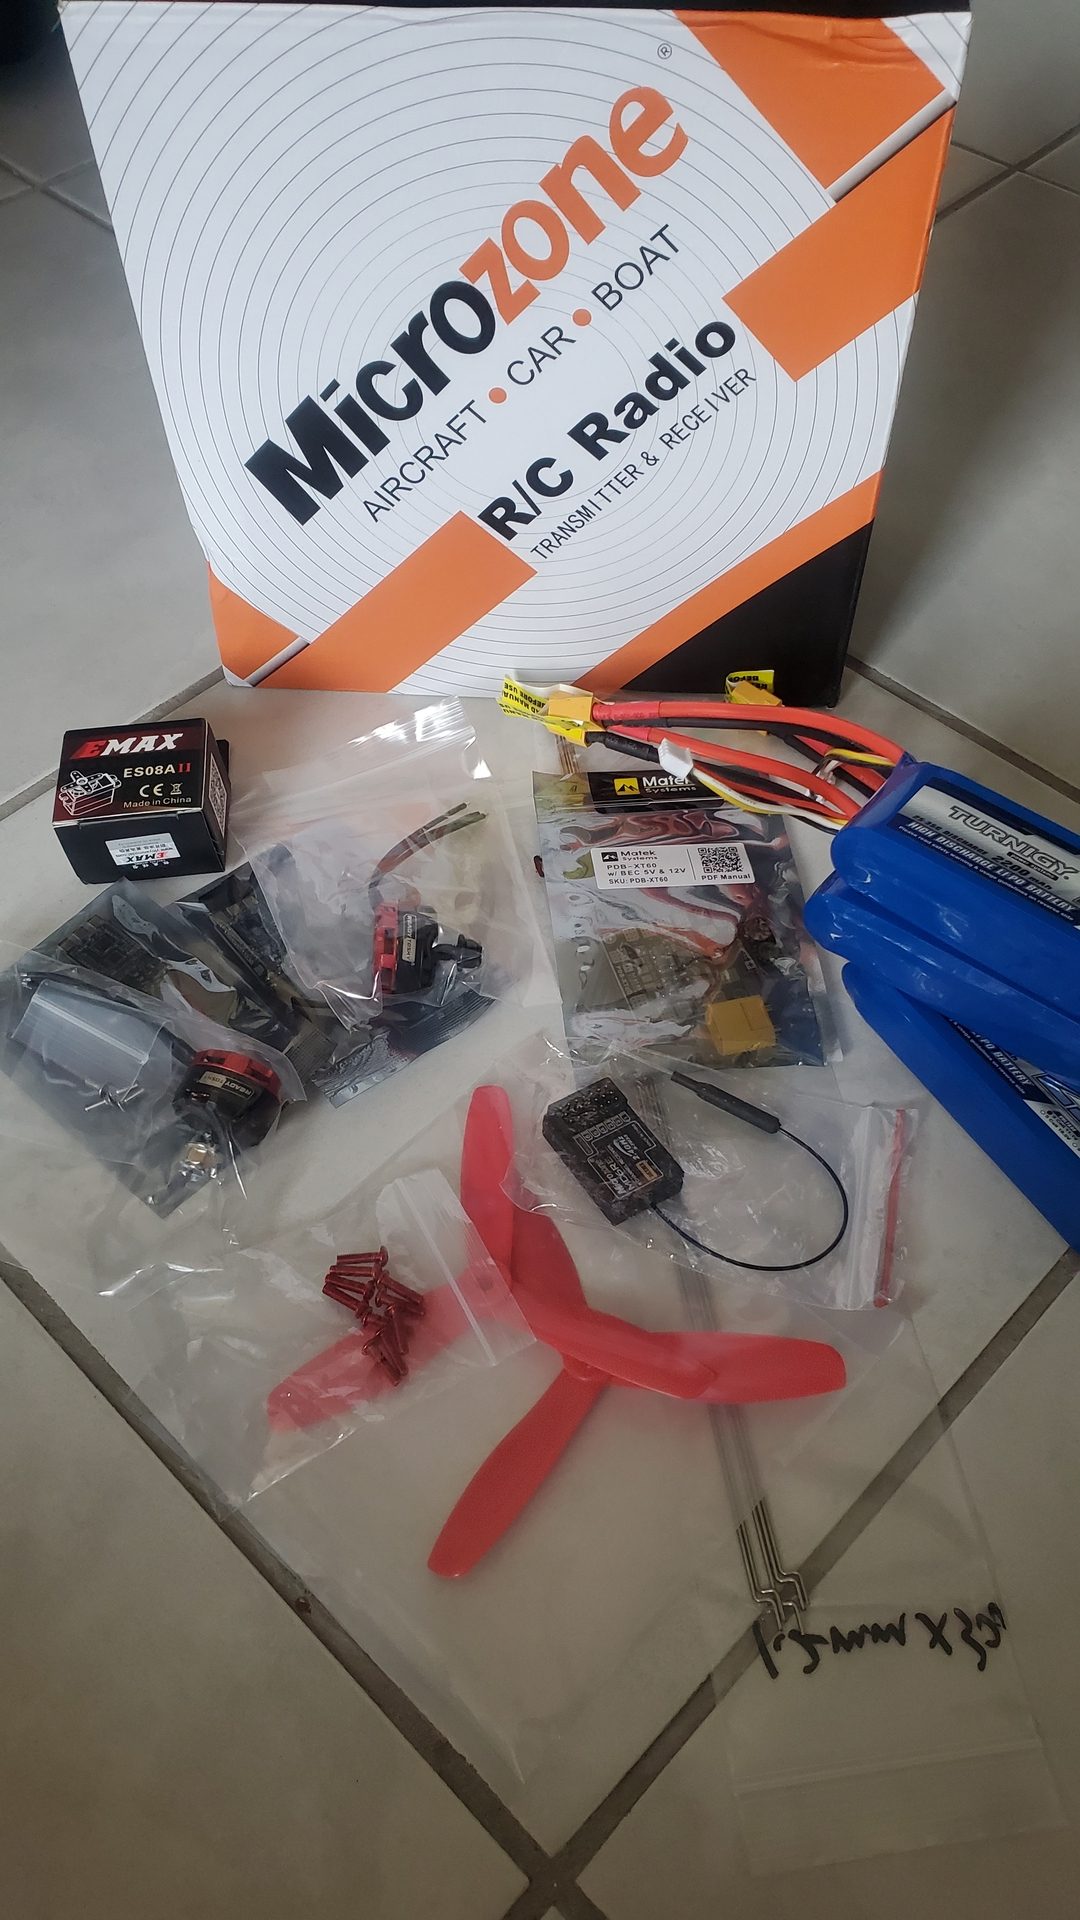
| Items | Where | Price |
|---|---|---|
| Brass tube, 3mm inside hole diameter | amazon | 10 |
| 2 little bee 30A ESC. My advice is to buy 3 if one is defective | aliexpress | 12 |
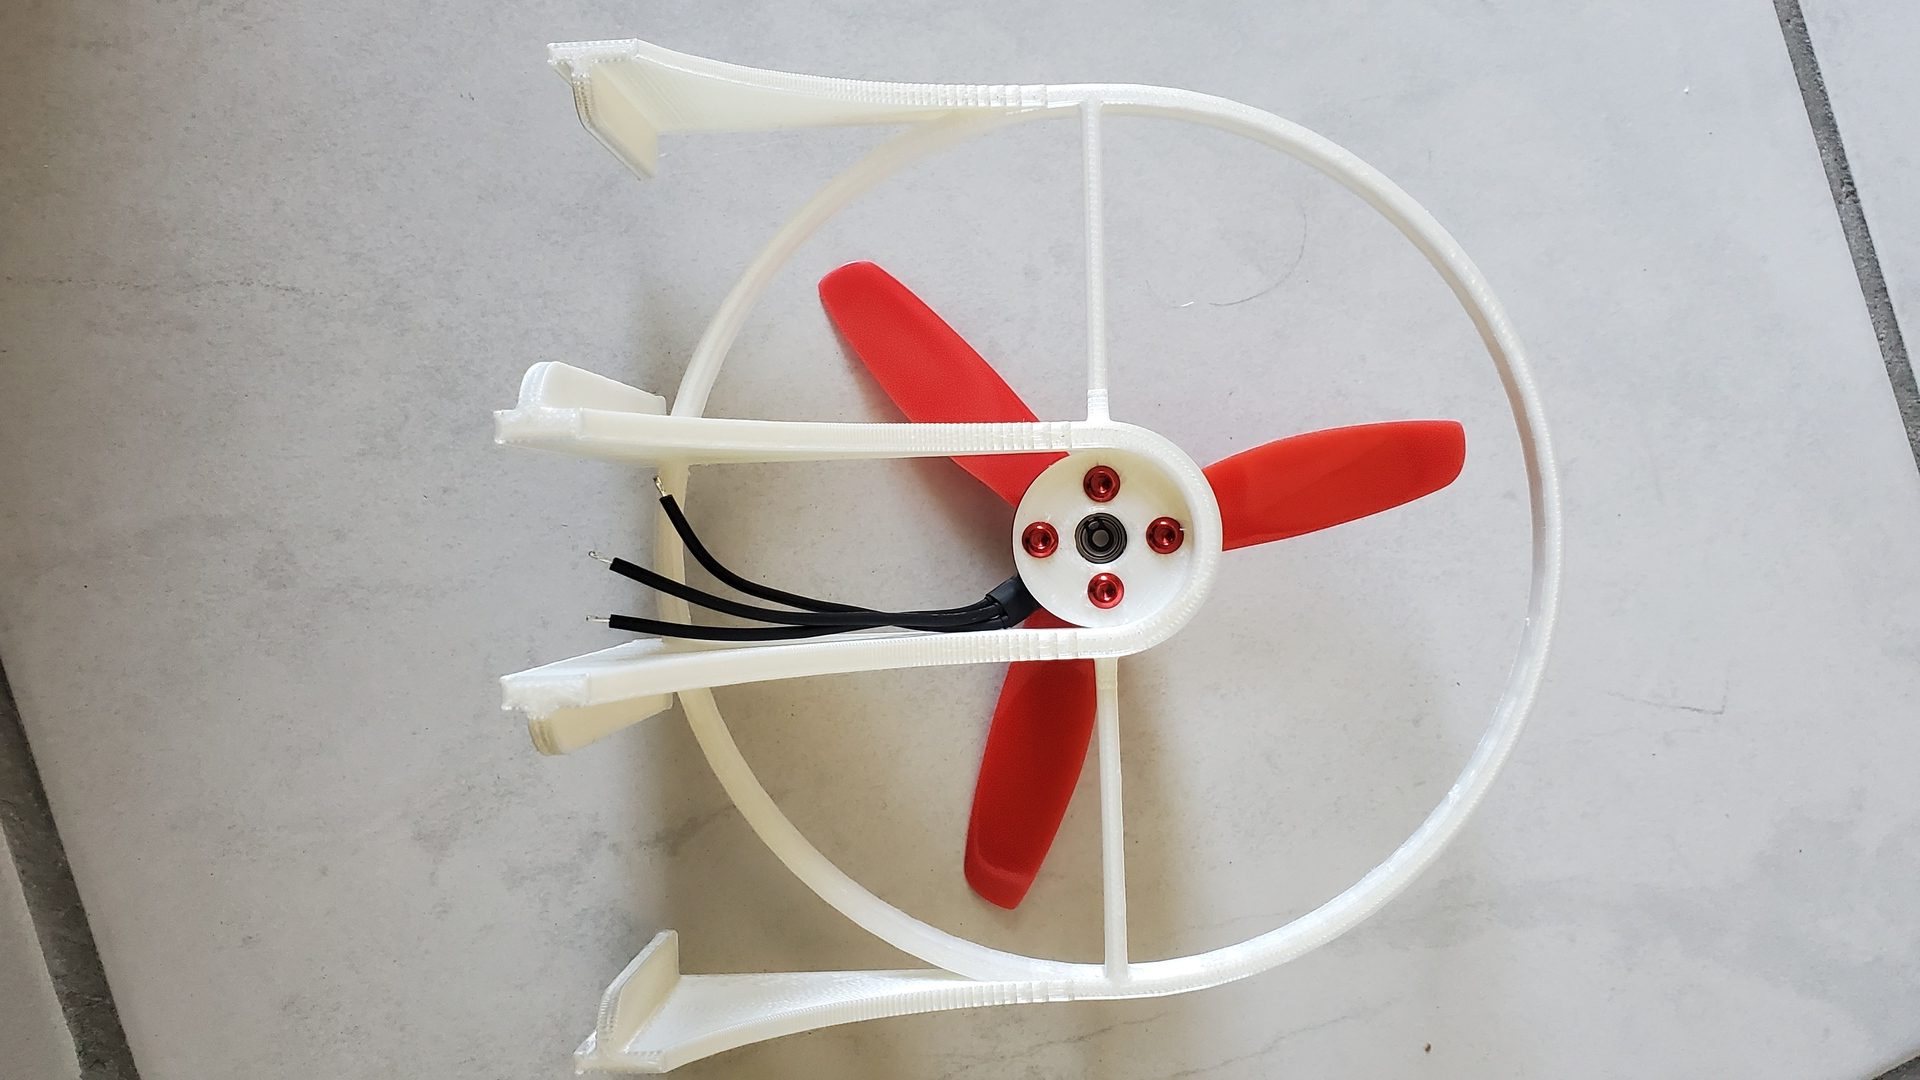
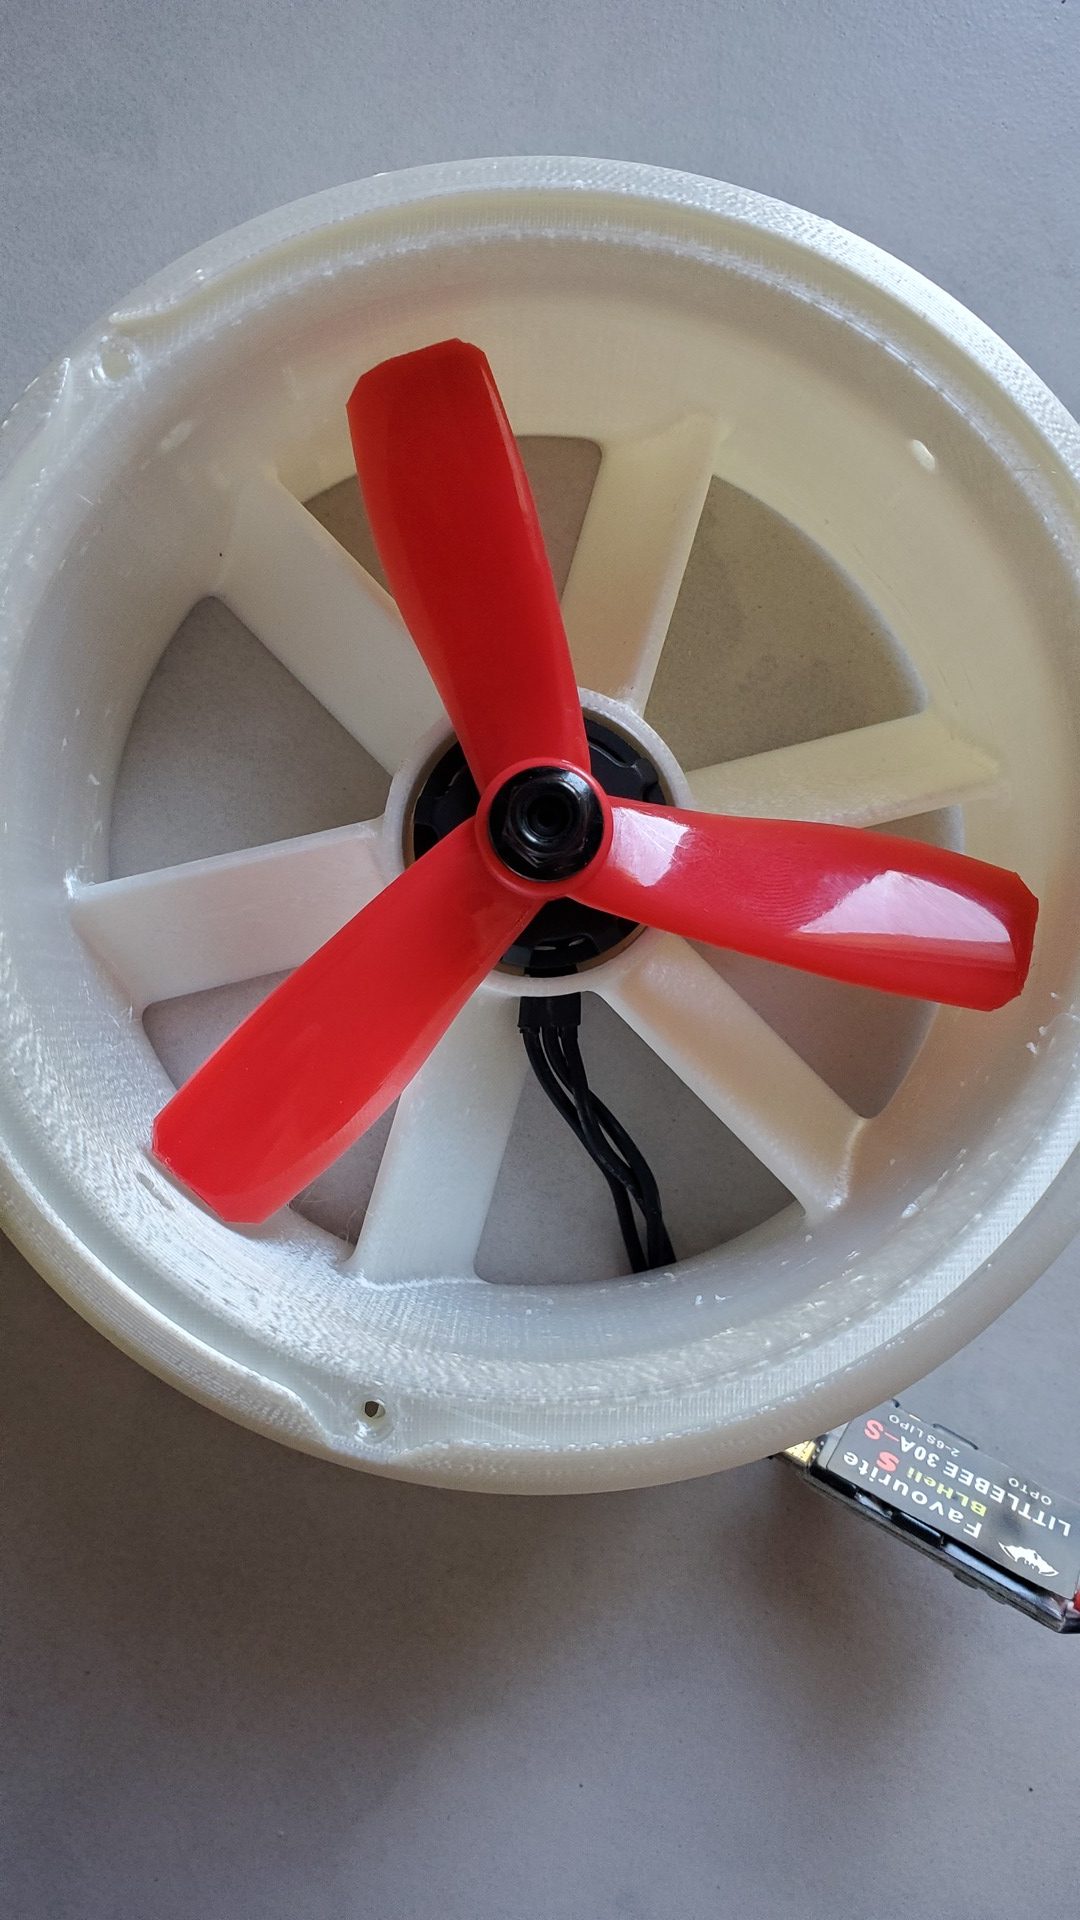
| 2 brushless RS2205 2300kv. I took a pair with one clockwise and the other counter-clockwise, just pair them with corresponding propellers | aliexpress | 12 |
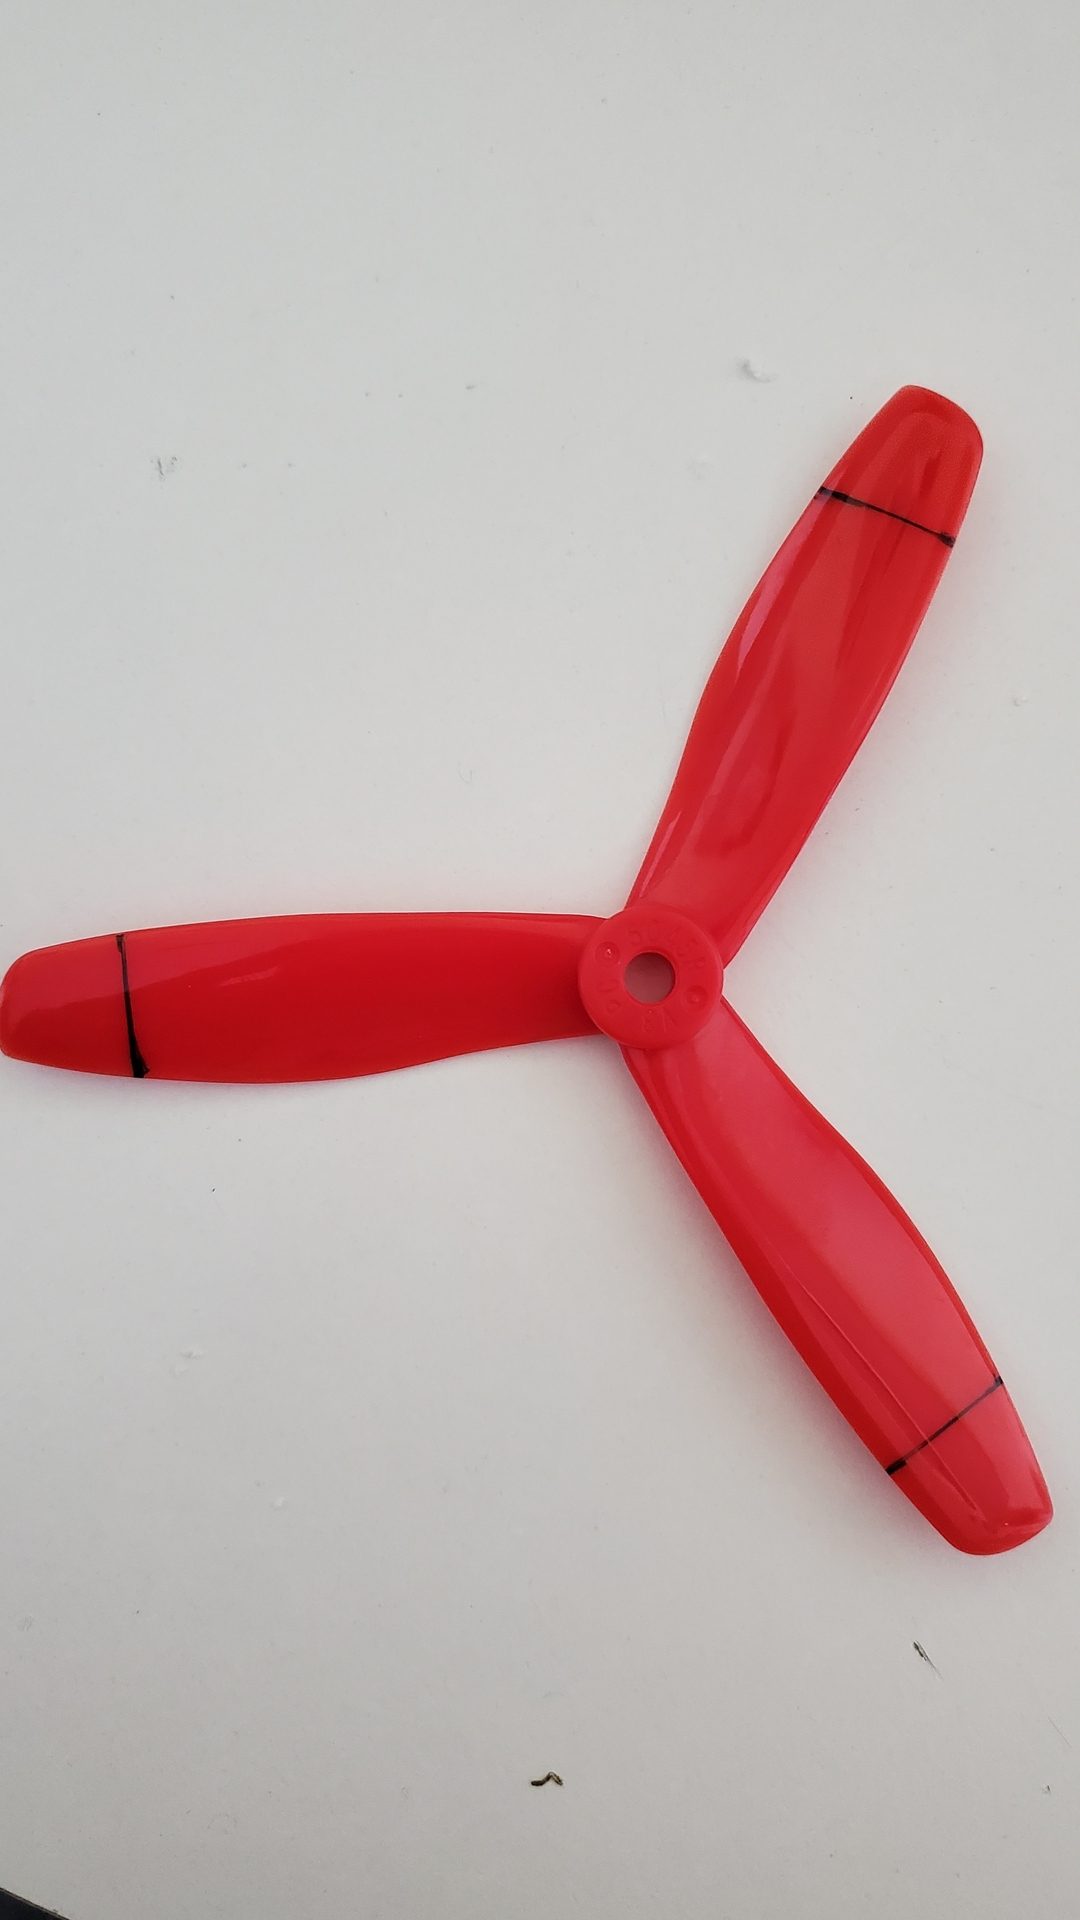
| 2 propellers, clockwise or counter clockwise, depending on your motors. I bought a kit of 12 in various colors to be able to choose the color I prefer during the build. | aliexpress | 9 |
| One connecting rod, 1.5 mm. I bought a kit with 5 pieces, just in case 😉 | aliexpress | 3 |
| 2.4 Ghz Microzone controller and receiver kit, 6 channels (only 3 channels needed). I took a right handed one so the lift motor can be triggered with the right thumb, while the left thumb is used to accelerate. | aliexpress | 28 |
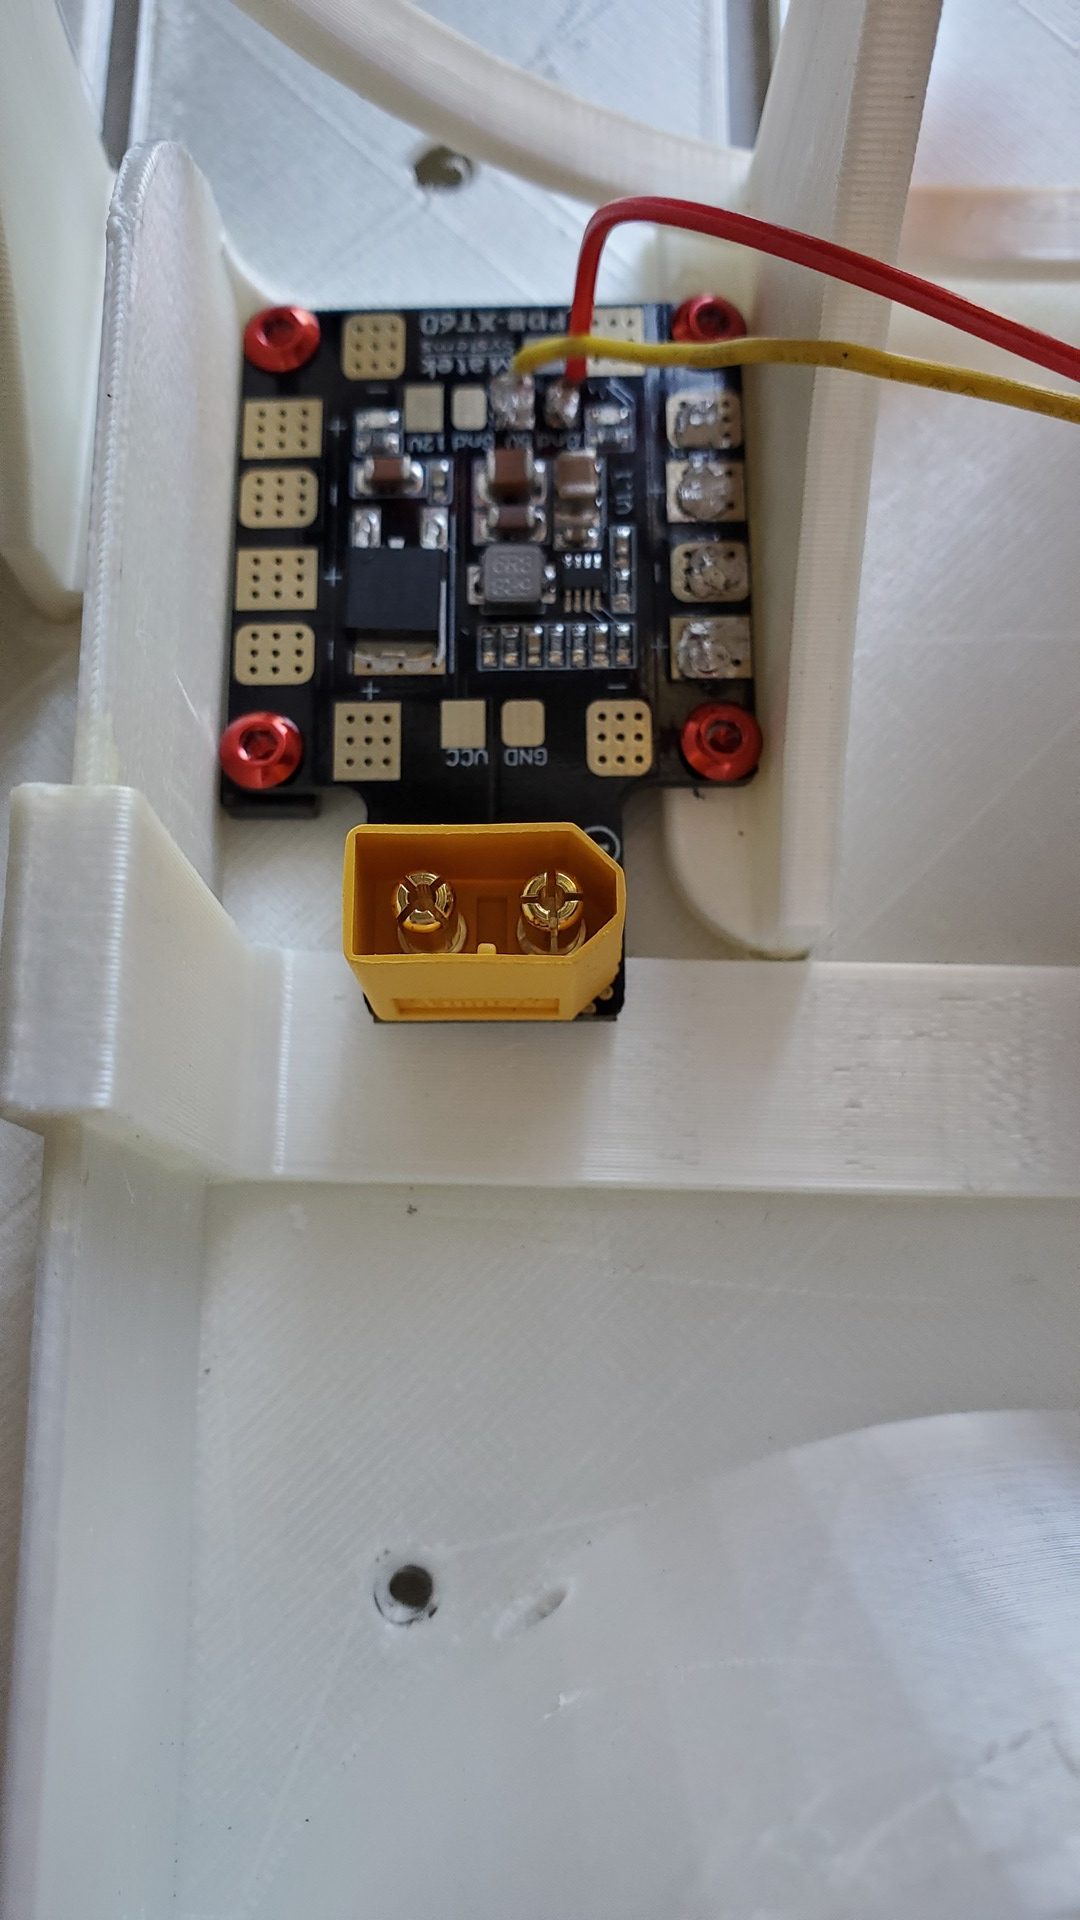
| A Power distribution board, Matek XT60 3A | aliexpress | 5 |
| A 9g Emax micro servo (ES08A) | aliexpress | 6 |
| Imax B6 lipo charger, complete pack | aliexpress | 27 |
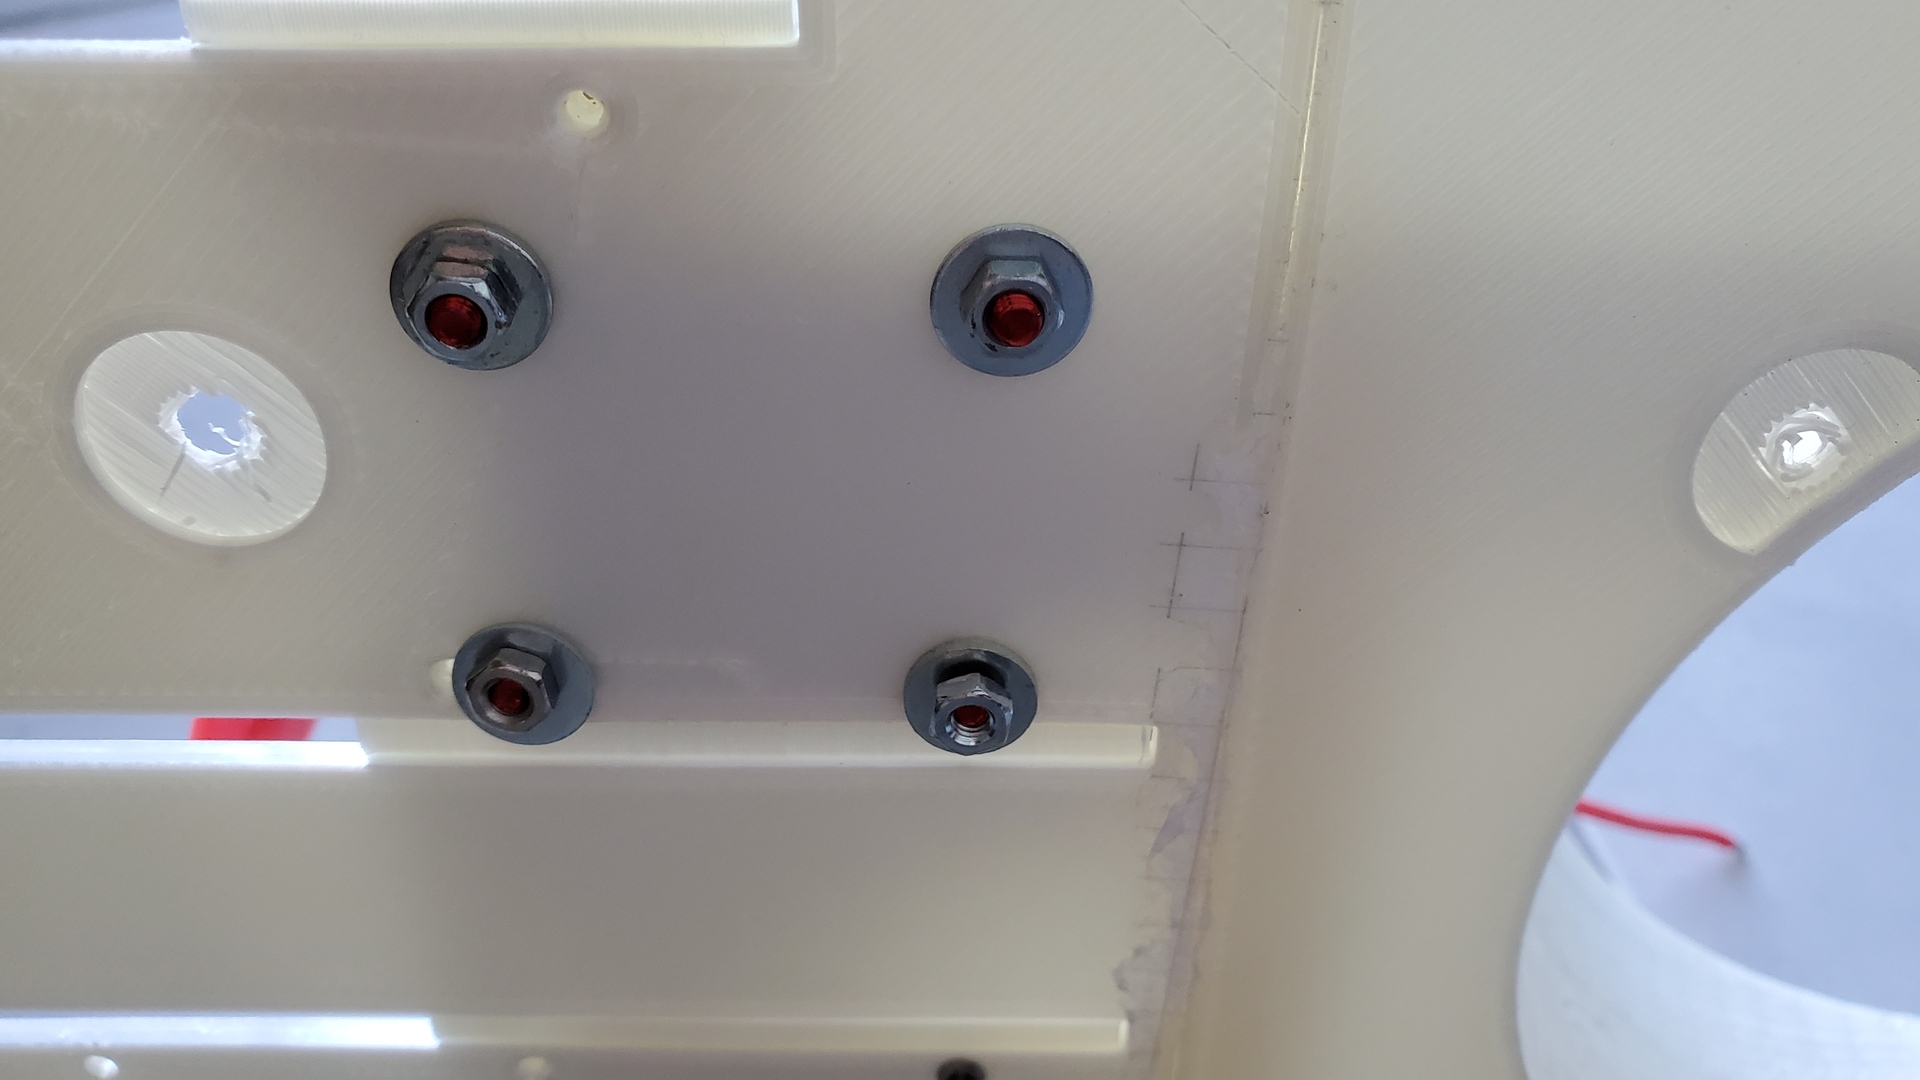
| 8 M3x12 skrew. I bought anodised ones in the same colors as the motor (red) | aliexpress | 4 |
| 1.3 mm connectors plug for connecting rods. Only one is needed, but there are often sold in pack | aliexpress | 5 |
| At least one 3S lipo battery. I personnaly bought 3 pieces : Turnigy 2200mAh 3S 25C | hobbyking | 12 |
| TOTAL | 133 | |
The build
Step by step
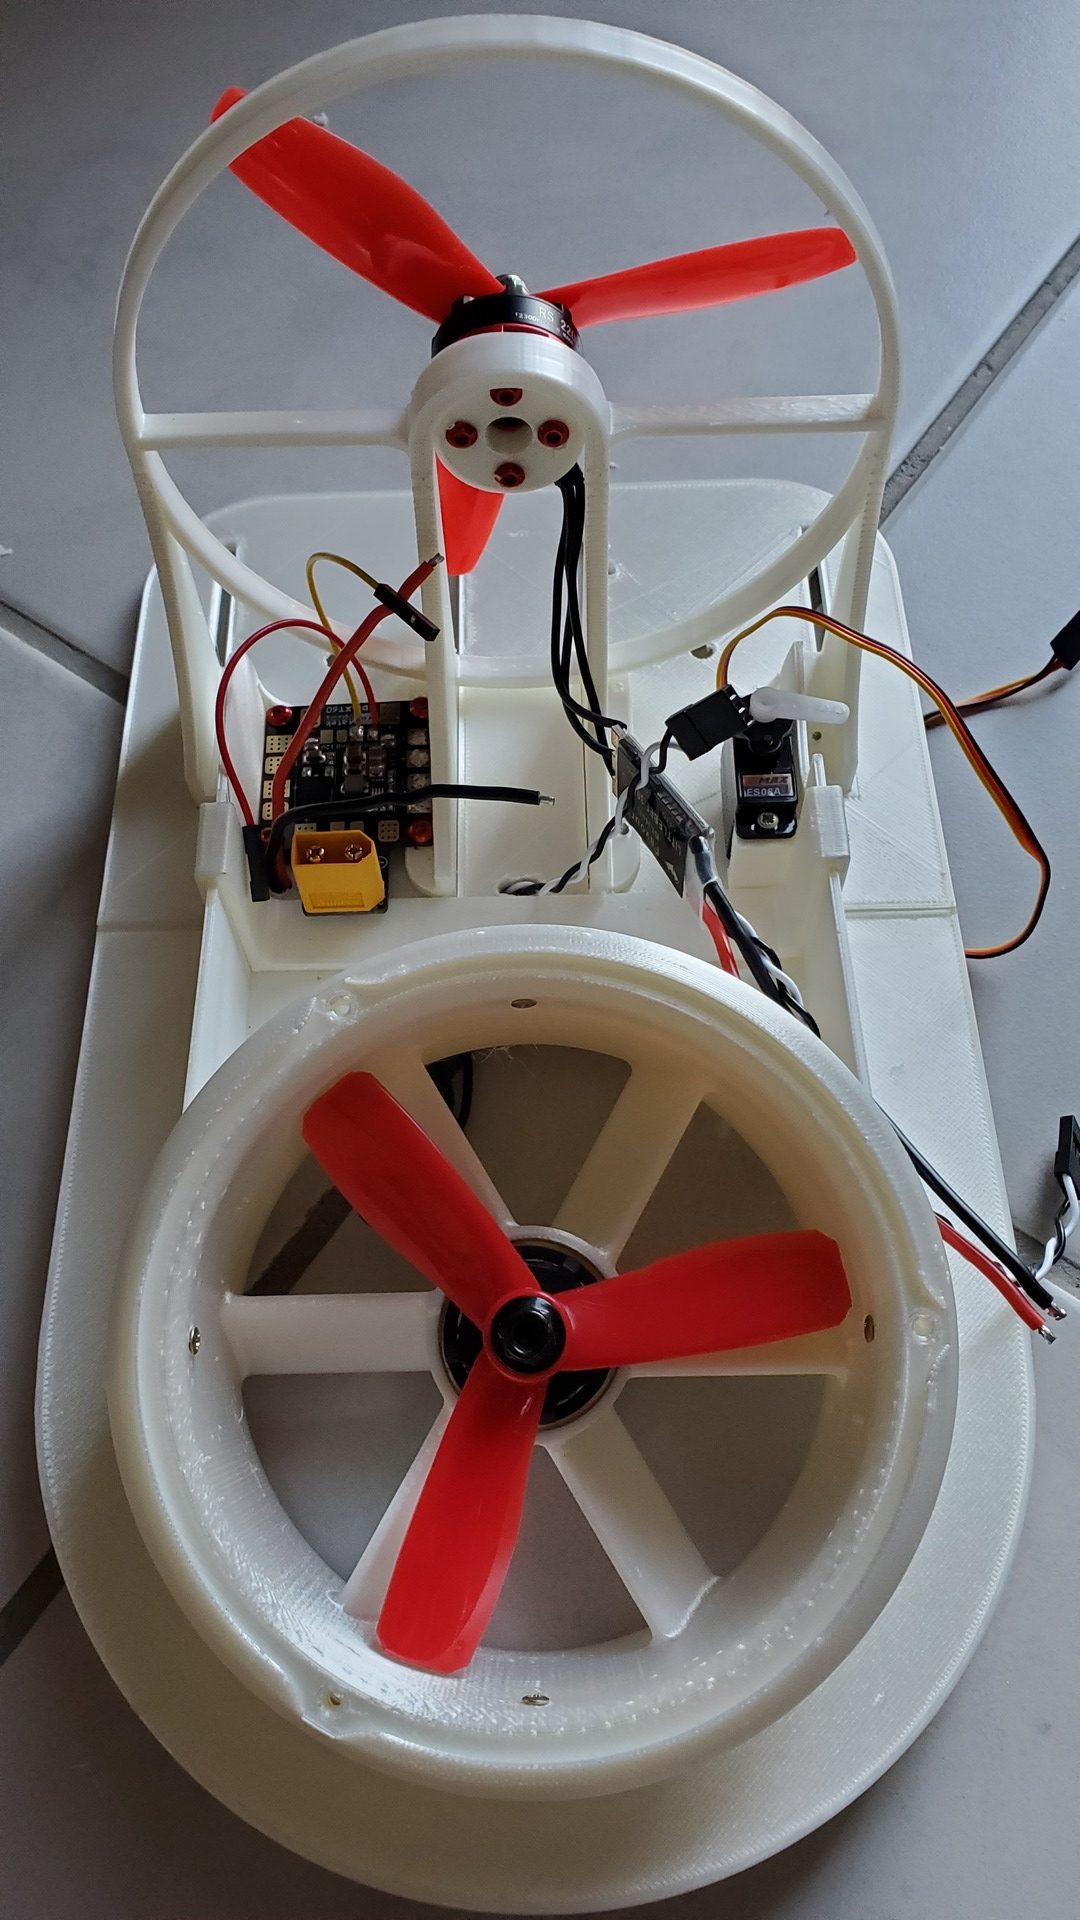
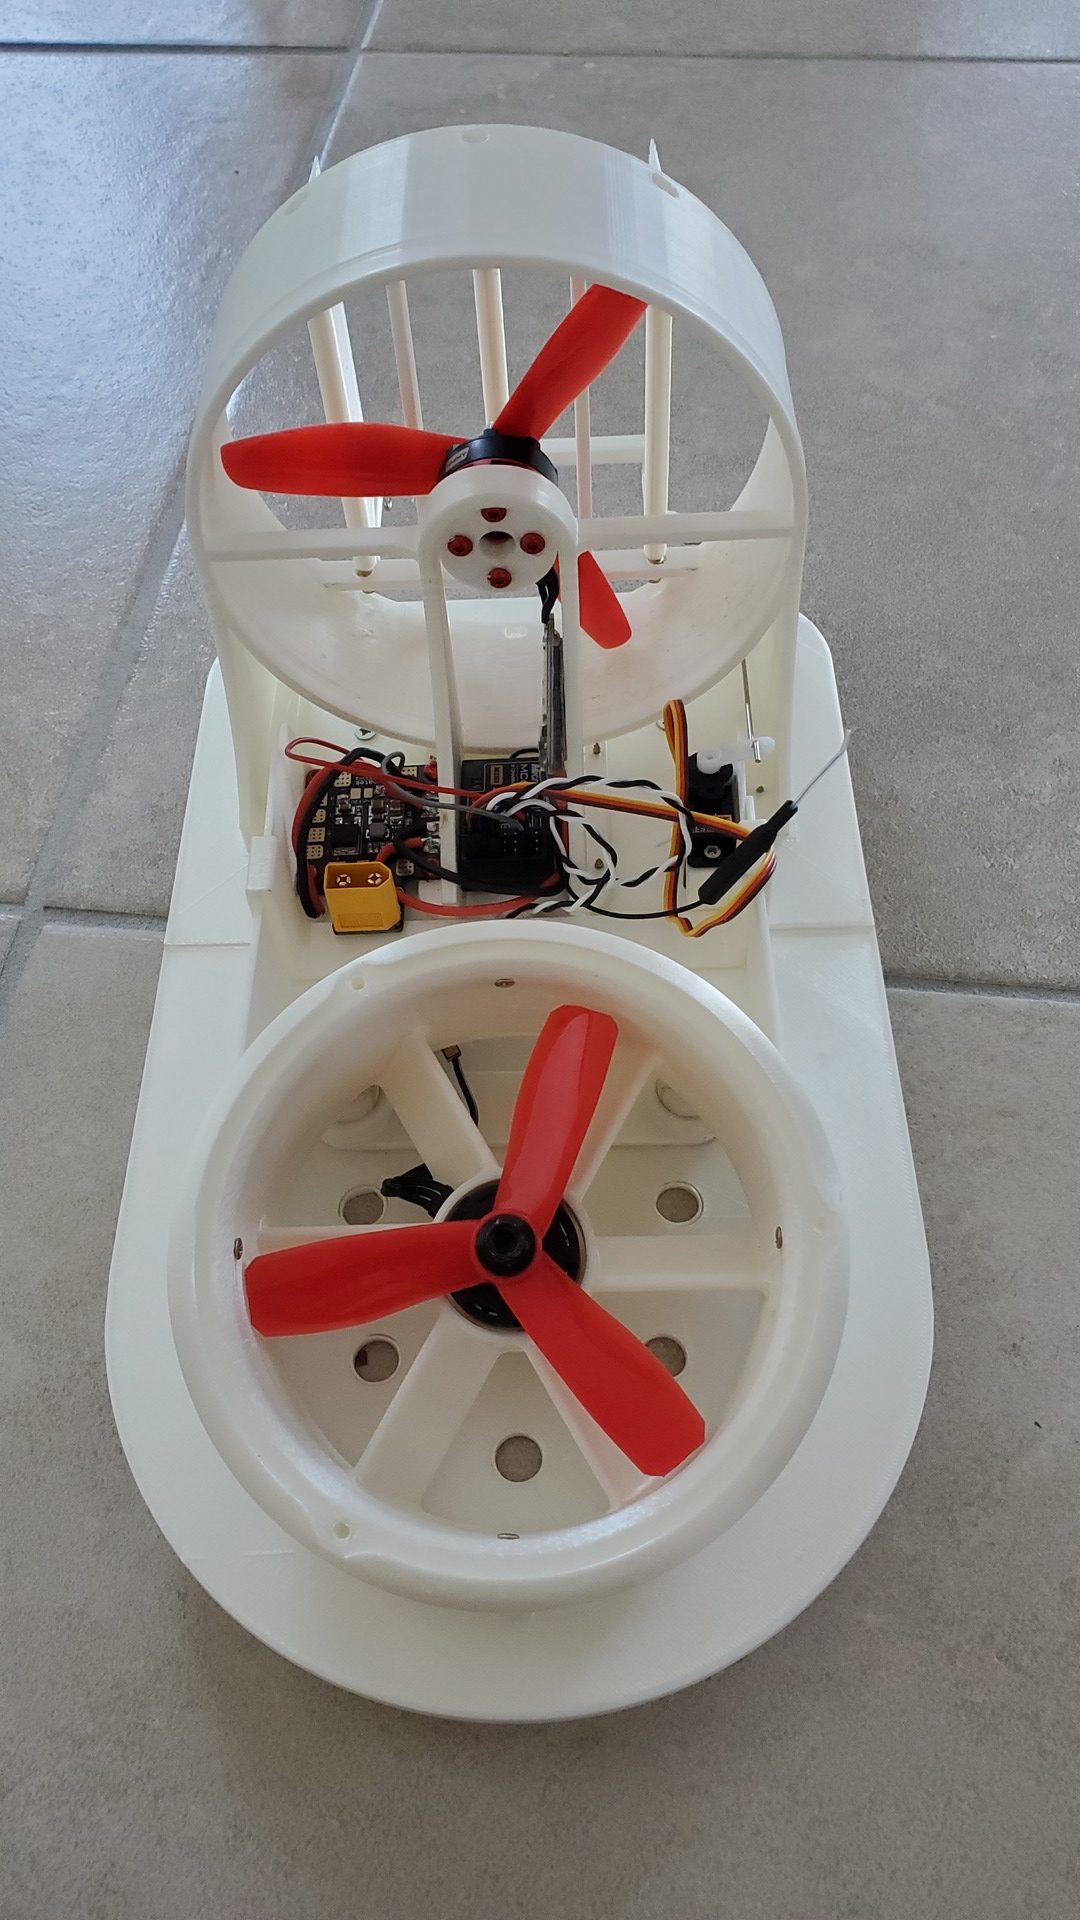
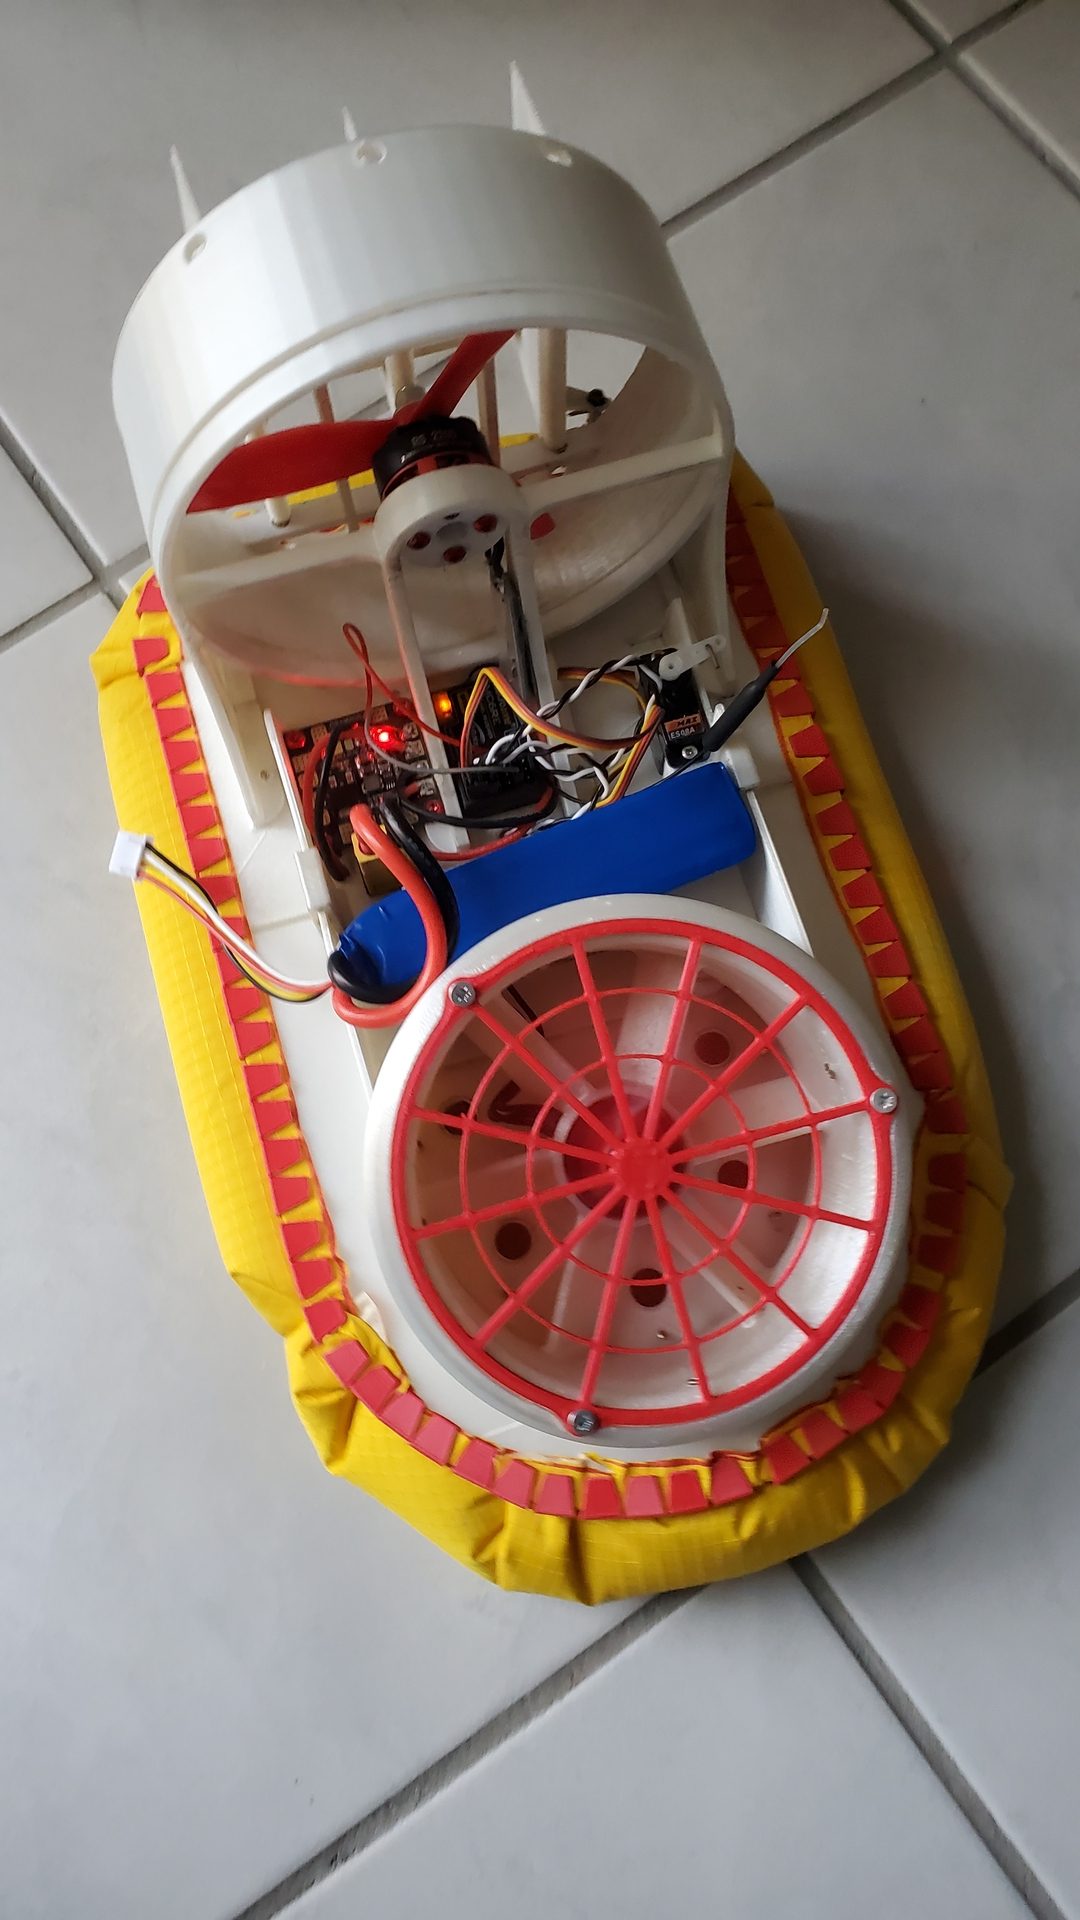
Glue the two main parts and check that the trust duct can be screwed
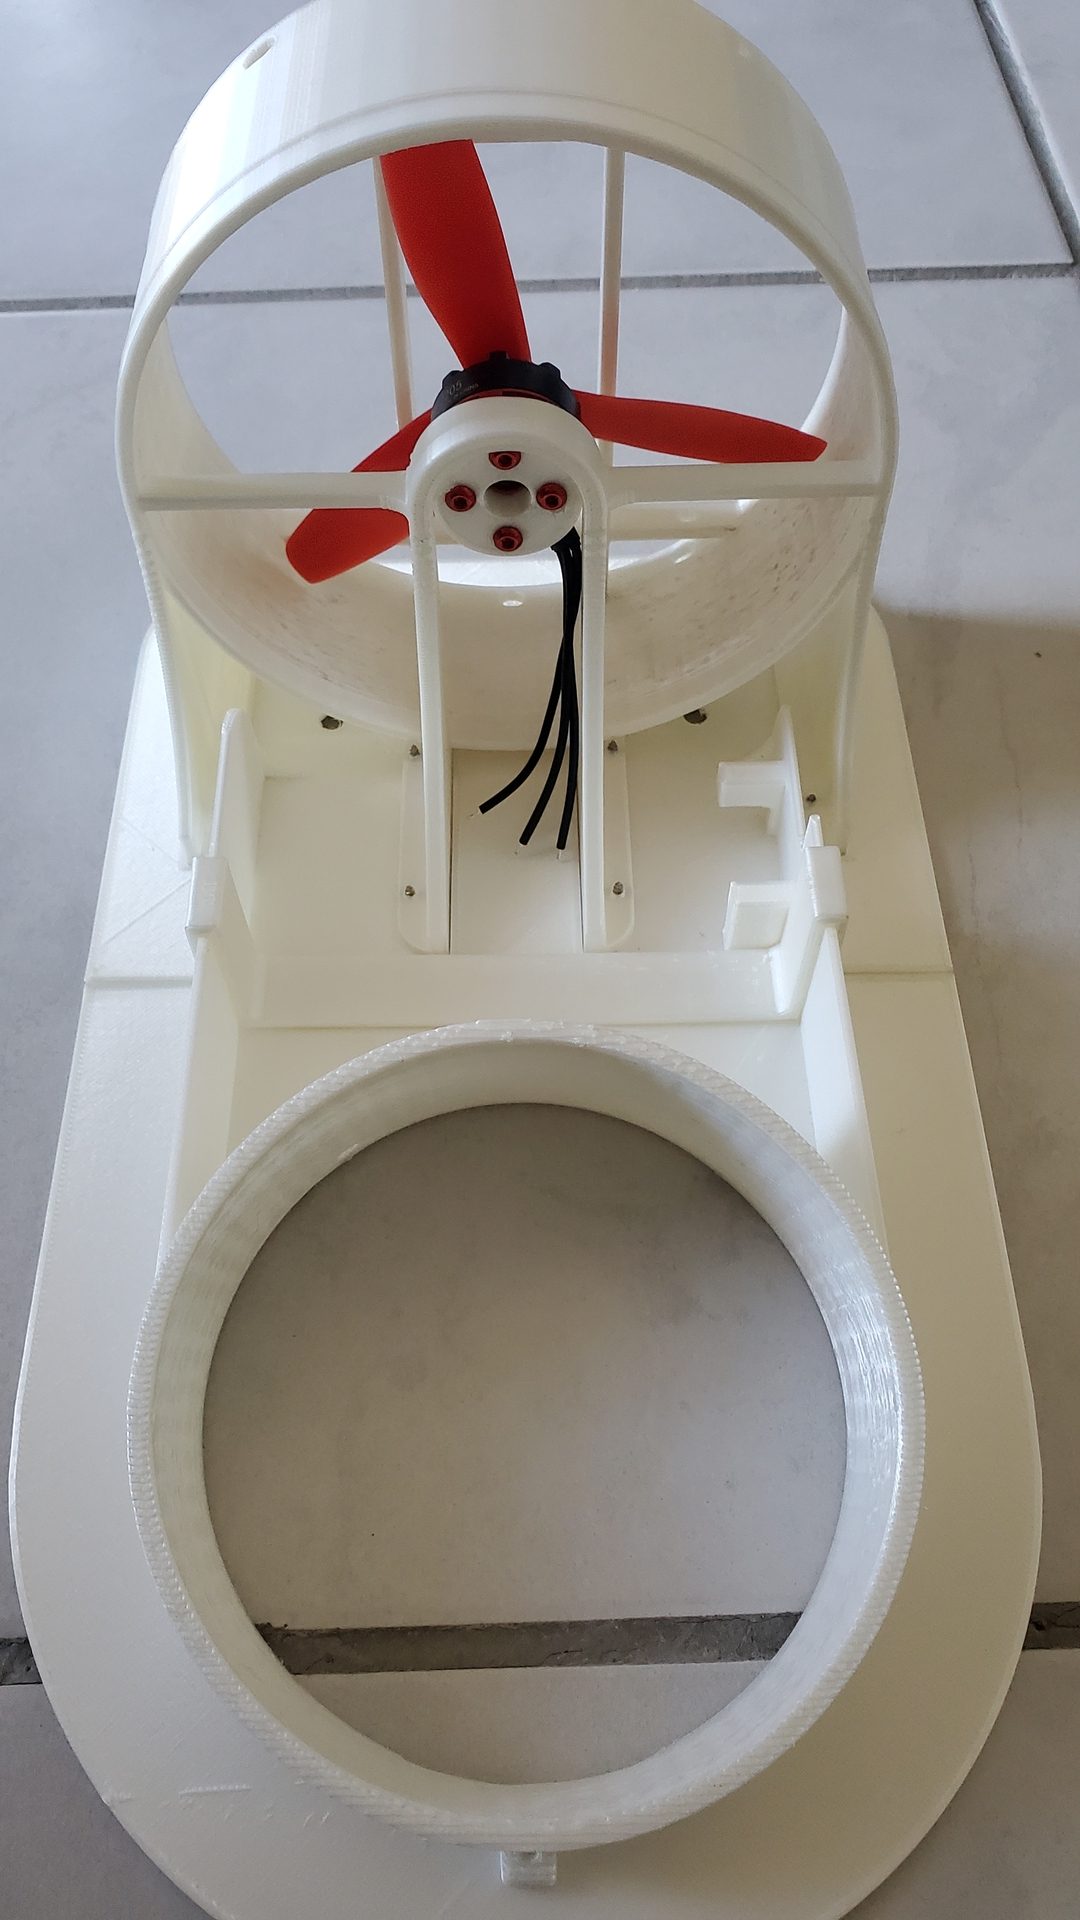
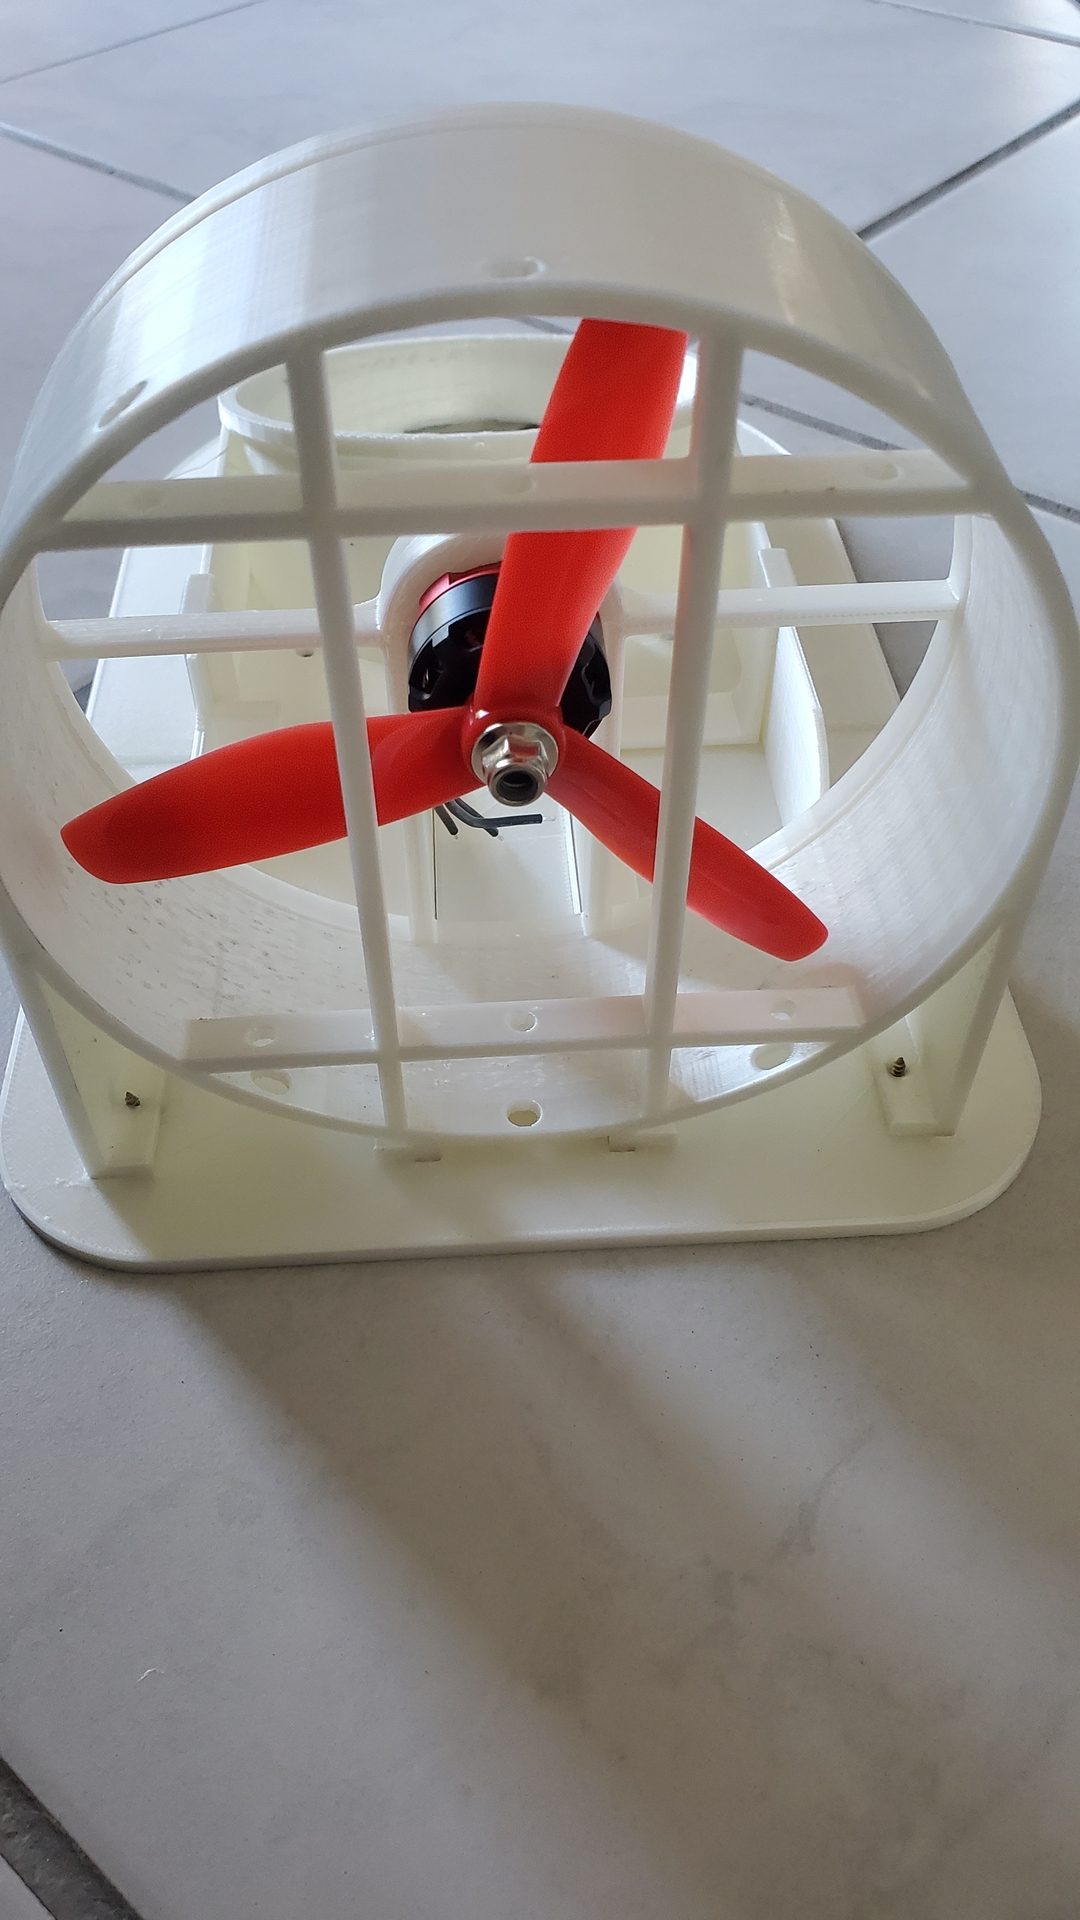
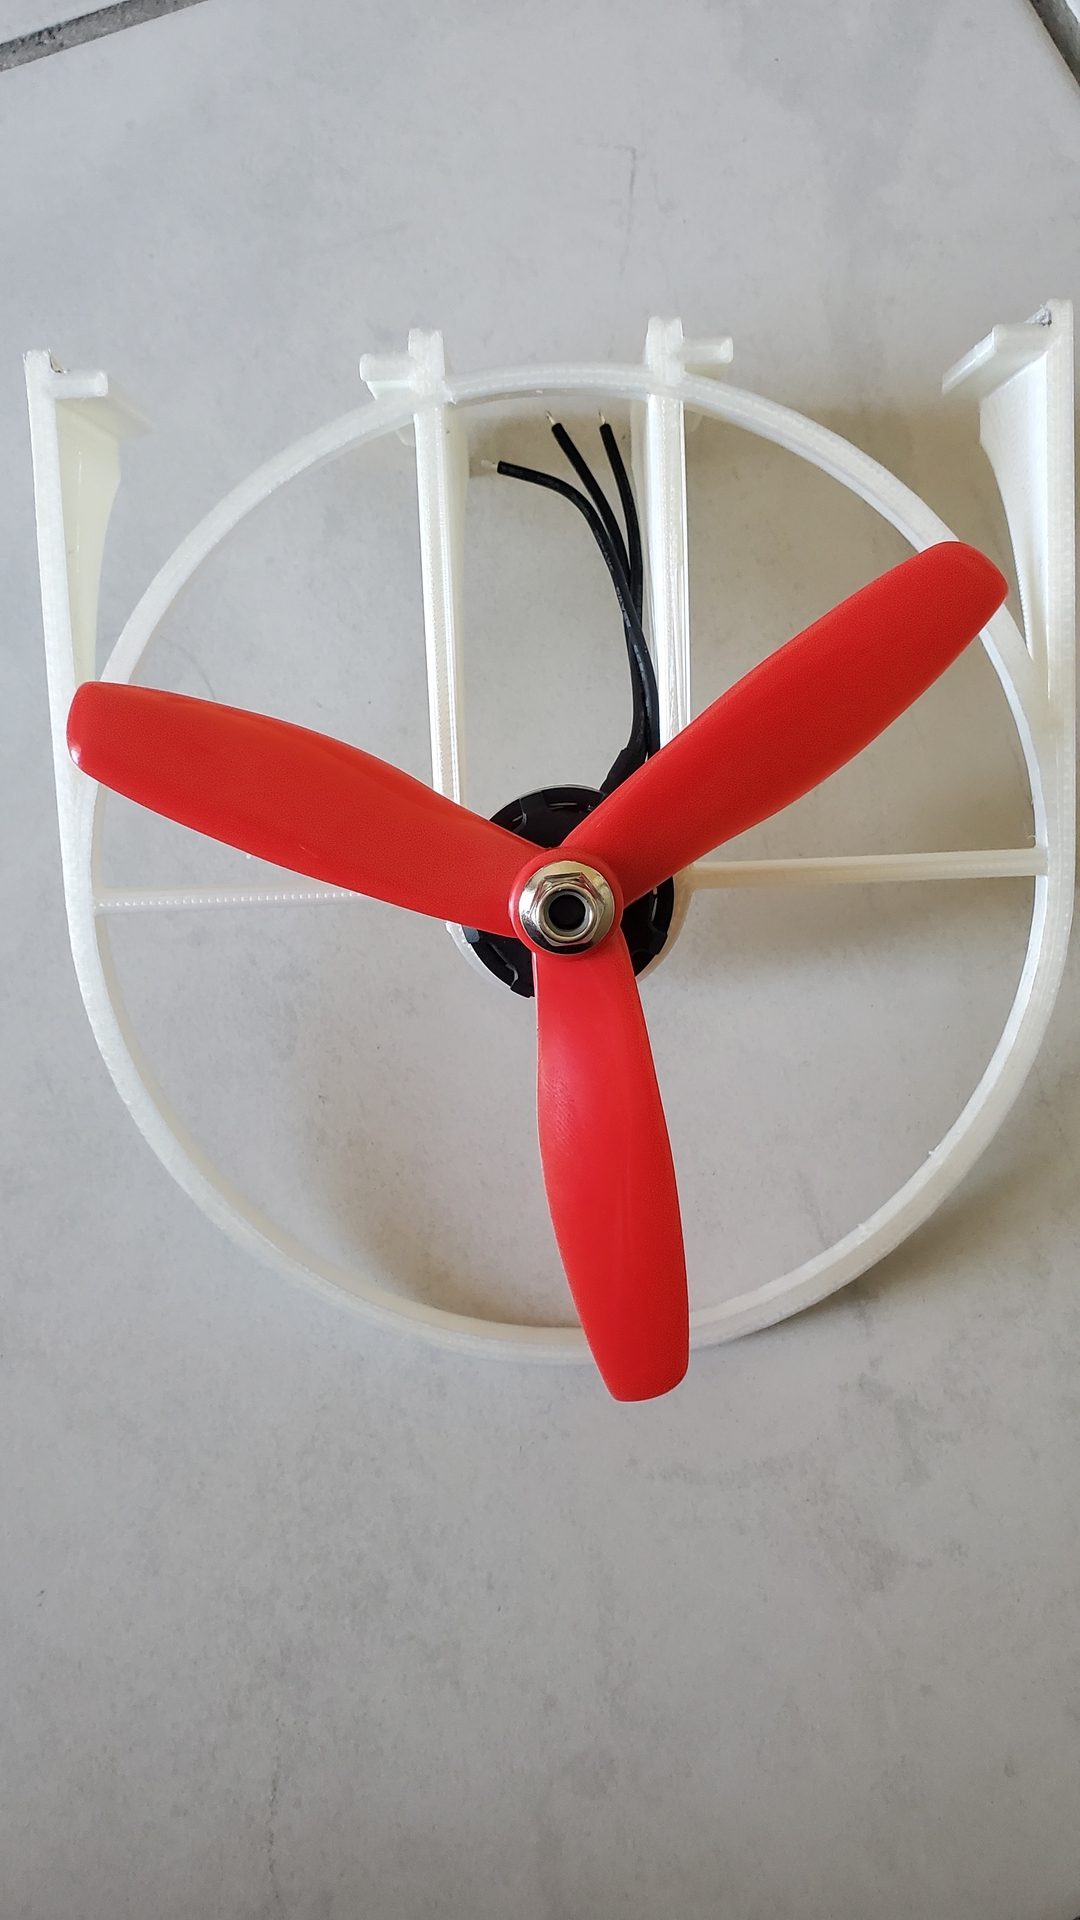
Mount the thrust duct propeller and check how it fits

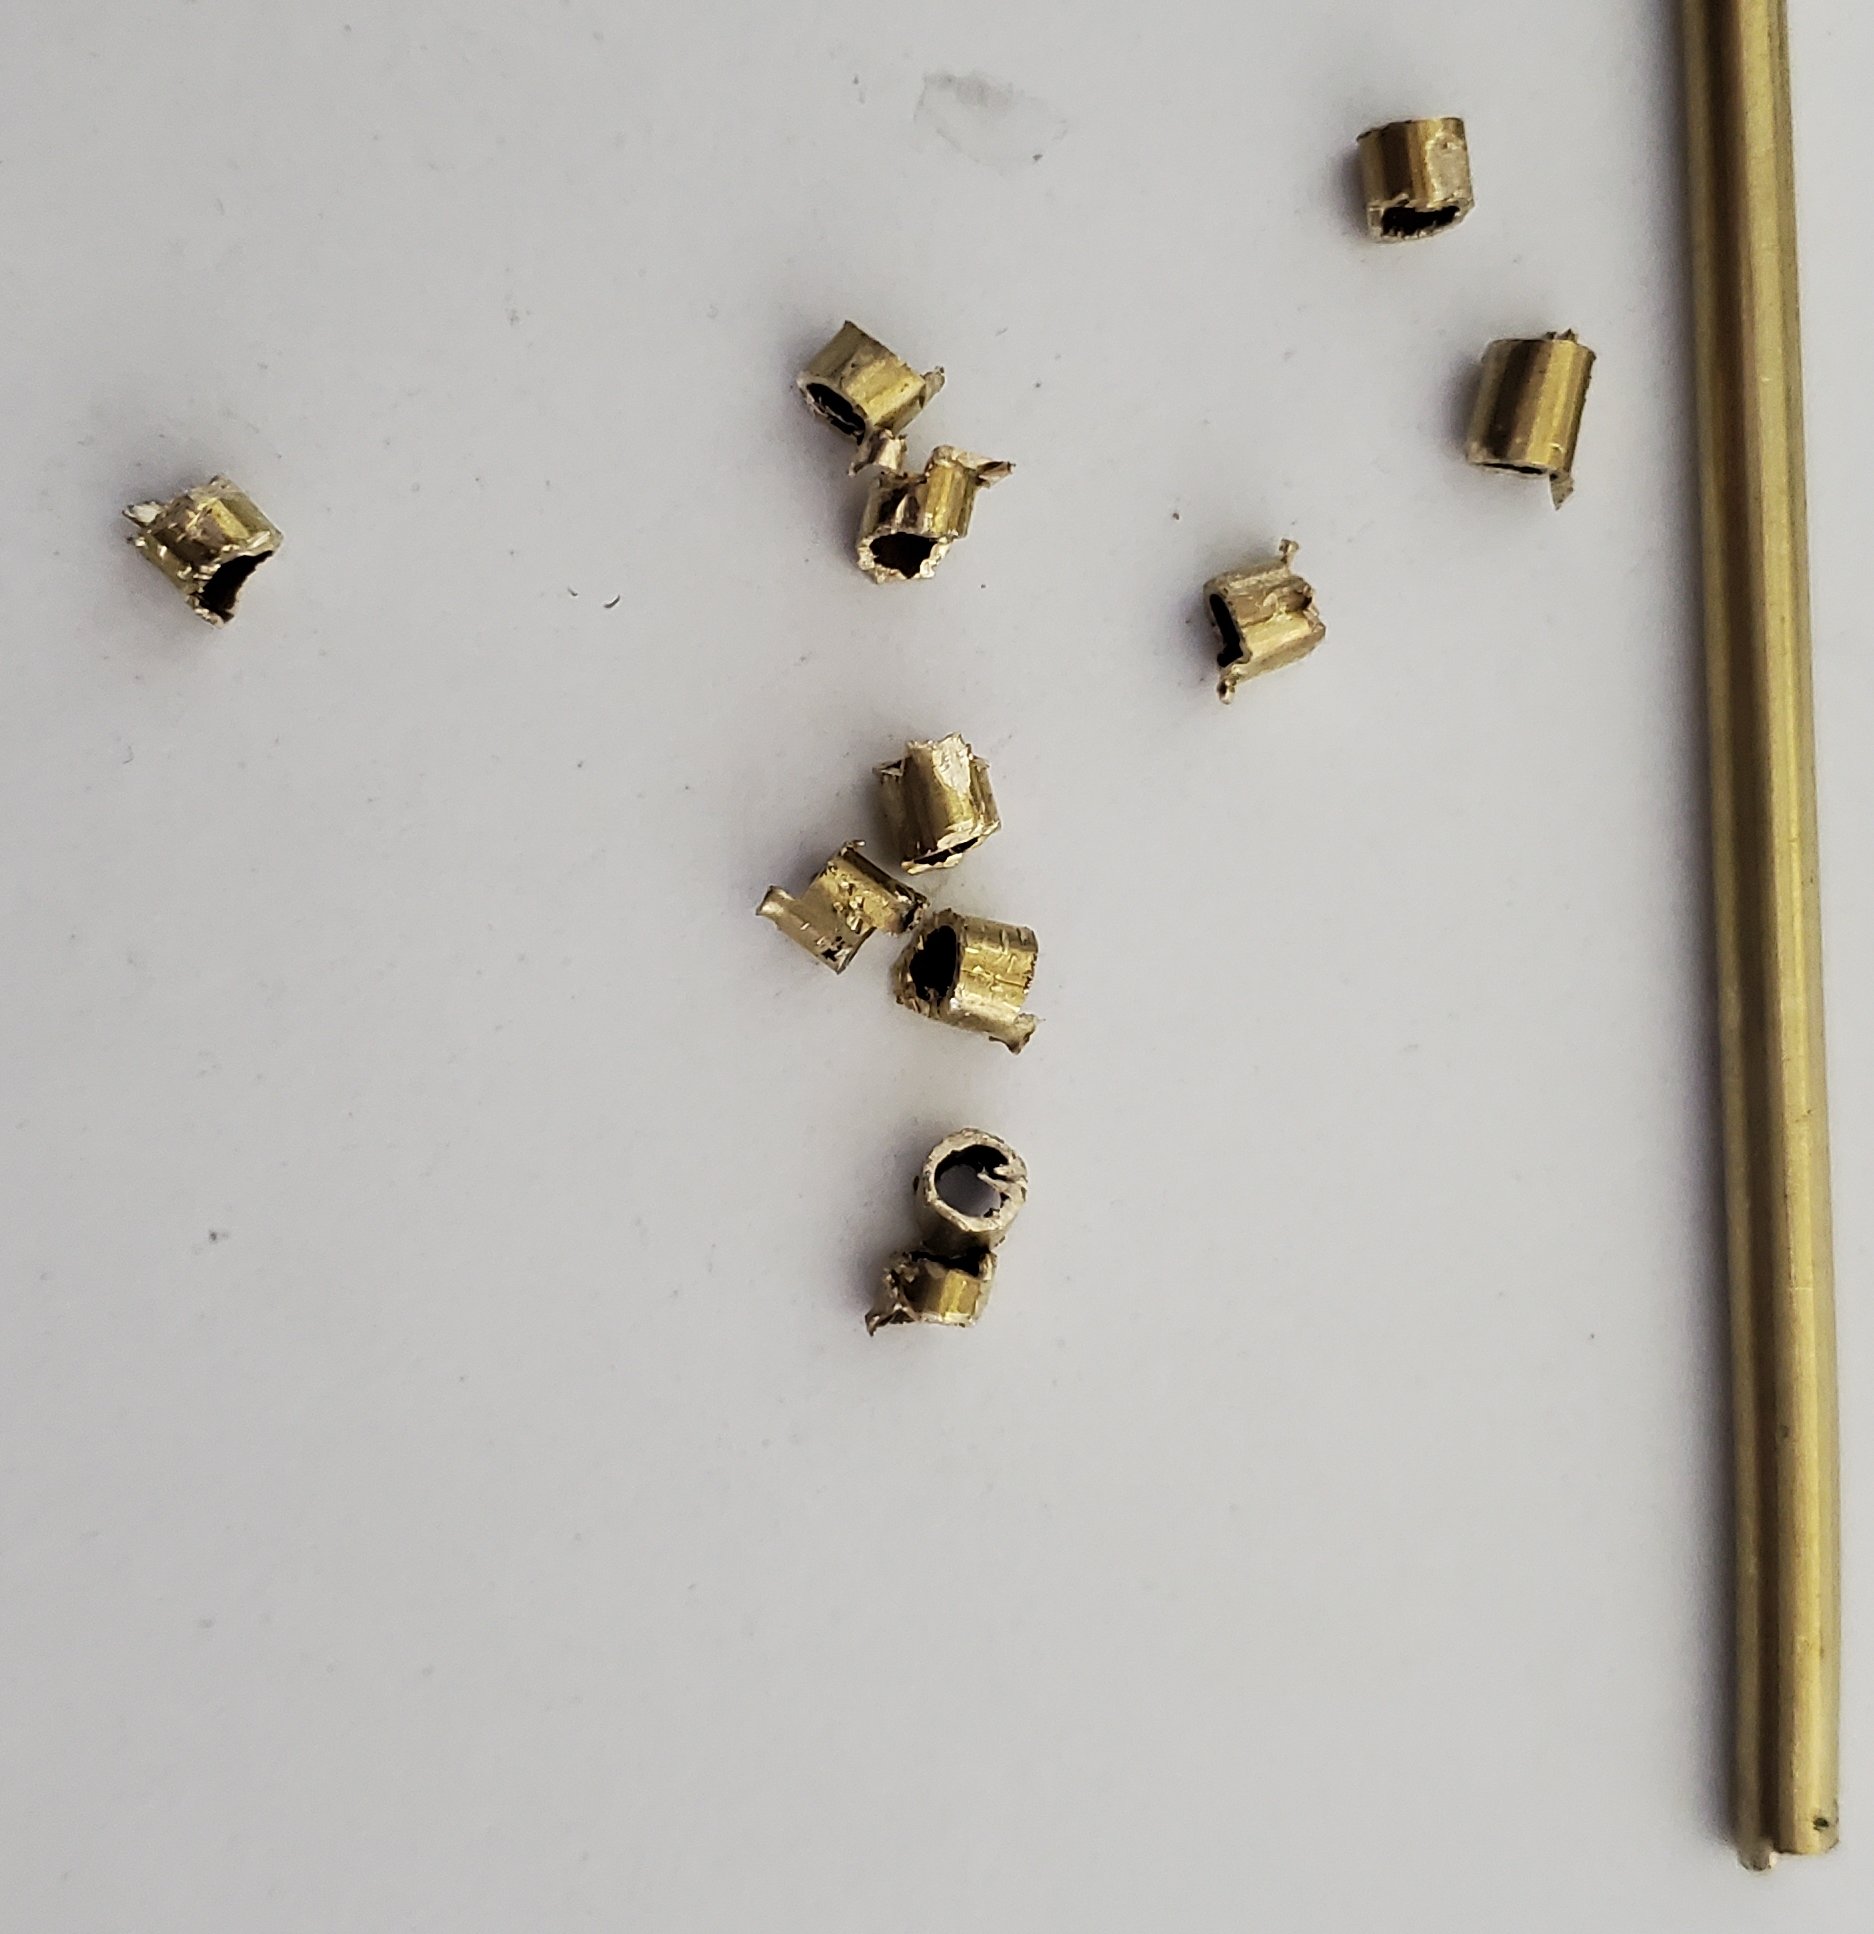
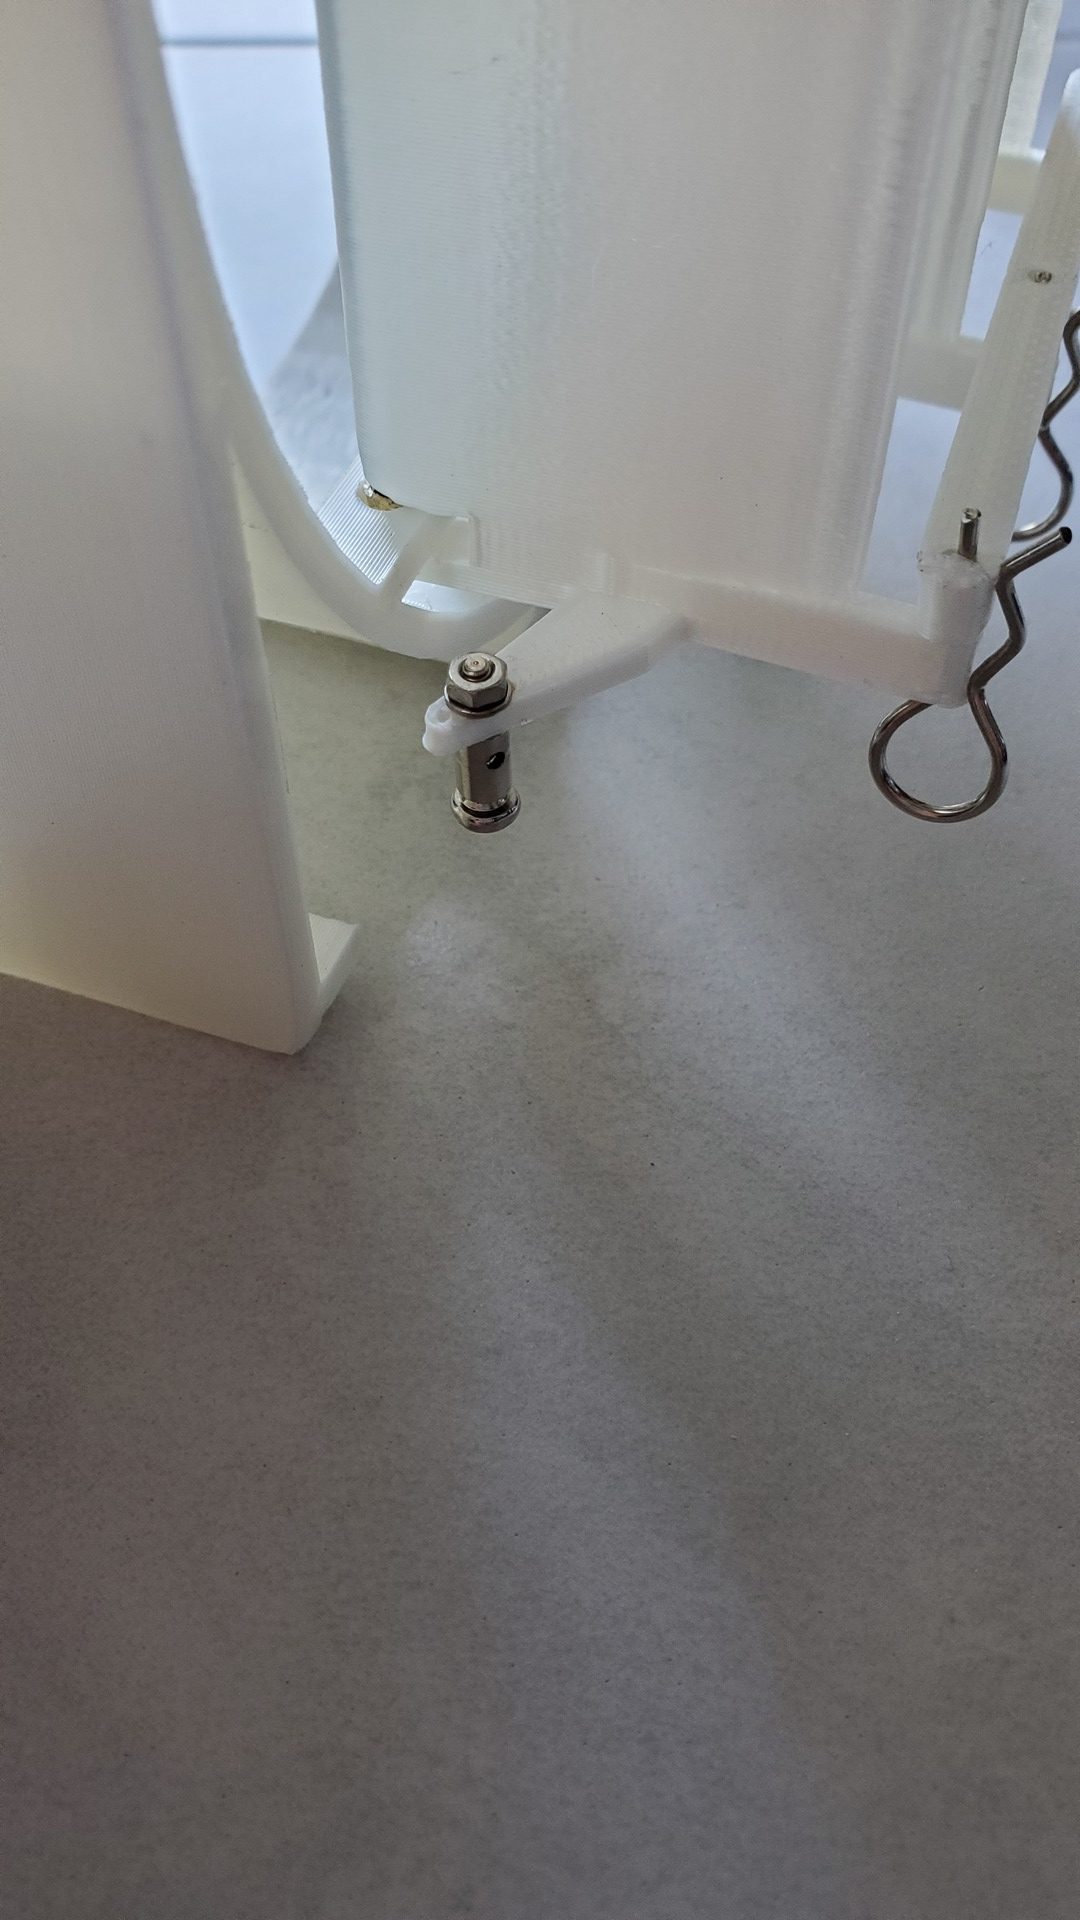
Cut small brass tube parts an put them in the holes before skrewing the rudders
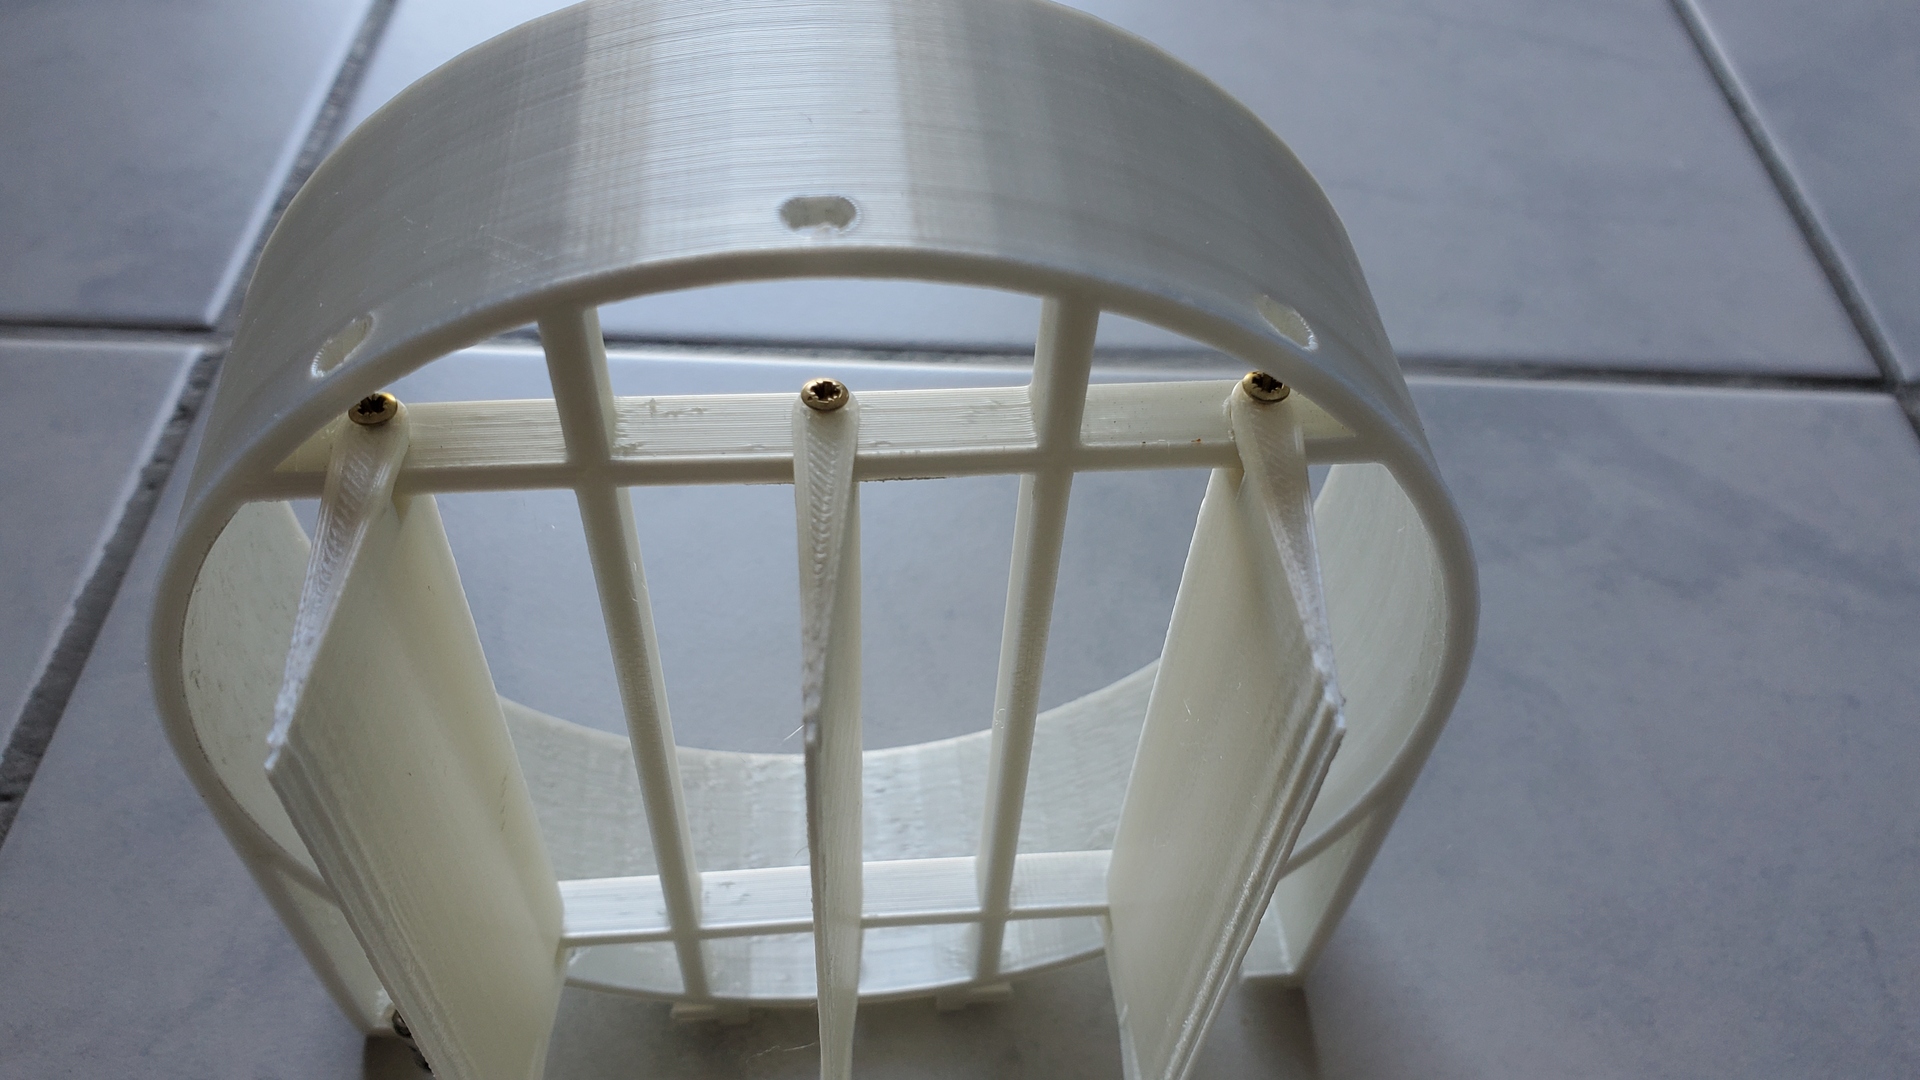
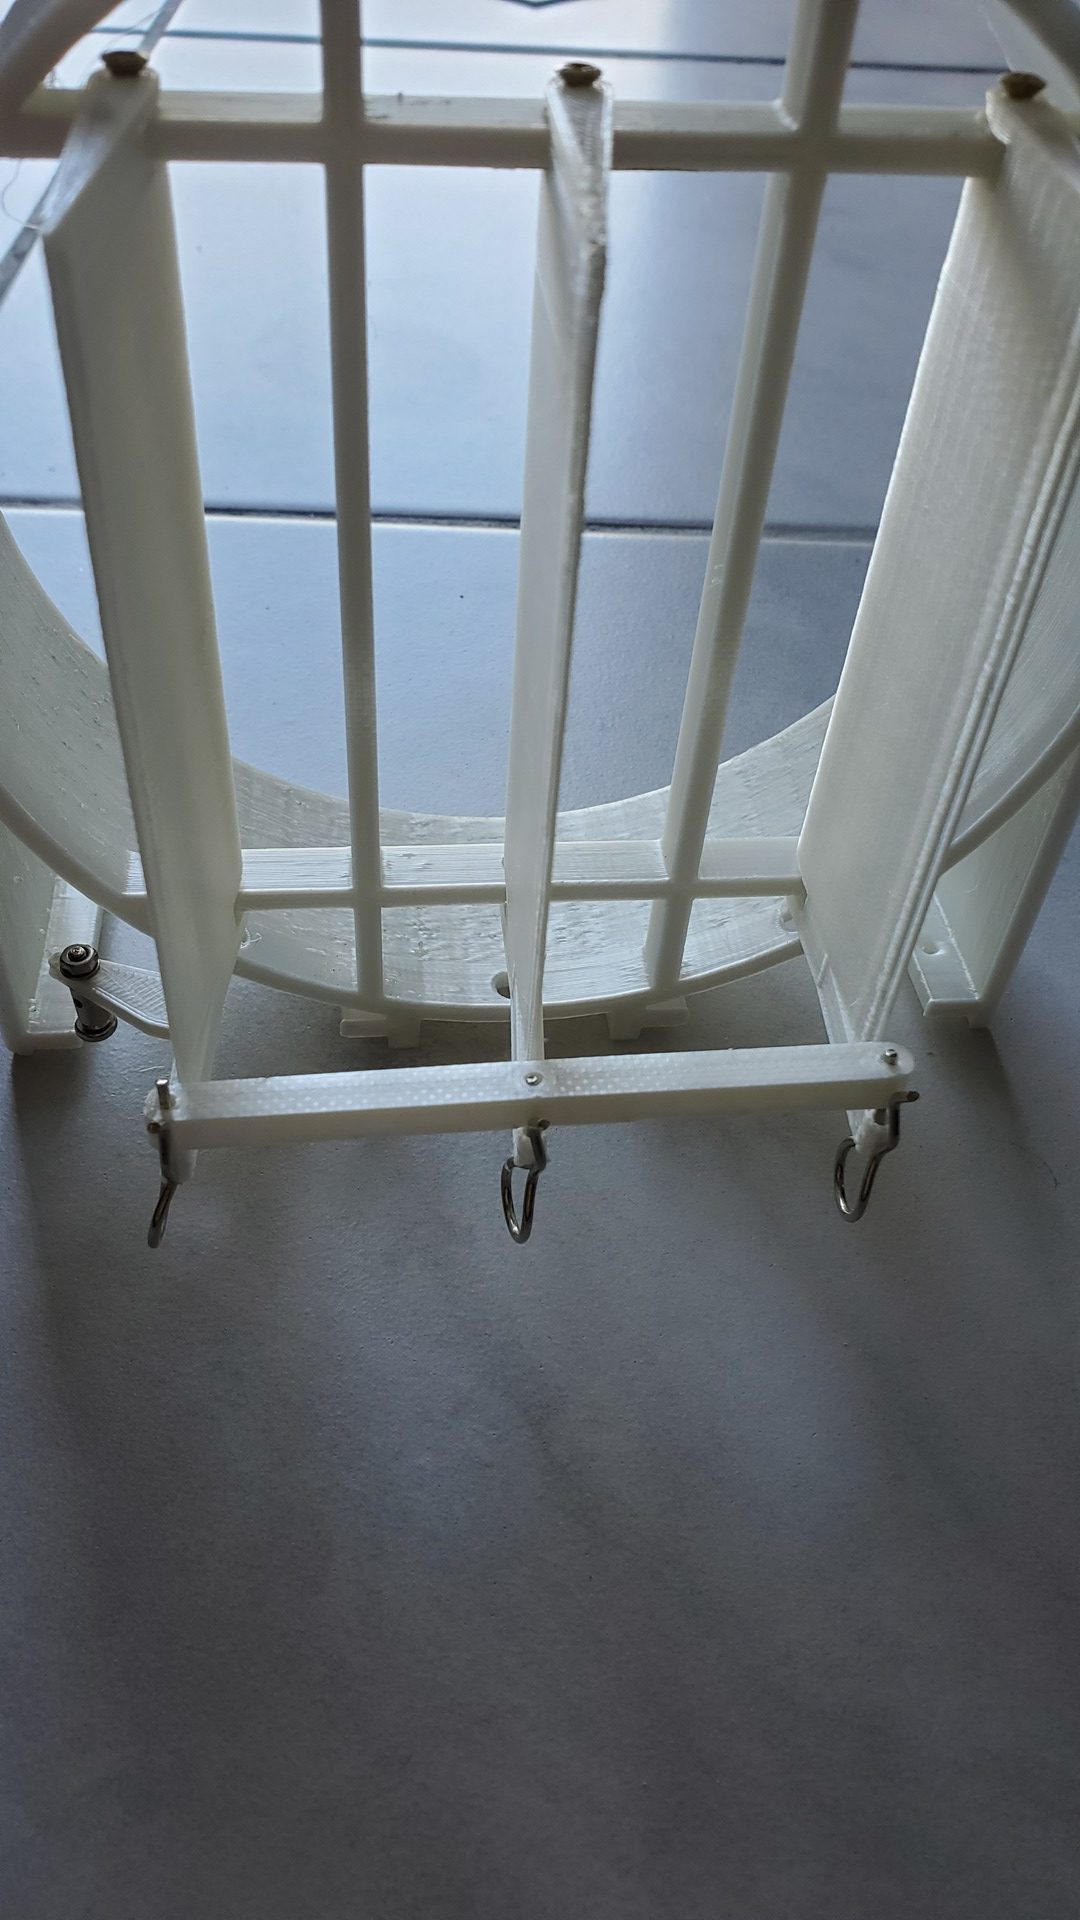
Add the tranversal bar at the bottom of the rudders so they move together. I fixed them with standard RC clips. Also add the connector plug that will be used for the connecting rod.
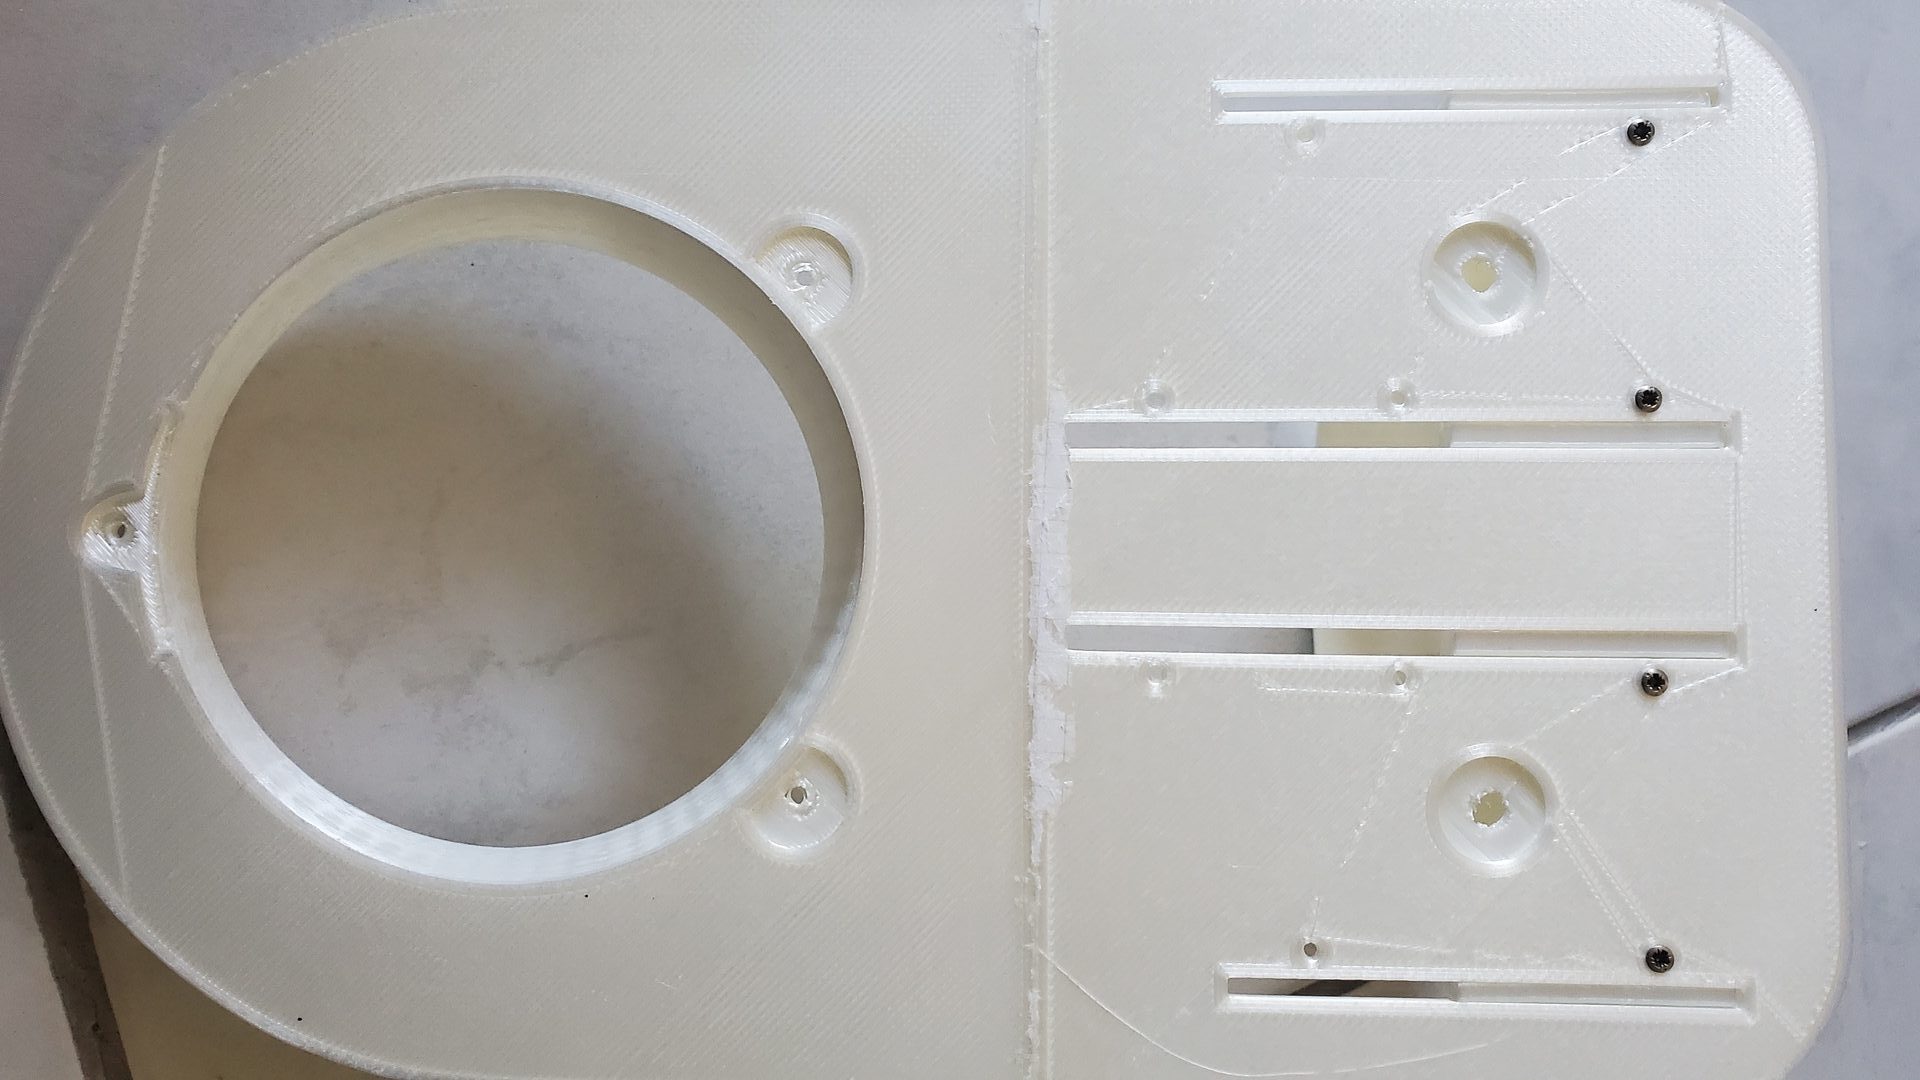
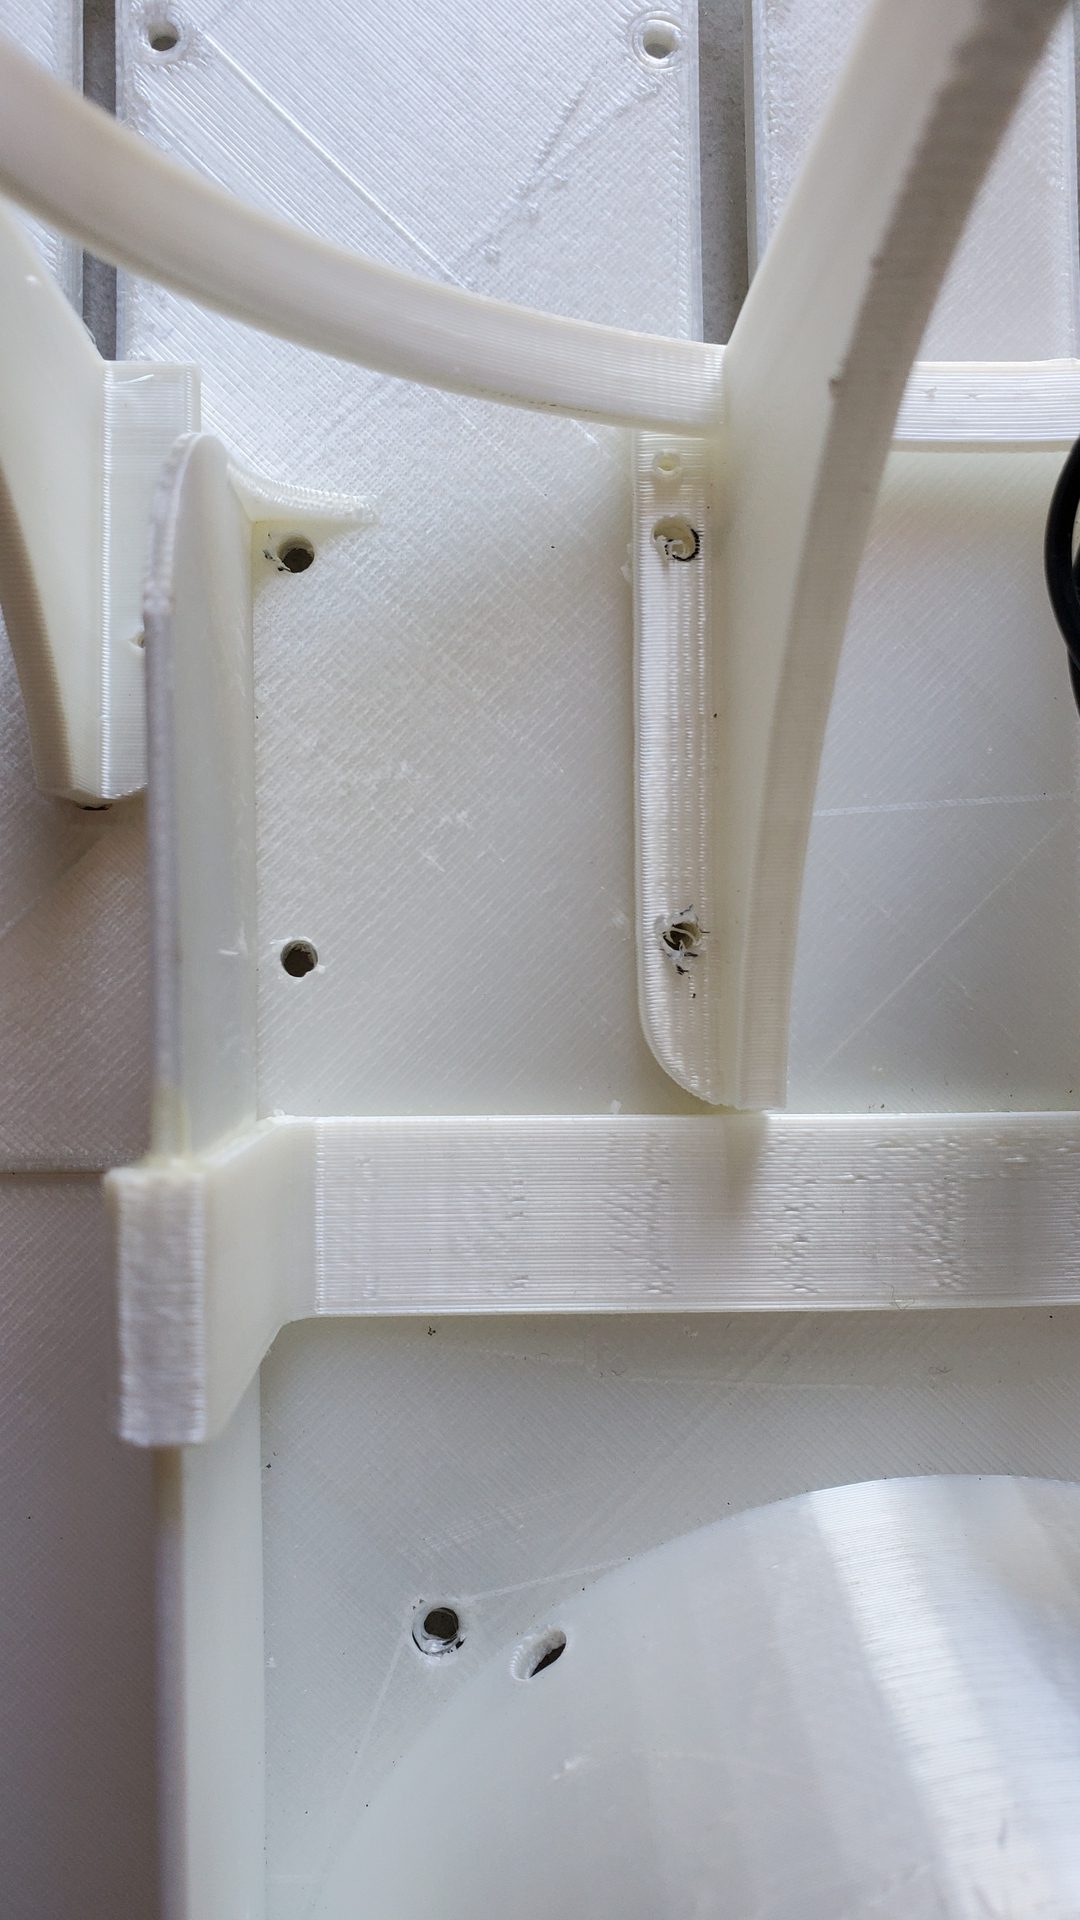
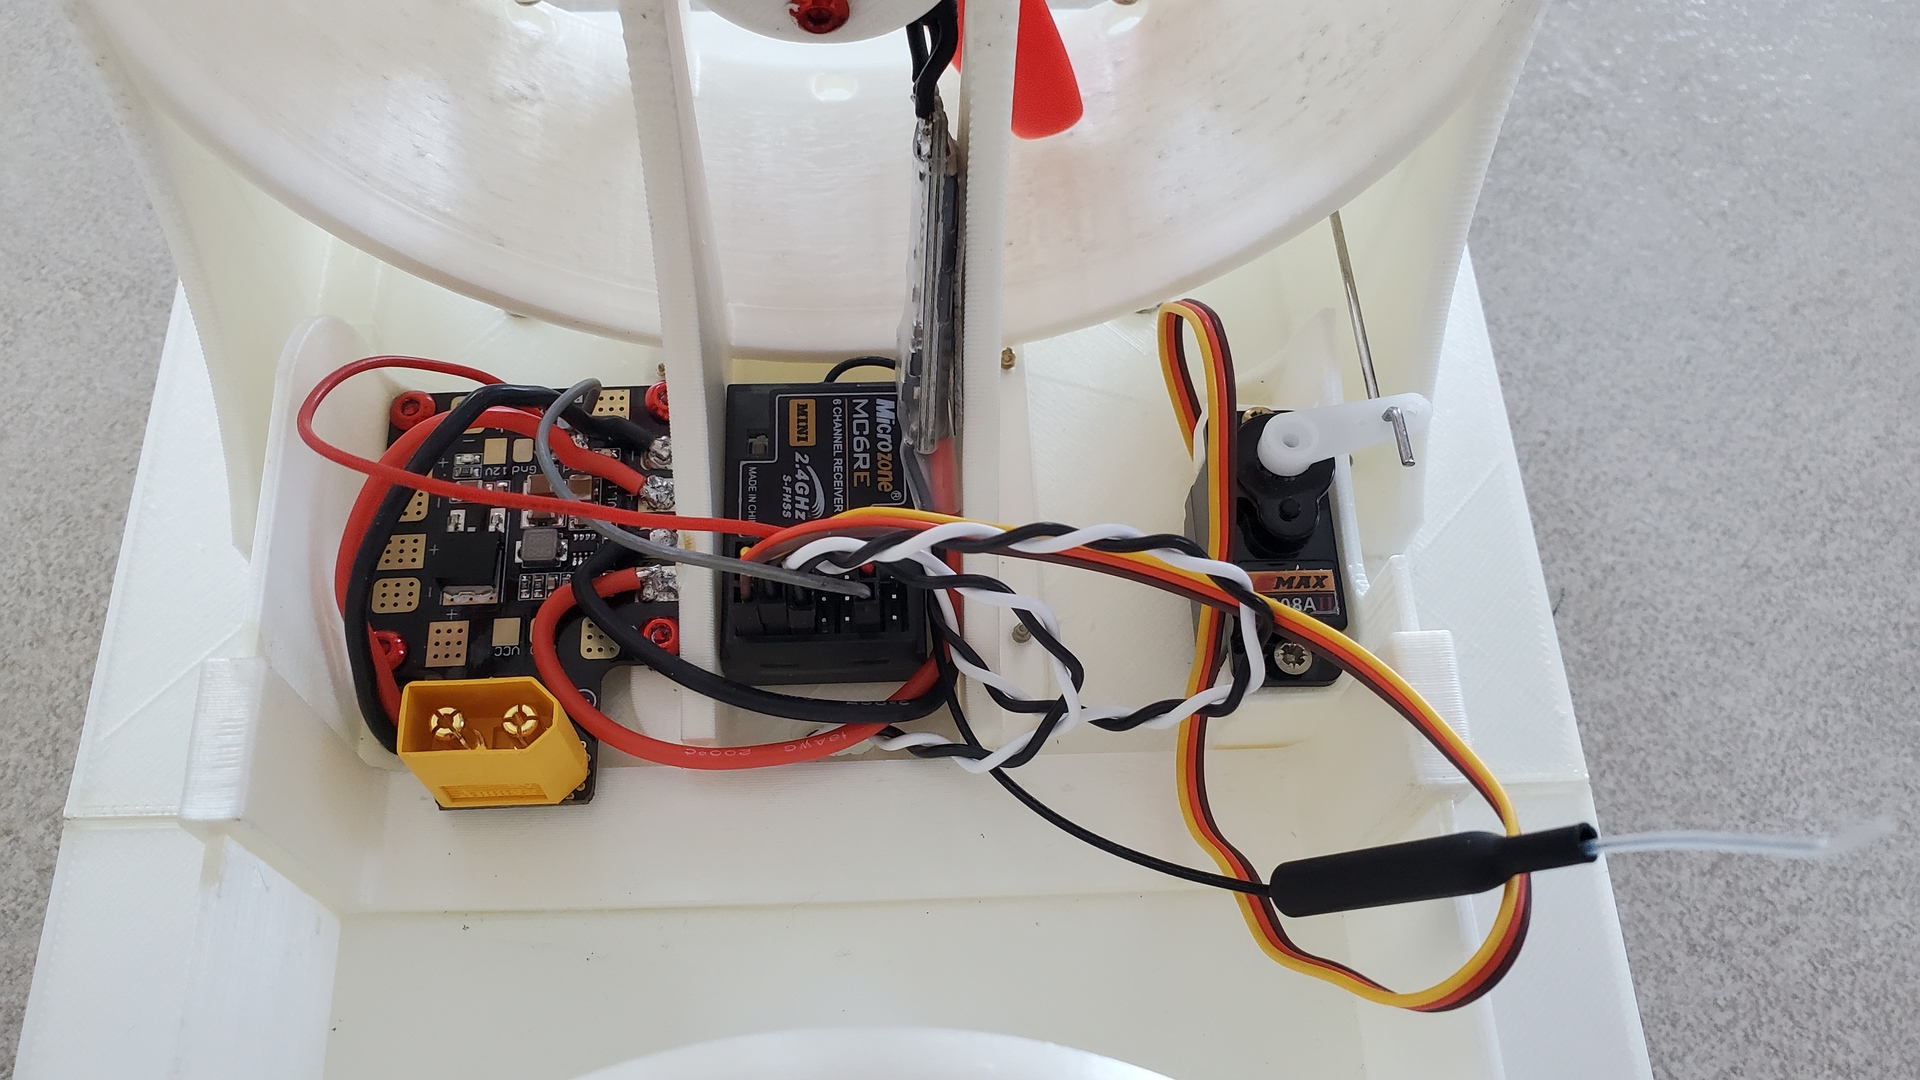
Make 4 holes in the left rear part, just before the thrust duct, to mount the power distribution board. I skrewed it from the bottom of the body.
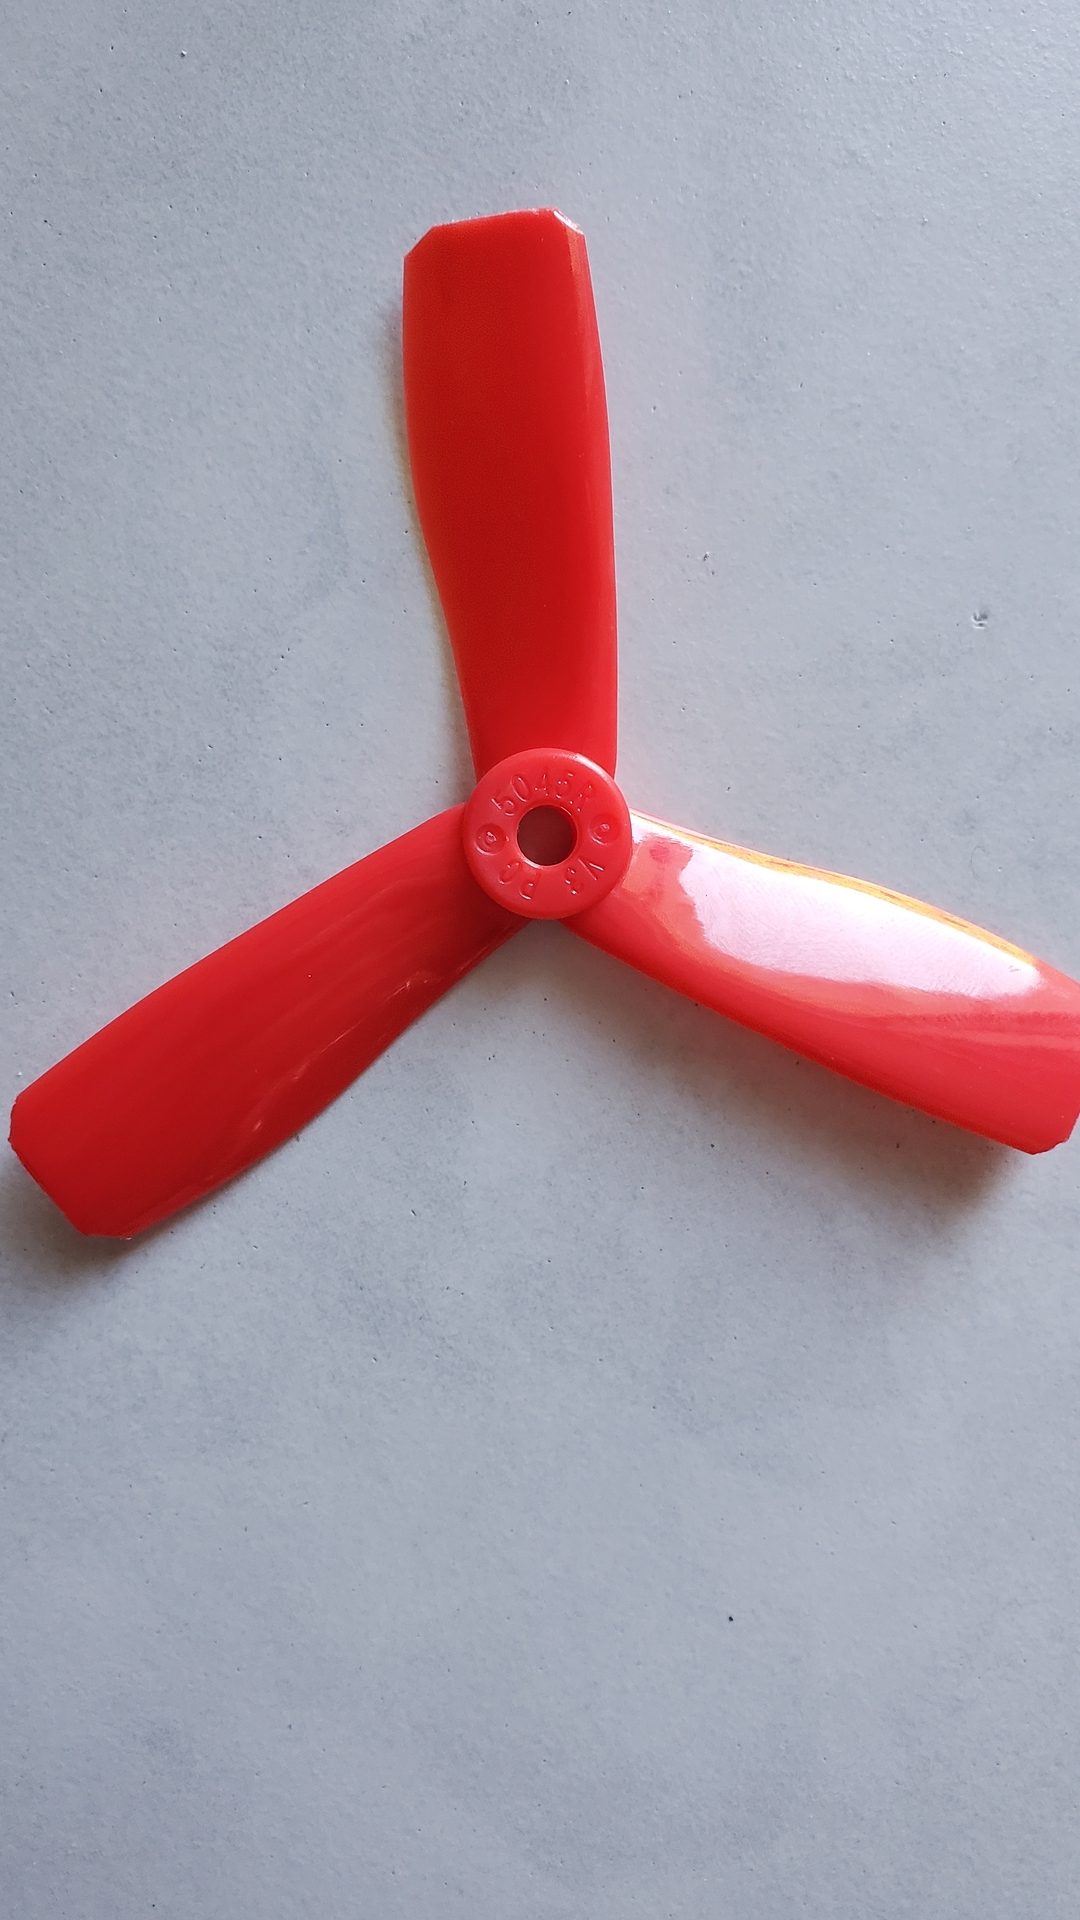
The lift propeller enclosure is not big enough for the 5045 propeller, so the propeller must be cut to fit.
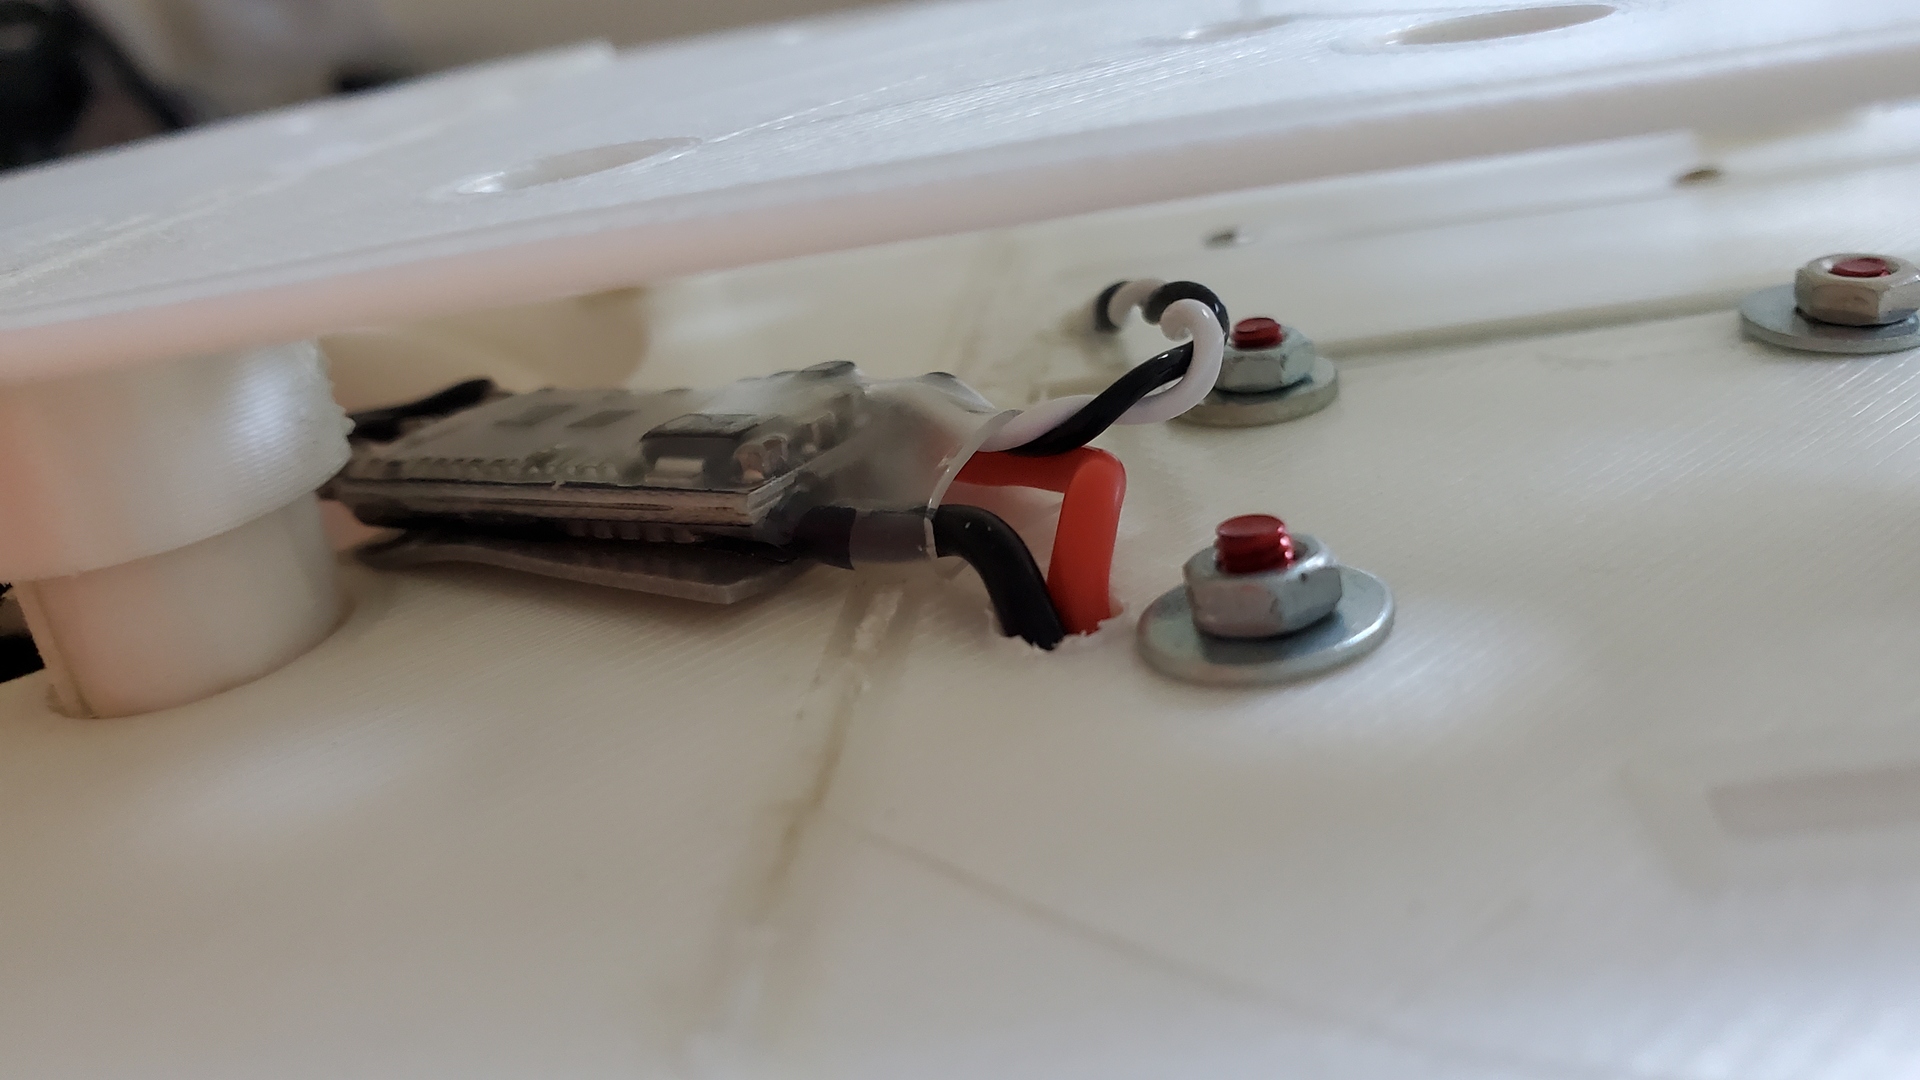
Then solder the ESC, and fix it under the body’s surface with some double sided adhesive.
Mount the Servo on the right, put the receiver on the middle of the thrust duct fixation legs, and fix the thrust propeller’s ESC on one of the two middle fixation legs of the thrust duct (again, with double sided adhesive)
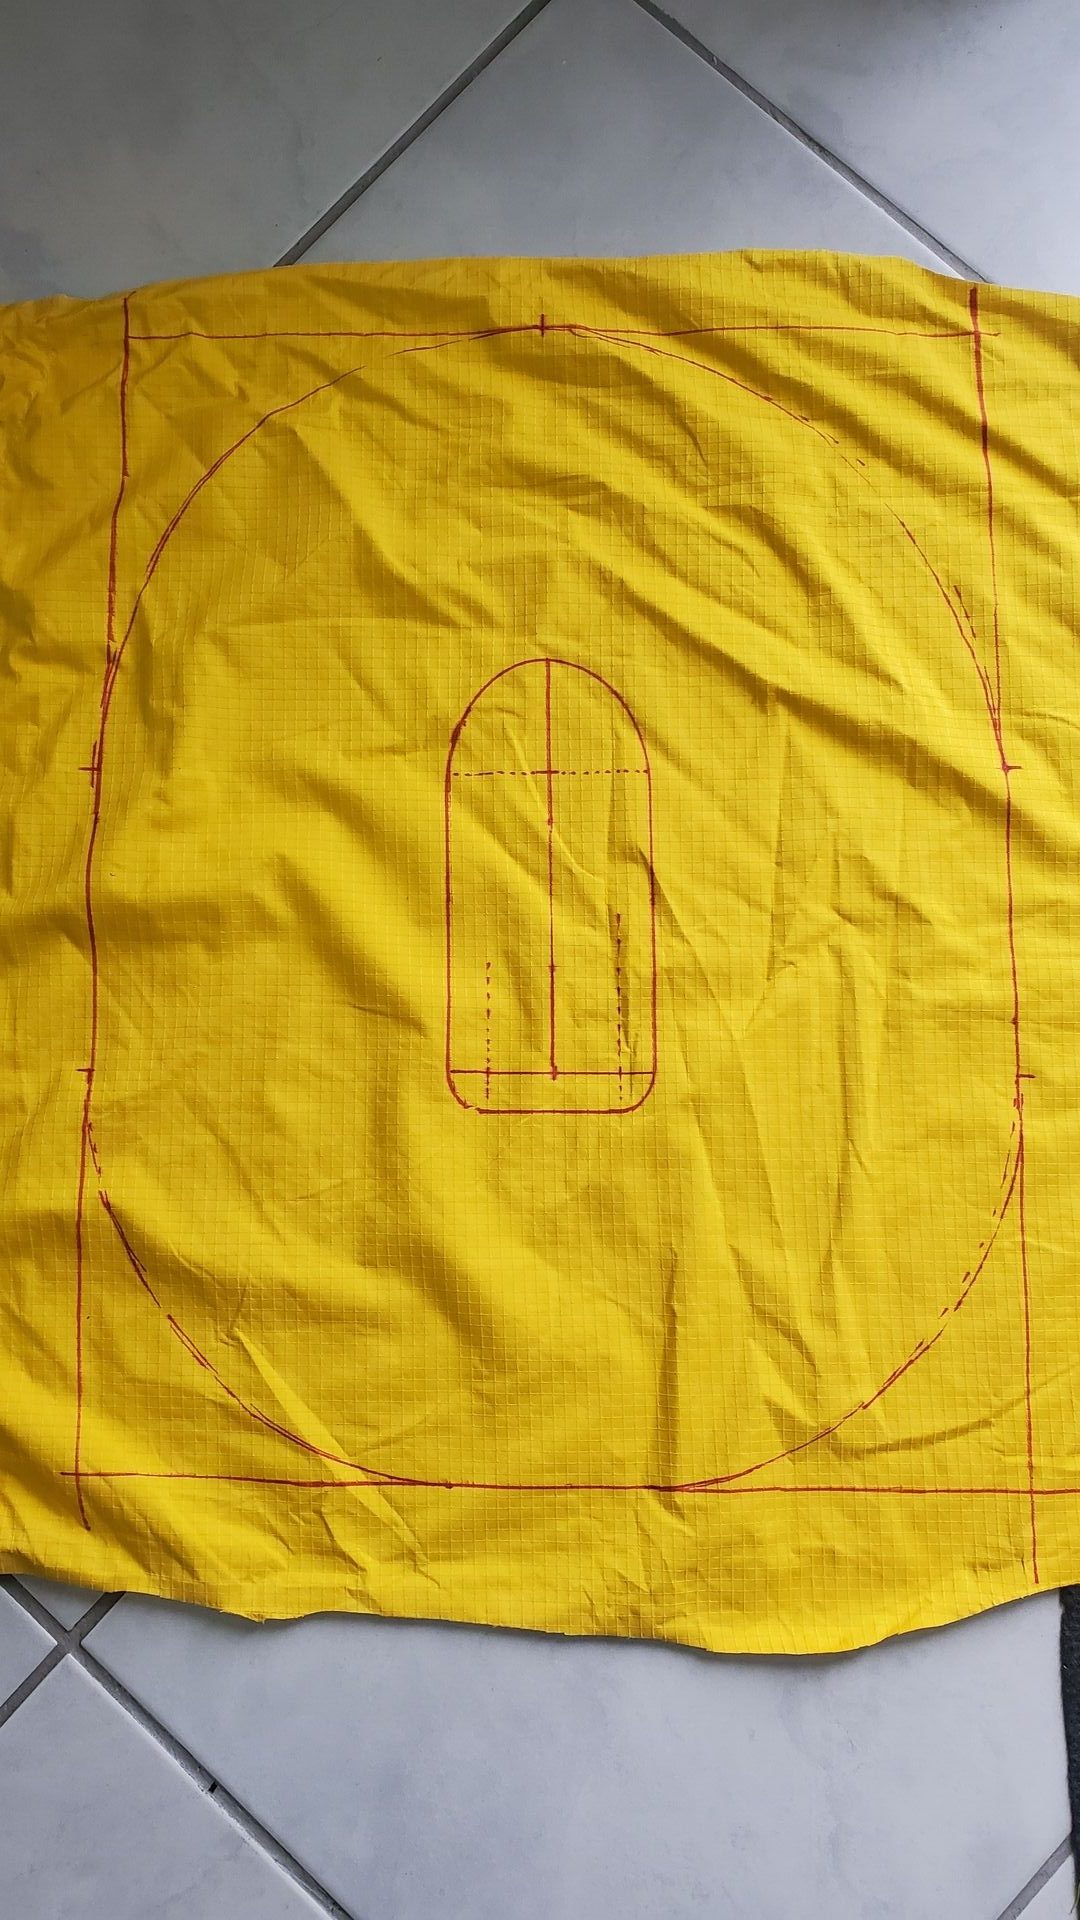
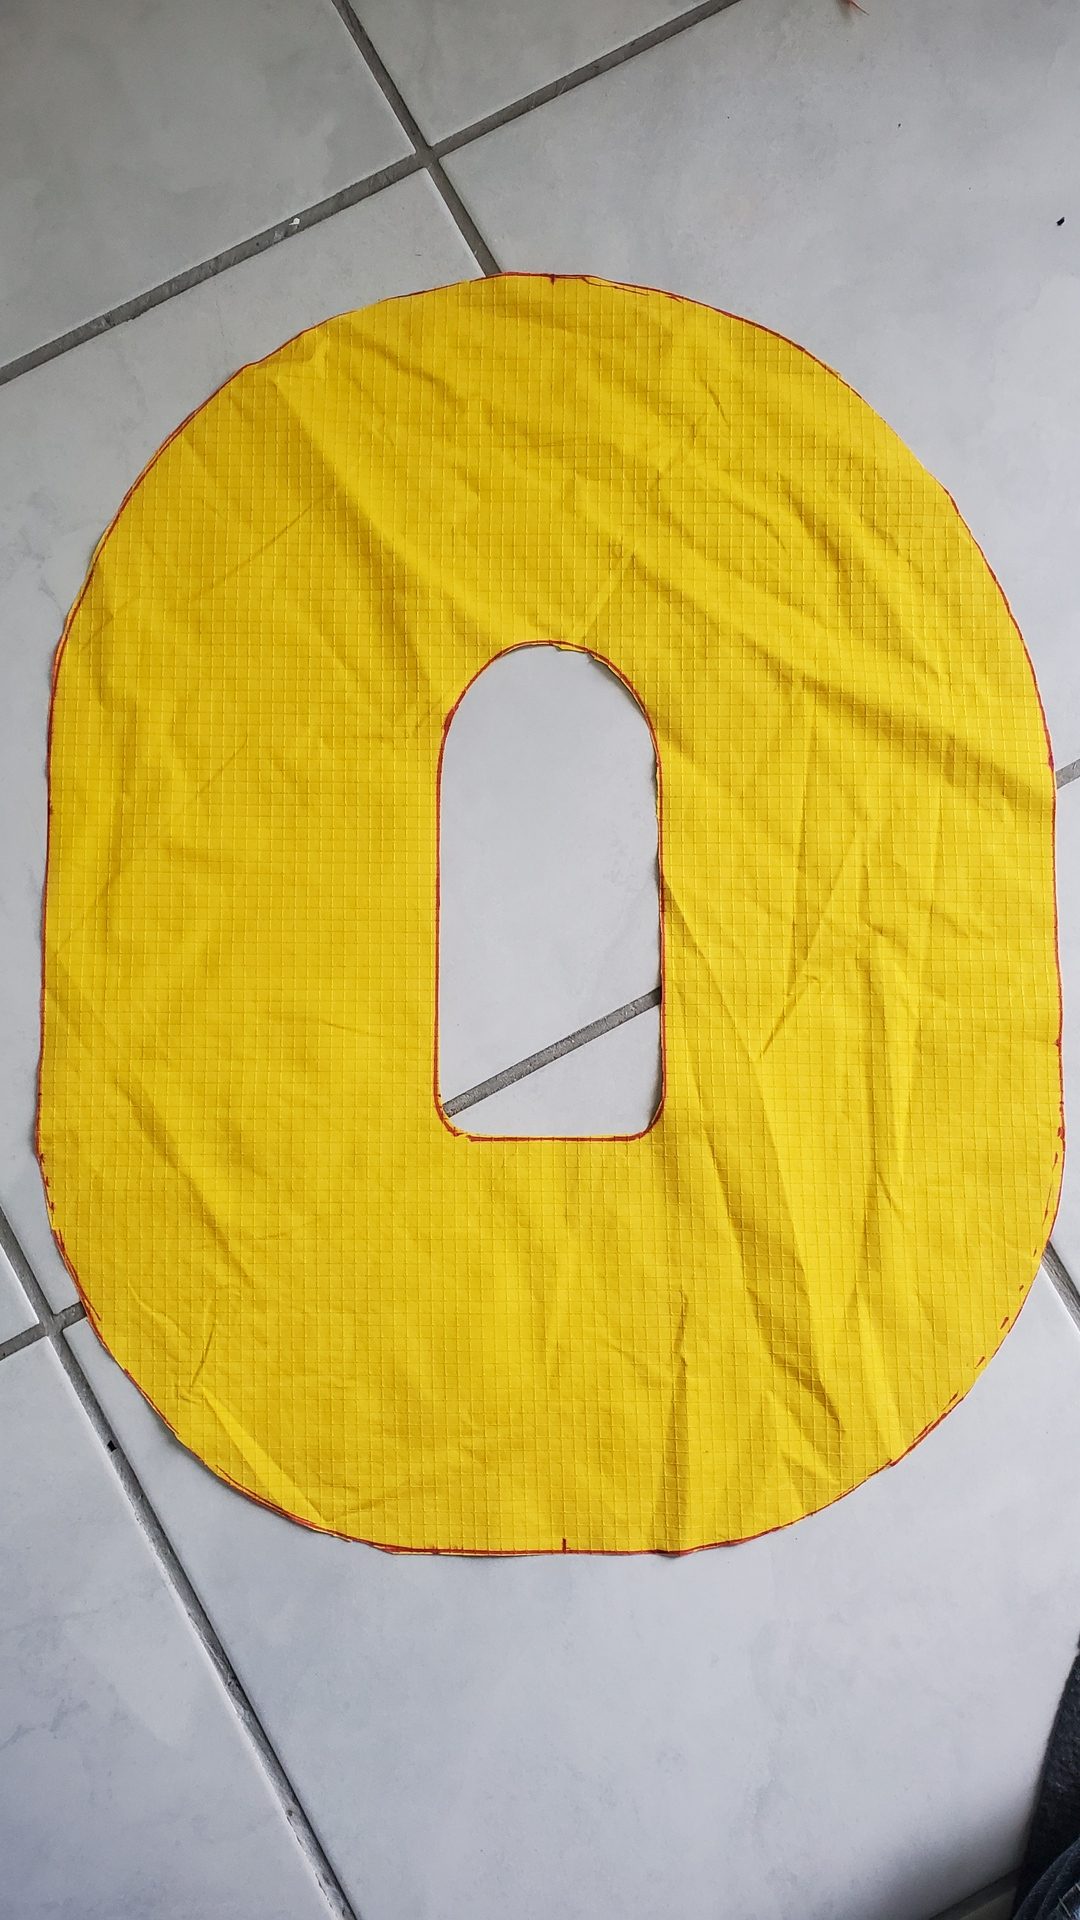
Cut the skirt. Here I used an old raincoat, but a good trash bag works also (it’s just less robust). As you can see, I used the inside of the raincoat (a kind of grid) to limit the number of smalls pebbles that could enter inside.
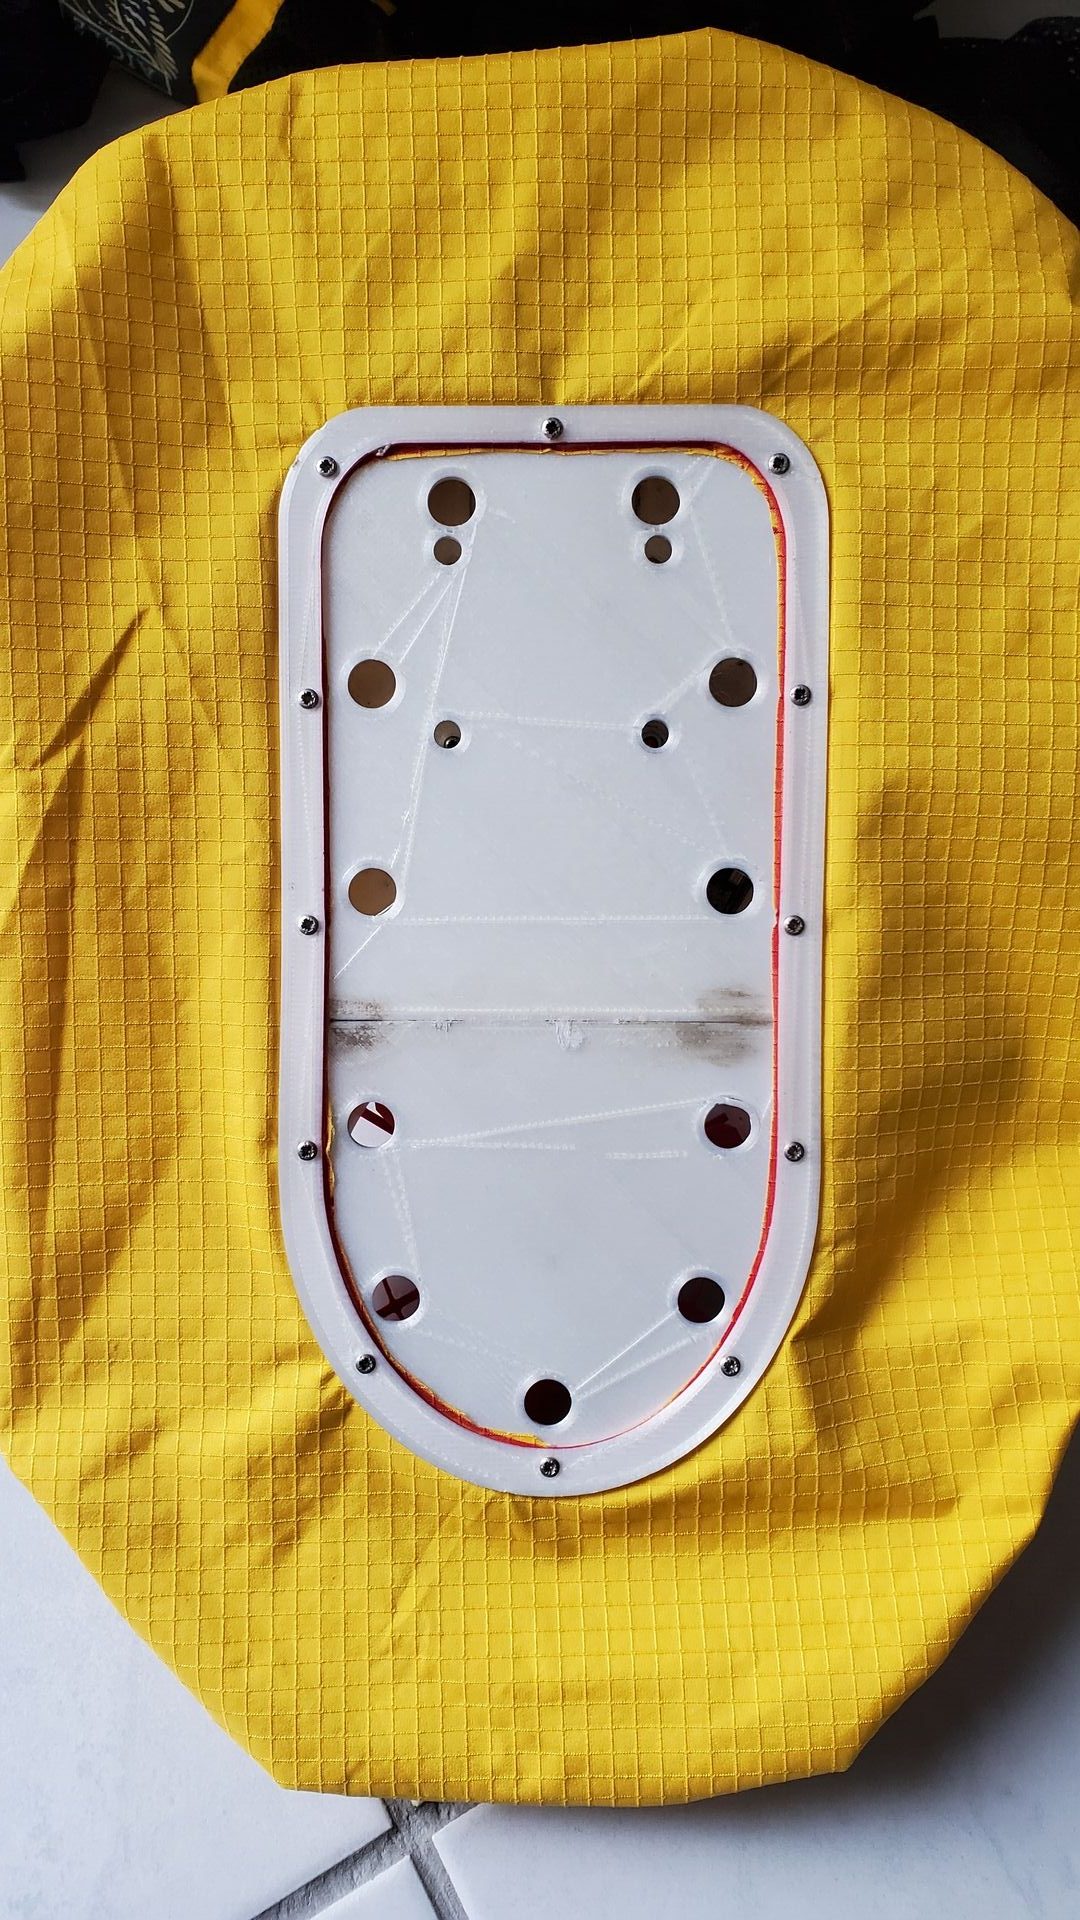
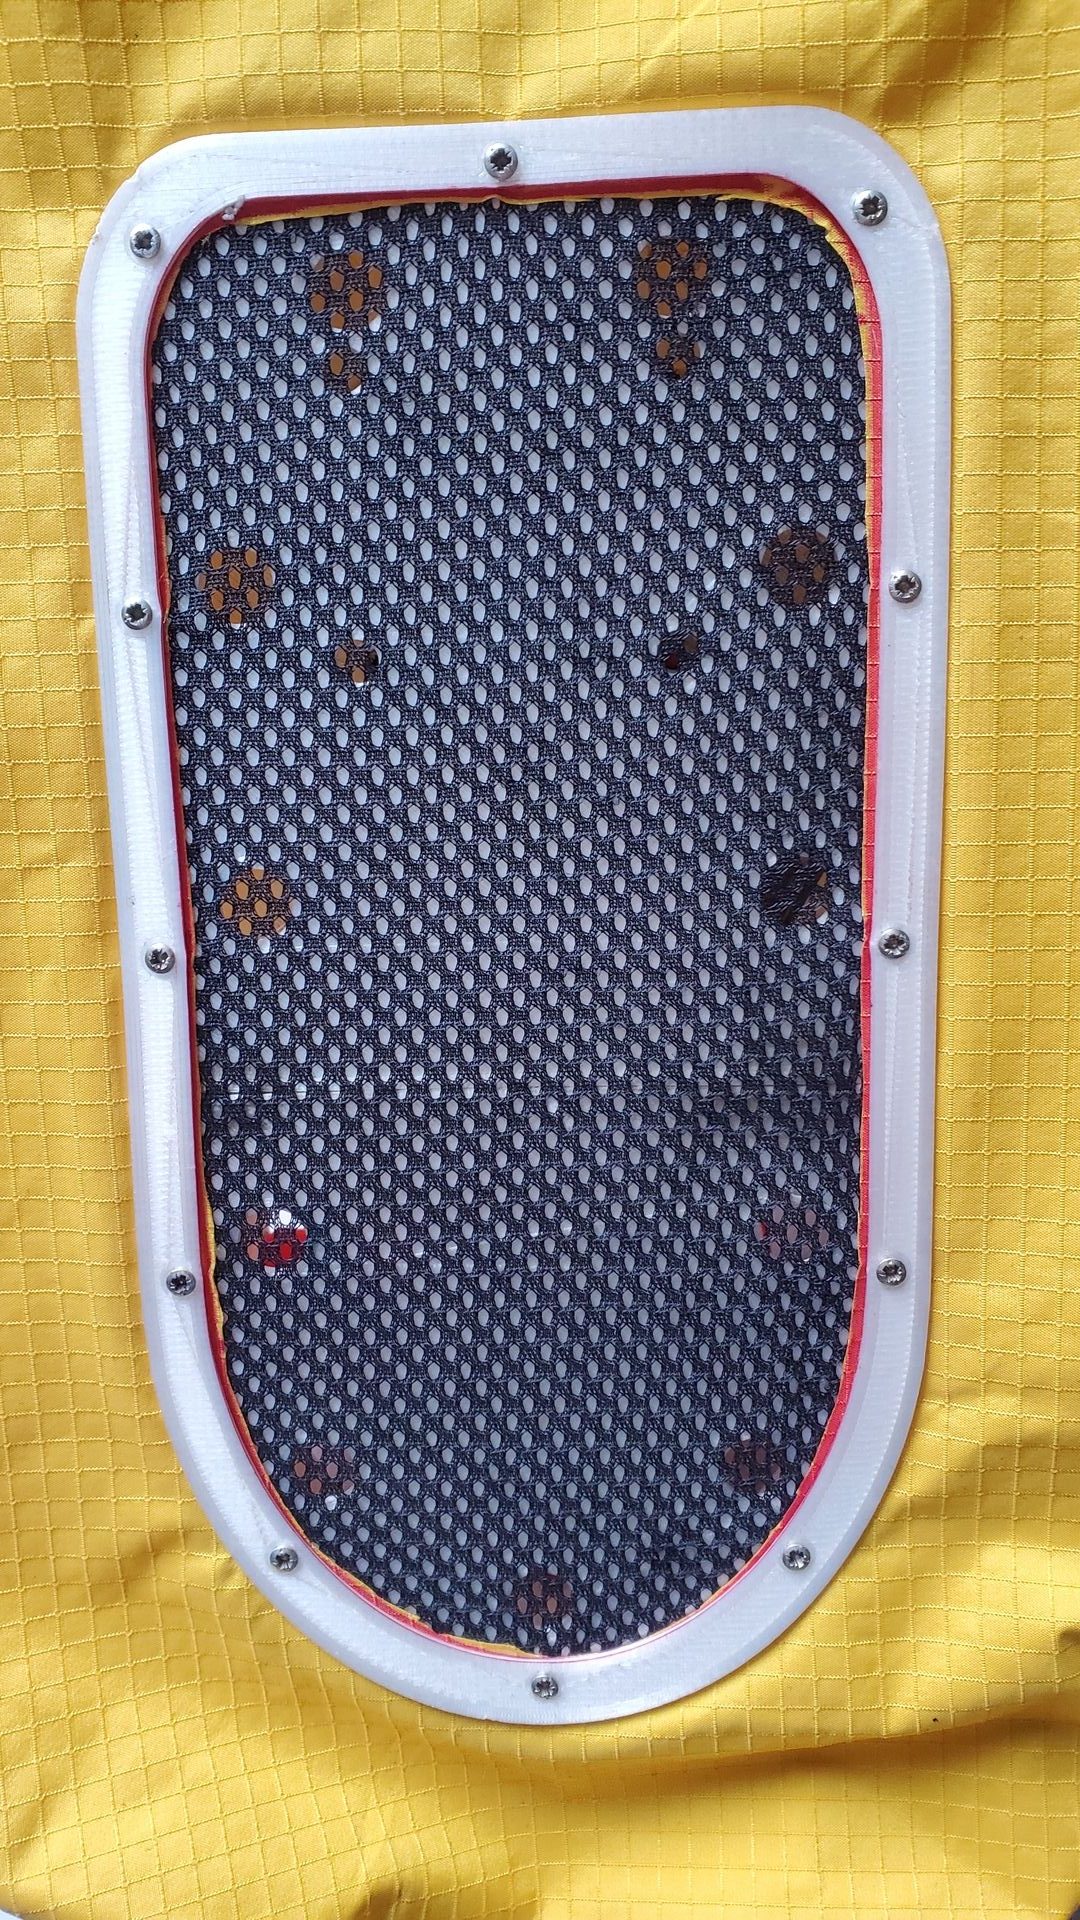
Finaly, fix the skirt, lift motor grid and add a battery… It’s ready to go !
Lesson’s learnt
- As every build I saw, the main concern is the skirt. Even the rain coat is starting to show some strong signs of wear after 5 or 6 hours of use. I need to find something stronger…
- The 2200 mAh battery is big and does not look so good in the hovercraft, but it last 15 to 20 minutes !
- Even with the protection I put under the body (the king of grid), there are some small pebbles that enter during a session. Though, there are easy to remove.