Converting a Tuya power plug to ESPHome device
I wanted to add some power consumption measures to my Openhab installation. But as for now, the majority of my installation relies on 433 Mhz devices and I did not found RFlink compatible ones that could send power consumption. By seing “Tuya Wifi” power plug on Aliexpress, I wanted to try one. Of course, these kind of device is “vendor locked”… unless you open it and flash an alternative firmware.
In fact, there are a lot of similar models but they may house different microcontrollers : esp (32 / 8266), beken (bkxxx, blxxx), Realtec (rtlxxx), etc. The exact chip can usualy be identified with a quick search on the internet, and I discovered several opensource alternative firmwares. Each one support a limited set of microcontrollers (OpenBK7231T, Tasmota, libretiny, etc.).
Opening the device
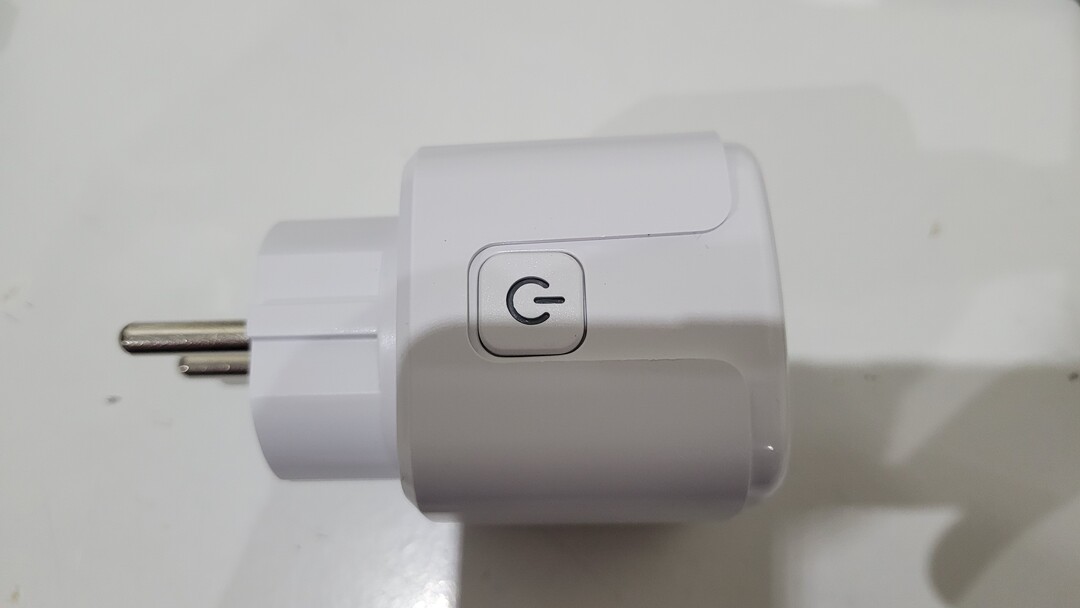
Note that the model I ordered had no specific brand, and may not be available anymore. In general, they are pretty easy to open with a pair of pliers by just pulling a bit the plastic.
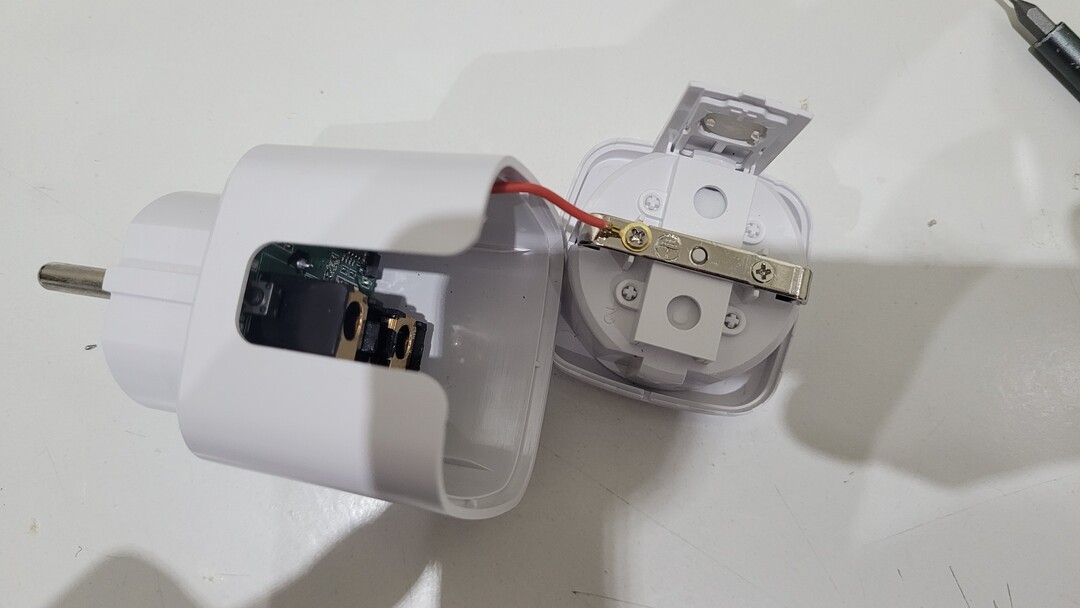
There is only one skrew that maintains the PCB (at the botton of the photo). I just removed it and the board was then easily removable.
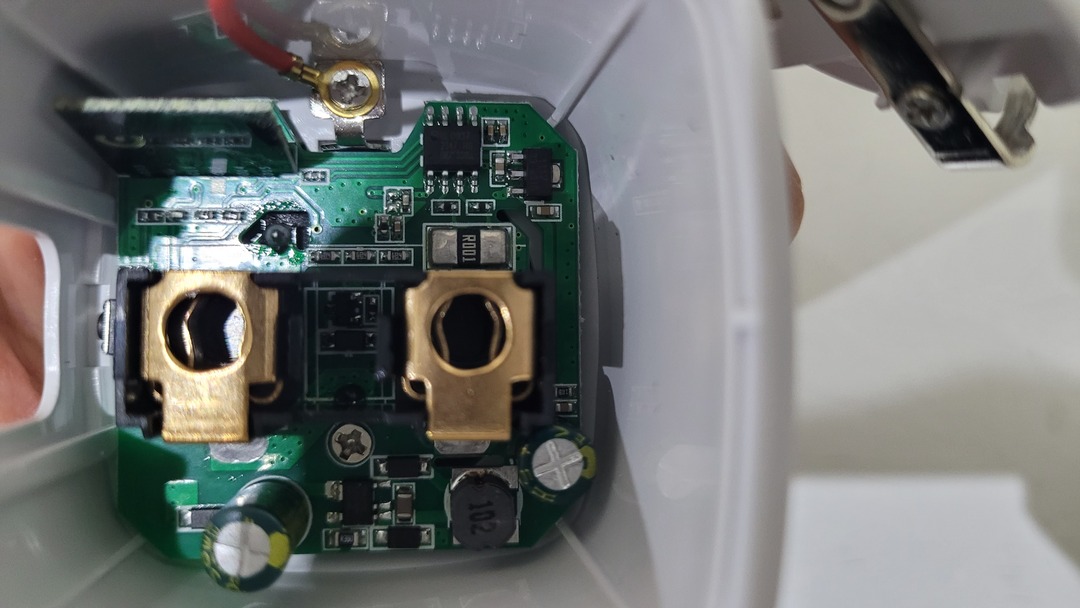

The important mention was “T102_V1.1”. A google search brung me to the documentation of this microcontroller which is a Realtek RTL8710BN:
- https://fcc.report/FCC-ID/2AU7O-T102V11/4540736.pdf
- https://docs.libretiny.eu/boards/t102-v1.1/#pinout
Preparing for ESPHome
According to the documentation, here is the required pins :
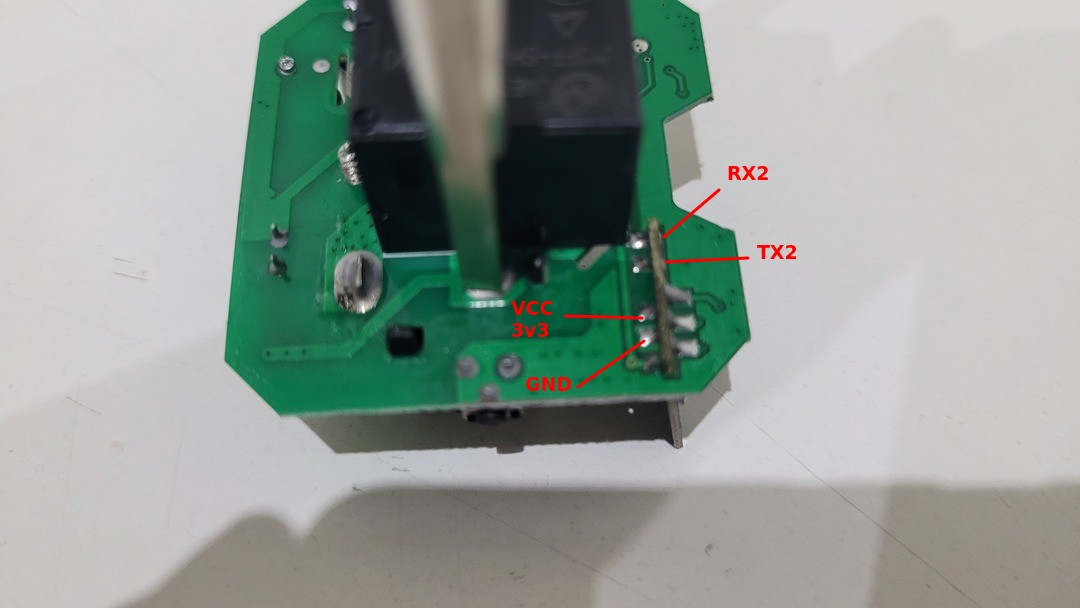
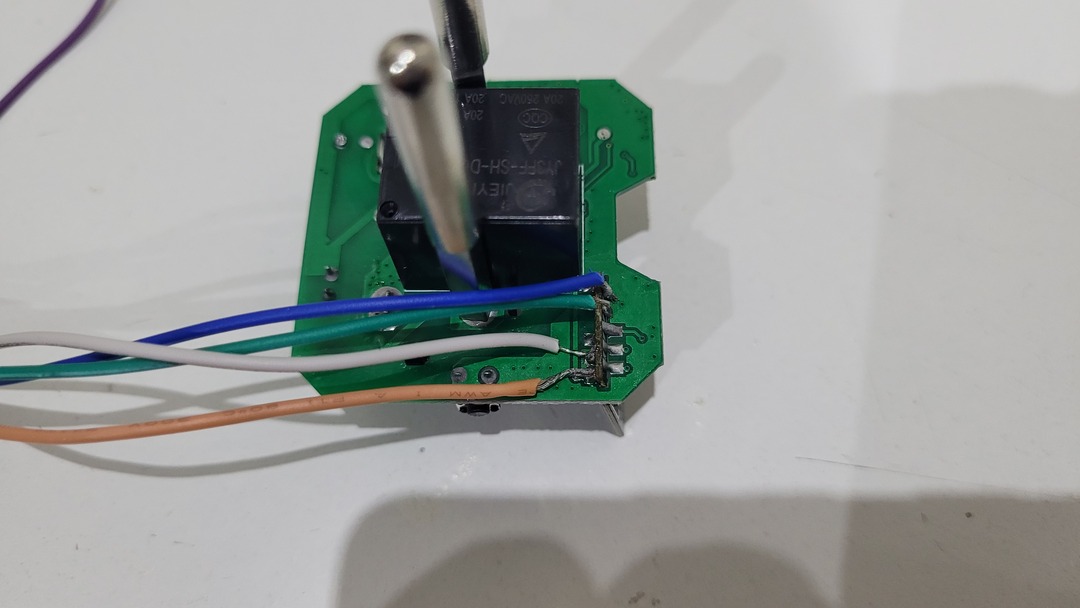
I soldered some dupond cables directly to the chip as it can be flashed in place:
To be able to flash the microcrontroller, it has to be put in “download mode”. This is triggered by putting TX2 to ground, powering on then releasing TX2 from ground.
This mode allows to get informations, dump the firmware or upload a firmware via the DEBUG UART port (TX2 / RX2).
Like the documentation advices, I used a FT232RL usb to serial adapter because the other ones I have did not pass the initial handshake (timeout).
Before trying to flash ESPHome, which is the only opensource available alternative, I wanted to test the connection and backup the original firmware. To do so I installed libchiptool via python’s PIP tool.
|
1 |
pip install ltchiptool |
With this tool installed, I checked if the communication was working correctly:
|
1 2 3 4 5 6 7 8 9 10 11 12 13 14 15 16 17 18 19 20 21 22 23 24 25 26 27 28 29 30 31 32 33 |
python3 -m ltchiptool flash info -d /dev/ttyUSB0 RTL8710B I: Connecting to 'Realtek AmebaZ' on /dev/ttyUSB0 @ 1500000 I: Transmission successful (ACK received). I: Transmission successful (ACK received). I: |-- Success! Chip info: RTL8710BX I: Reading chip info... I: Chip: RTL8710BX I: Transmission successful (ACK received). I: Transmission successful (ACK received). I: +---------------------+--------------------------------+ I: | Name | Value | I: +---------------------+--------------------------------+ I: | Chip Type | RTL8710BX | I: | MAC Address | D8:D6:68:9A:E5:26 | I: | | | I: | Flash ID | 68 40 15 | I: | Flash Size (real) | 2 MiB | I: | | | I: | OTA2 Address | 0xFFFFFFFF | I: | RDP Address | 0xFFFFFFFF | I: | RDP Length | 0xFFFFFFFF | I: | Flash SPI Mode | QIO | I: | Flash SPI Speed | 100MHZ | I: | Flash ID (system) | FFFF | I: | Flash Size (system) | 2 MiB | I: | LOG UART Baudrate | 115200 | I: | | | I: | SYSCFG 0/1/2 | 40000200 / 02010301 / 00000001 | I: | ROM Version | V0.1 | I: | CUT Version | 0 | I: +---------------------+--------------------------------+ I: |-- Finished in 4.215 s |
Then I dumped the original firmware:
|
1 2 3 4 5 6 7 8 9 10 11 |
python3 -m ltchiptool flash read -d /dev/ttyUSB0 RTL8710B smartplug.bin I: Connecting to 'Realtek AmebaZ' on /dev/ttyUSB0 @ 1500000 I: Transmission successful (ACK received). I: Transmission successful (ACK received). I: |-- Success! Chip info: RTL8710BX I: Reading Flash (2 MiB) to 'smartplug.bin' [########################################### 100% I: Transmission successful (ACK received). I: Transmission successful (ACK received). I: |-- Finished in 84.723 s |
Flashing ESPHome
Despite ESPhome recommendation is to install from git, I prefered to use python’s PIP to do so.
|
1 |
pip install esphome |
Then I created a configuration file for the device and followed the instructions.
Board type is rtl87xx and board id is t102-v1.1
|
1 |
python3 -m esphome wizard smartplug.yml |
With the Yaml file, I compiled ESPhome firmware for the device :
|
1 |
python3 -m esphome compile smartplug.yml |
And finaly uploaded this firmware to the device, using the same trick as for dumping (TX2 to ground, power on, then release)
|
1 |
python3 -m esphome upload smartplug.yml |
Here is the output I got :
|
1 2 3 4 5 6 7 8 9 10 11 12 13 14 15 16 17 18 19 20 21 |
Configuring upload protocol... AVAILABLE: uart CURRENT: upload_protocol = uart Looking for upload port... Using manually specified: /dev/ttyUSB0 Uploading .pioenvs/powerplug1/firmware.uf2 |-- Detected file type: UF2 - esphome 2024.3.0 |-- Connecting to 'Realtek AmebaZ' on /dev/ttyUSB0 @ 1500000 |-- Transmission successful (ACK received). |-- Transmission successful (ACK received). | |-- Success! Chip info: RTL8710BX |-- Writing '.pioenvs/powerplug1/firmware.uf2' | |-- esphome 2024.3.0 @ 2024-03-25 22:40:51 -> t102-v1.1 ###########################################|-- Transmission successful (ACK received). |-- Transmission successful (ACK received). |-- Transmission successful (ACK received). |-- Transmission successful (ACK received). | |-- Finished in 15.869 s =================== [SUCCESS] Took 16.86 seconds ================ INFO Successfully uploaded program. |
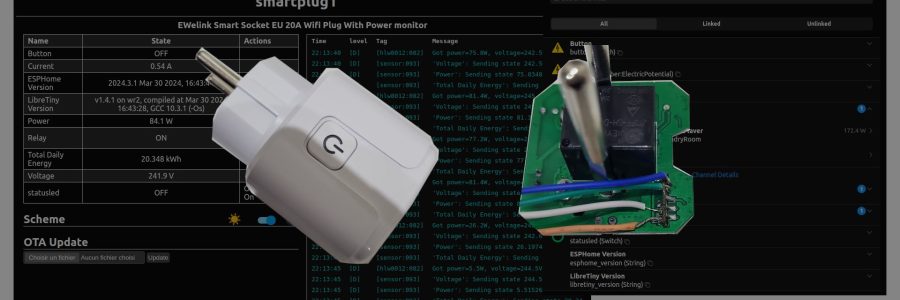
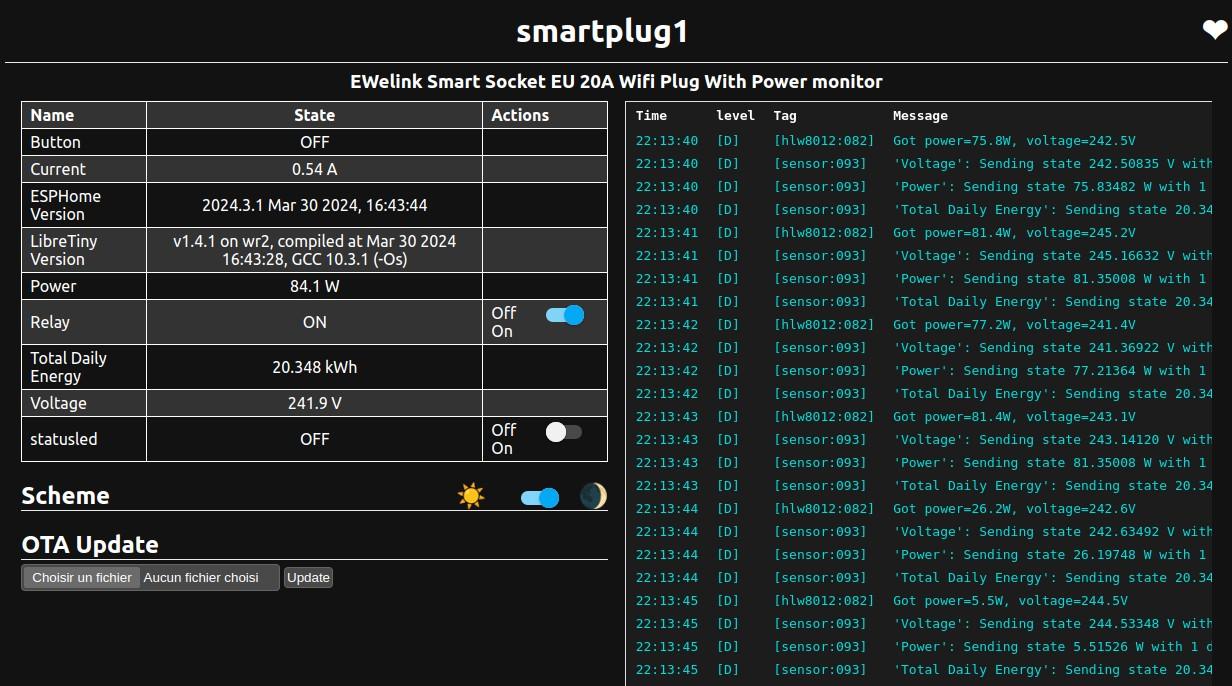
At this time a reset (unplug / replug) and voila ! The smartplug was running ESPHome.
However, it just connected to the Wifi and was not reporting nor doing anything because the ESPHome Yaml file was just containing the bare minimum. EspHome need to know how to read sensors and how to drive the relay with GPIOs.
Chance is that someone actually documented a very similar device from another brand. In fact they are the same, so I used a similar YAML file to compile a new firmware and uploaded it.
Unfortunately, the boot process stop complaining that “Change interrupts not supported”. This is a known issue that have been reported, but there is a workaround : https://github.com/libretiny-eu/libretiny/issues/155
After the wiring_irq.c file modified as stated in the issue’s comments, the device booted correctly. Note that MQTT is not yet implemented for RTL87XX.
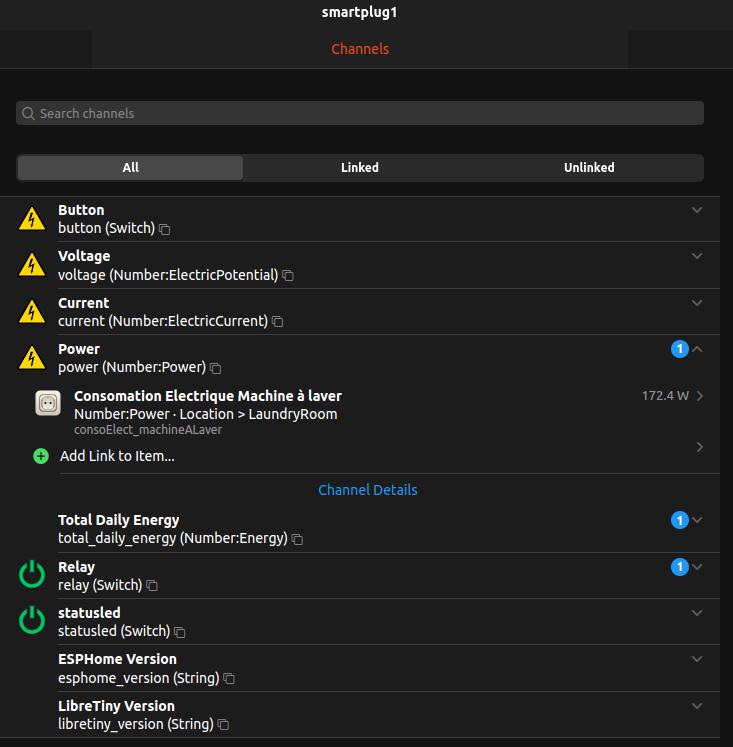
Integration with OpenHab
This is the easiest part as an EspHome binding already exists. So In order to use this Esphome driven smartplug I just did the following in Openhab:
- Installl the “ESPHome Binding for the native API”
- Add a thing and choose the ESPHome Binding
- Choose the “Add manually” option by selecting “ESPHome Device”
- Enter the hostname eg. “smartplug.local.lan” and the API password from the YAML file