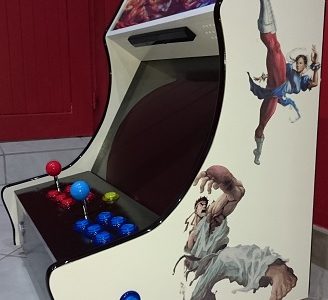
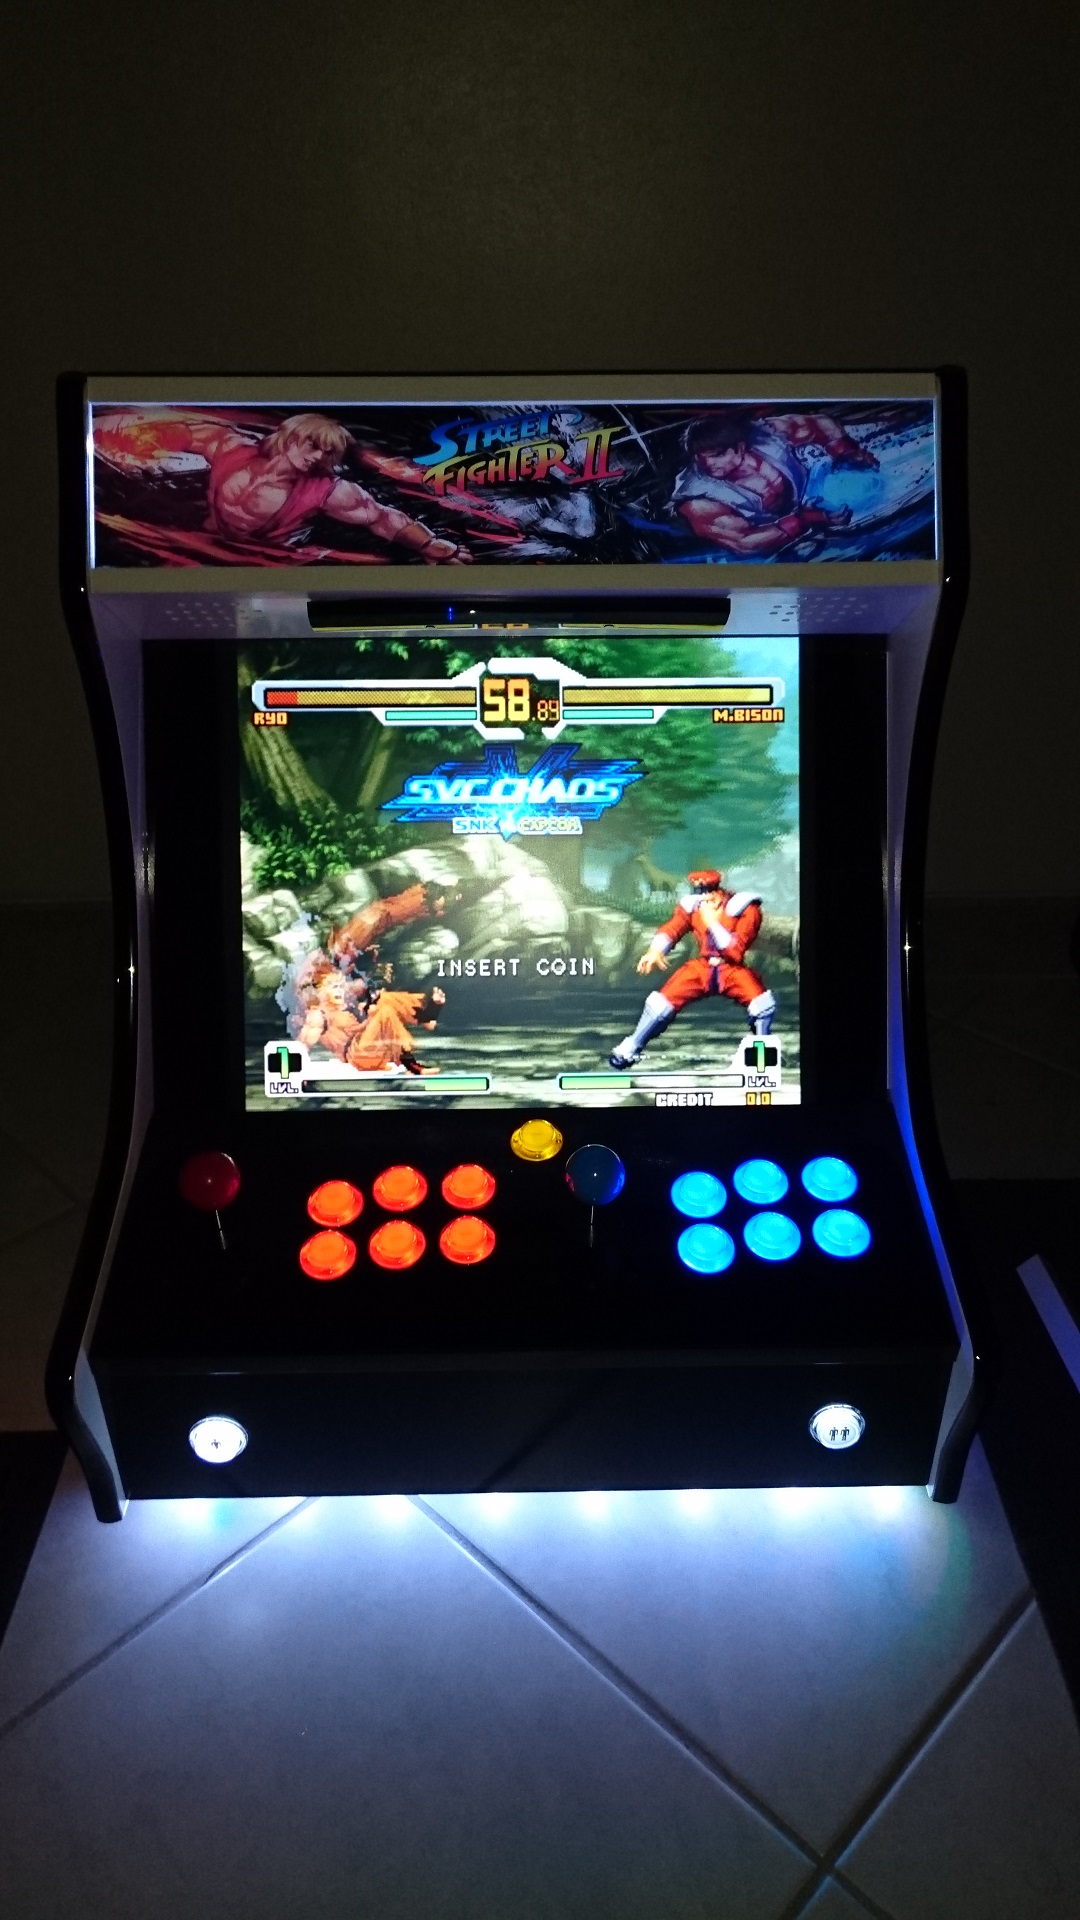
Retrogaming: homemade bartop
The story began some years ago, when I built from scratch a “true” fullsized arcade cabinet (see the gallery). This Mame Cab was pretty cool, with nice arcade feeling : CRT screen, optical guns (ps 1), trackball, real coin door.
The problem was the size of the beast : HxLxD was 190x80x120 cm. It was taking a lot of space… Space that I needed to create a new study area.
So, I sold my “old” Mame Cab and started to build a bartop which is a lot smaller…
Features
The Bartop is able to run many arcade games and uses Hyperspin as frontend:
- Laser disc with Daphne
- Misc Arcade with Mame
- Sega Model 2 with Nebula
- Two Sega Model 3 games with Supermodel
- ZN1 with Zinc
- Some pinballs with Futur Pinball
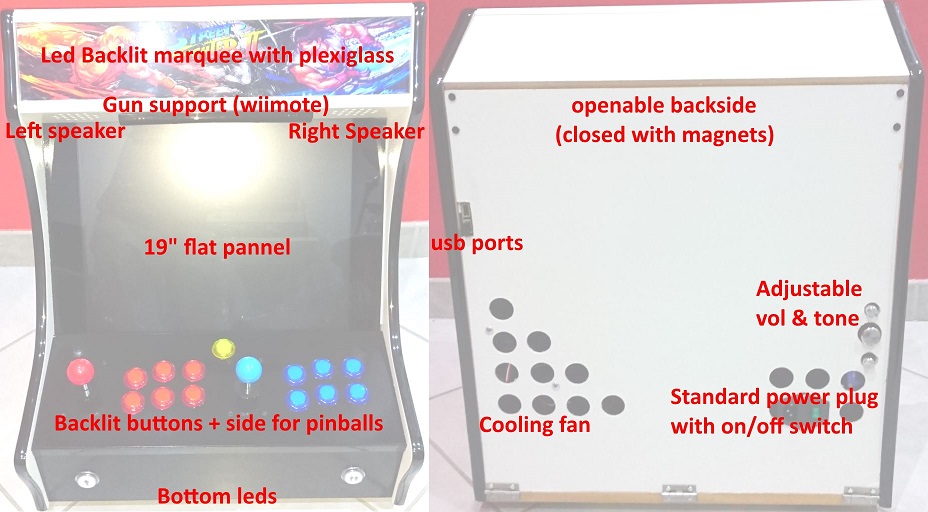
Main features are :
- Backlit marquee and bottom, for a cool look in the dark
- “Always on” backlit buttons
- 19 inch DVI display to get a decent size with a 4:3 ratio
- Stereo sound, with adjustable volume, bass and treble
- Light Gun support throught Wiimote
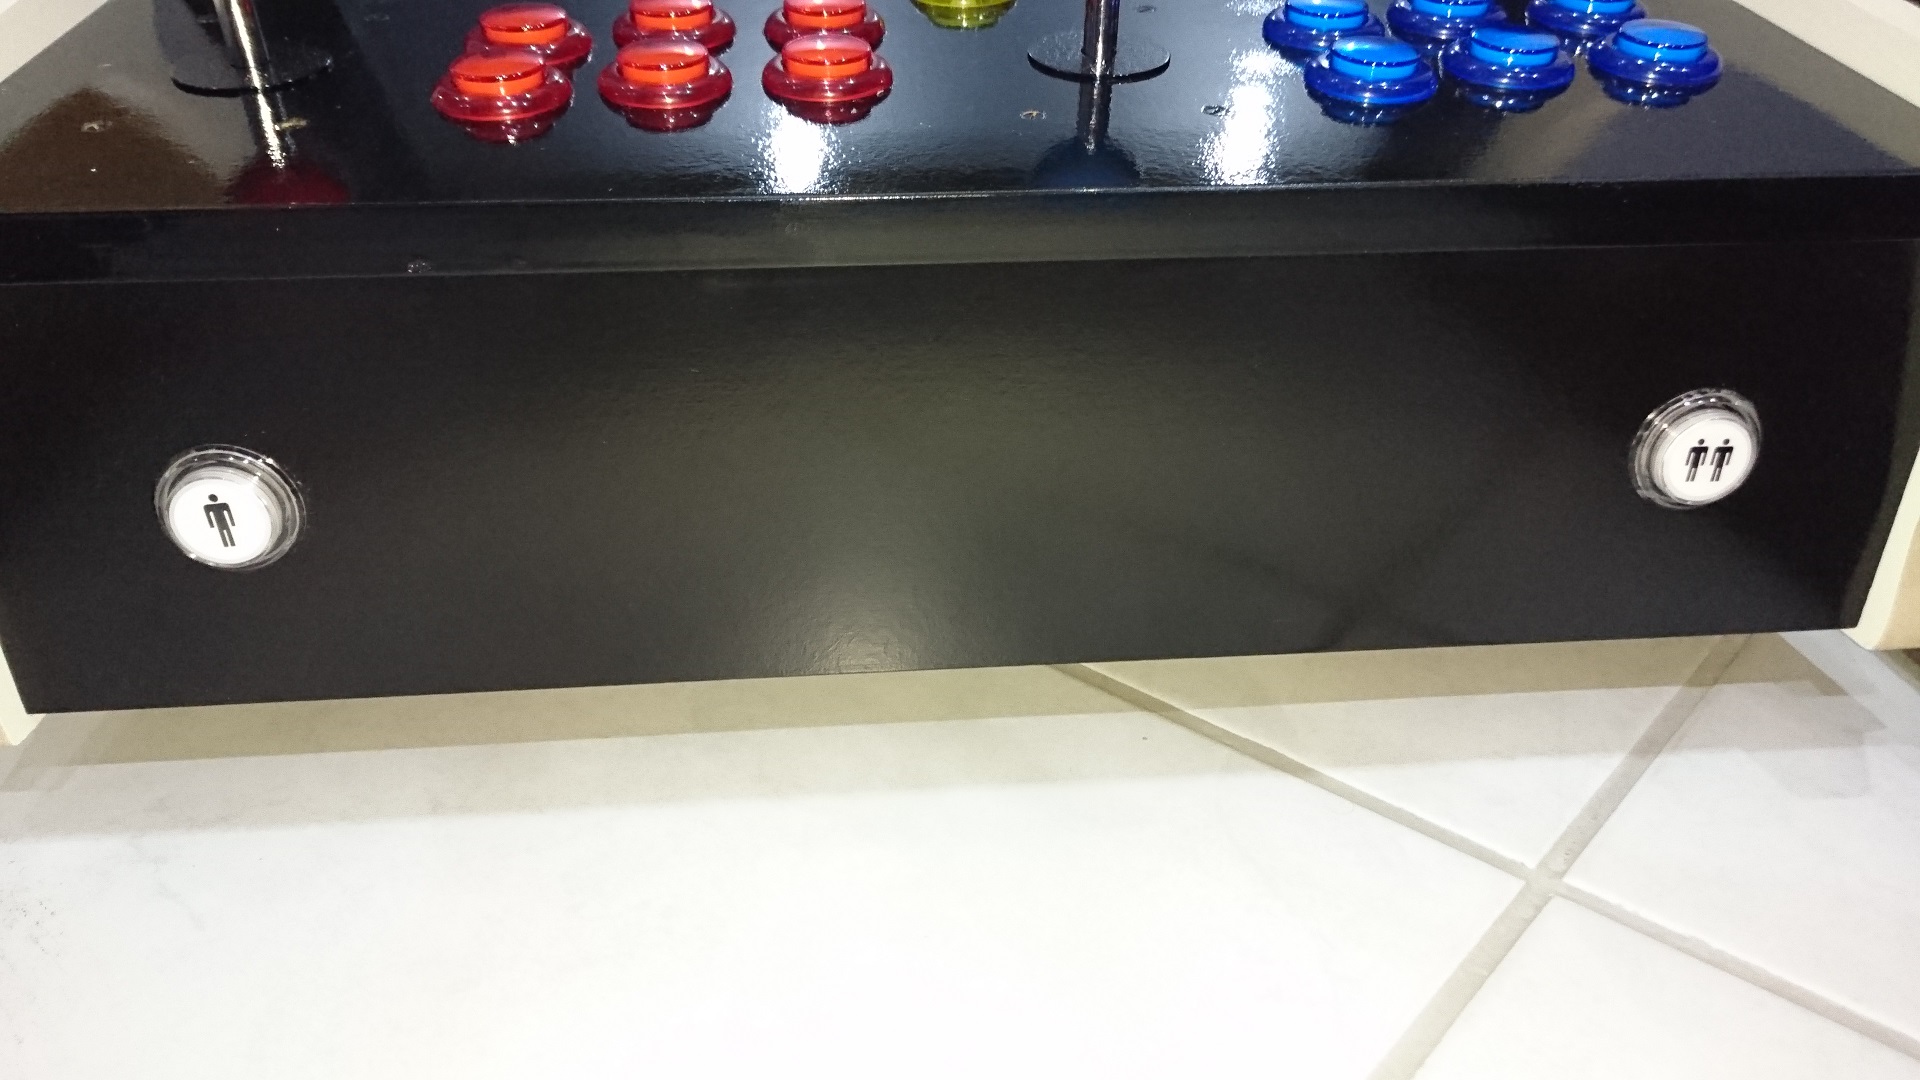
- Side buttons for pinball tables
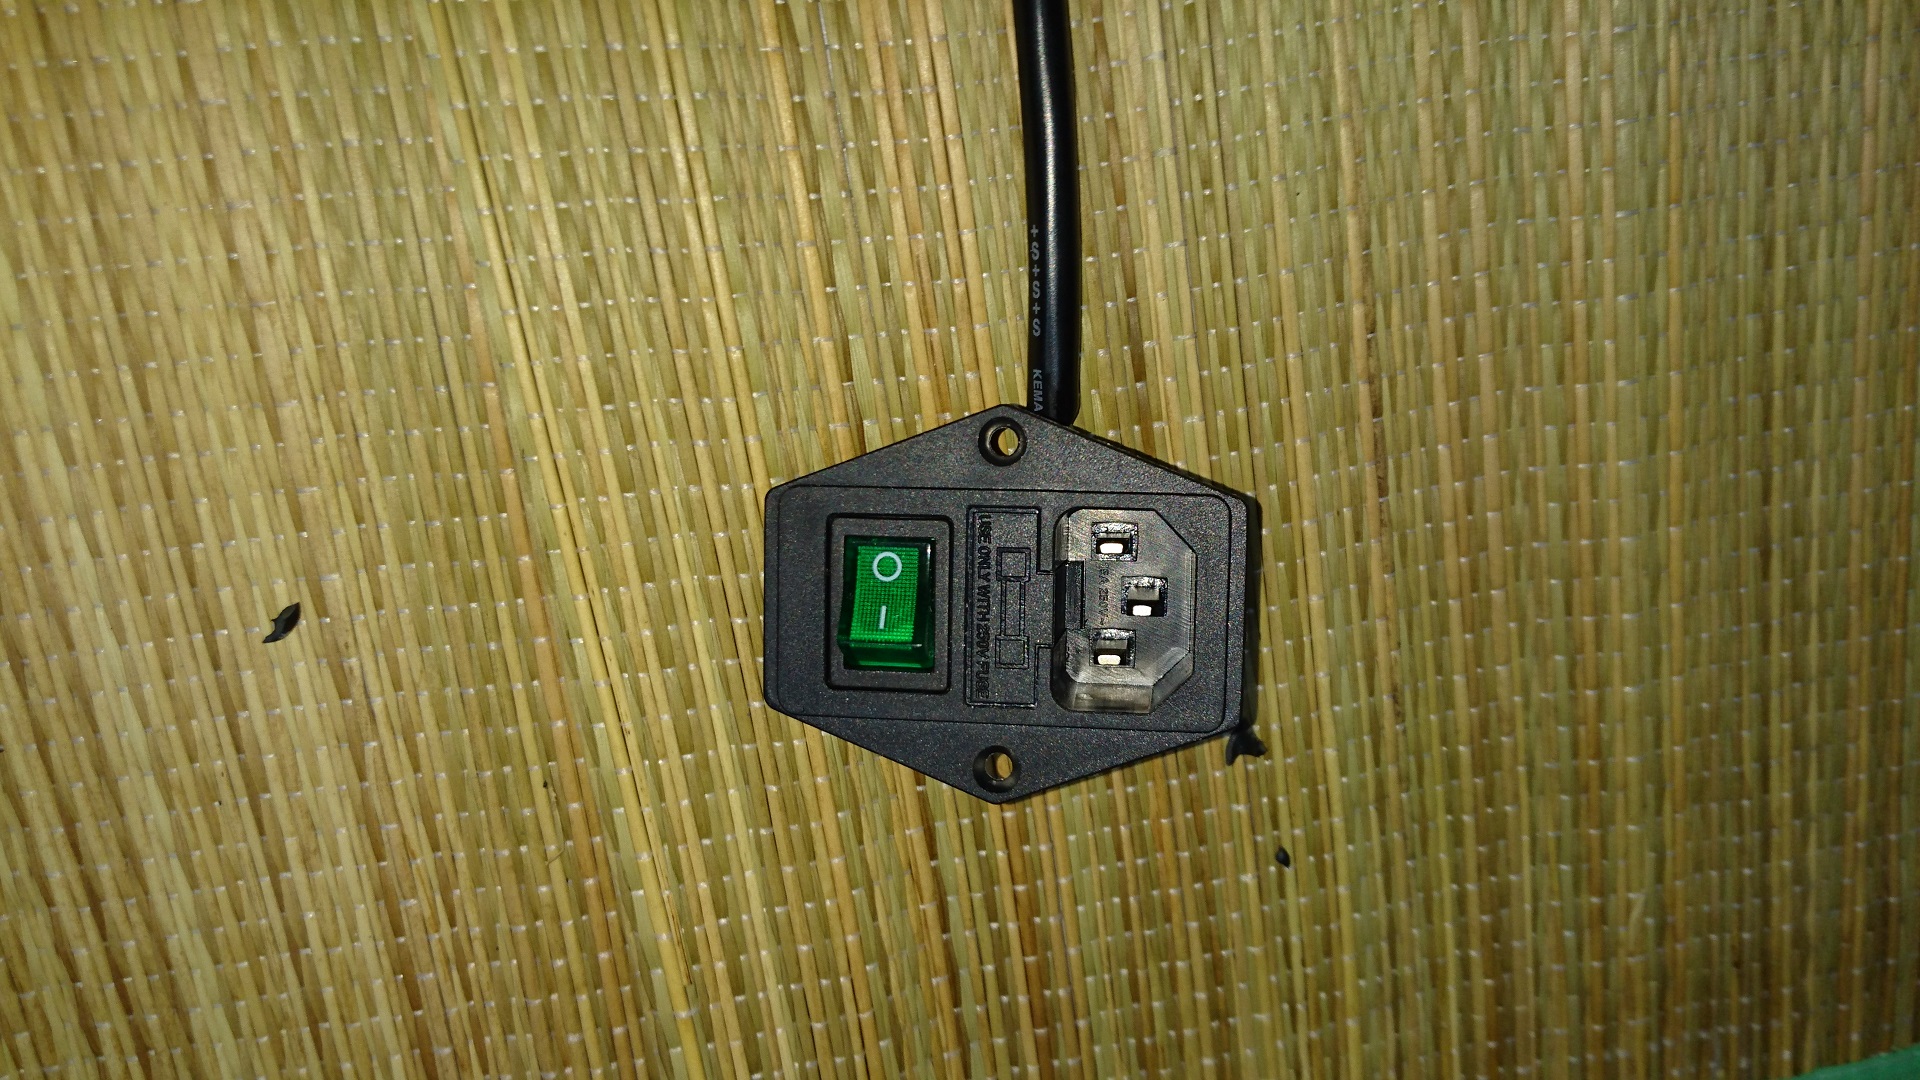
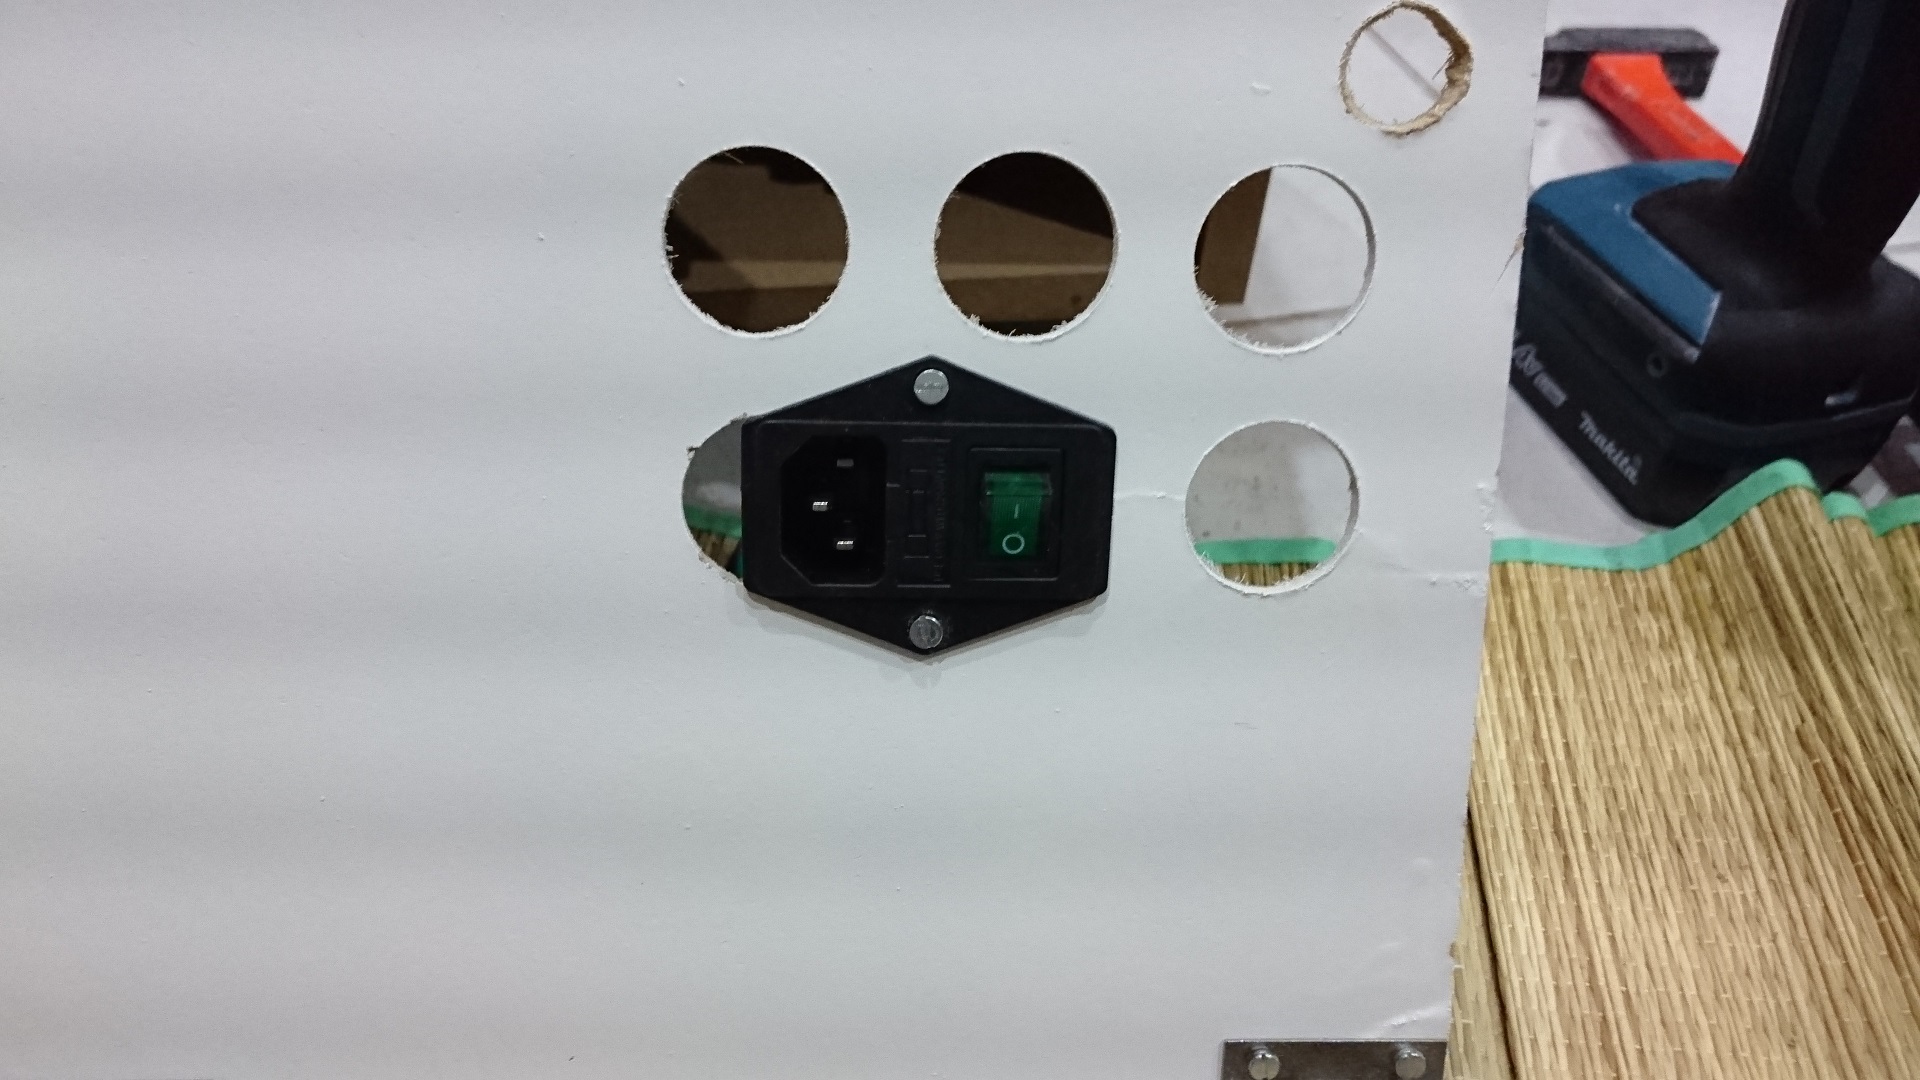
- Standard C14 Power plug with on/off switch
- Accessible usb ports (for wifi, keyboard, etc.)
Hardware part
Components
Gettings nice emulators and good looking frontend (which is a matter of personnal taste) often require M$ Windows… and so a full featured PC with good performances. I don’t usualy use Windows at home, but I really put emulators and frontend as priority !
Thus, all electronics parts are “simple” PC parts or interfaces.
PC (I already had all of this, except the monitor and the ssd):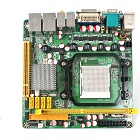
- Mini ITX motherboard : Jetway nc62k
- CPU : Atlhon XP 64 6000+ together with Akasa AK-861CU AMD Low Noise Cooler
- 2 Gb Ram DDR2 800
- DVI Cable
- 19 inch LCD Monitor : LG L1972H (found on www.priceminister.com)
- A small 120W power supply (for PC, Leds, audio amplifier and buttons interfaces)
- Samsung SSD (840 evo)
Electronics parts: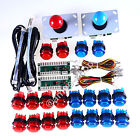
- Player 1 & 2 start buttons : found on ebay, sold by “procardetails”
- Dolphin Bar (for wiimote) : can be found on ebay or Amazon
- Two player Led Arcade Game kit: found on ebay, sold by “amye-shop”
- C14 Power plug with On/Off switch : found on ebay, sold by “gagaoutleteb”
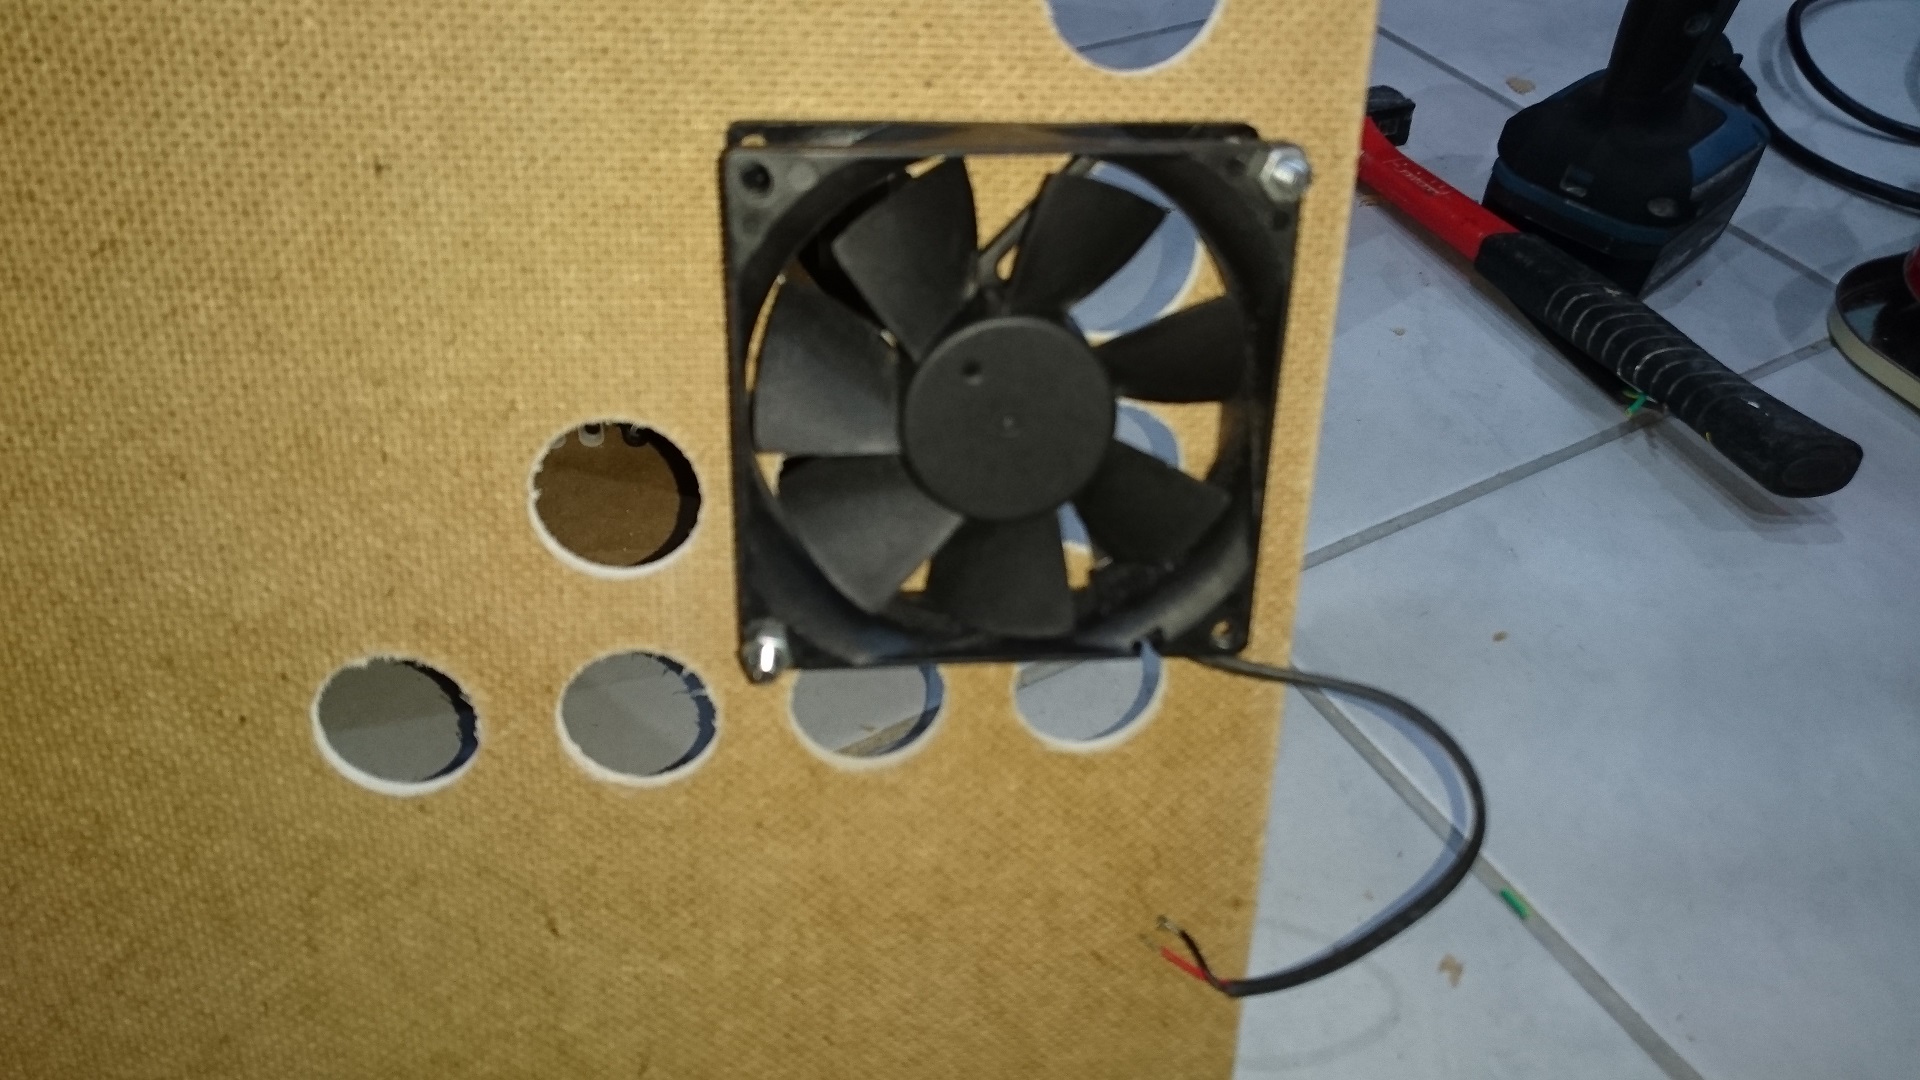
- standard 12V 80x80mm PC fan
- A wiimote + LightGun
Furnitures:
- A DIY bartop kit + plexiglass parts, found on ebay, sold by “djwillione”
- 12V Audio amplifier + Power + Oval Speaker, same seller
- White corner & straight lugs, local DIY shop
- Cupboard’s door magnets and hinges, local DIY shop
- 5V leds ruber for TV, local DIY shop (link)
- Small HETTICH plastic assembly parts (link)
Decorations:
- A4 side stickers : found on ebay, sold by “palma.fr2015”
- Adhesive black molding : found on ebay, sold by “procardetails”
- Black and white brillant spray paint, local DIY Shop
Build steps
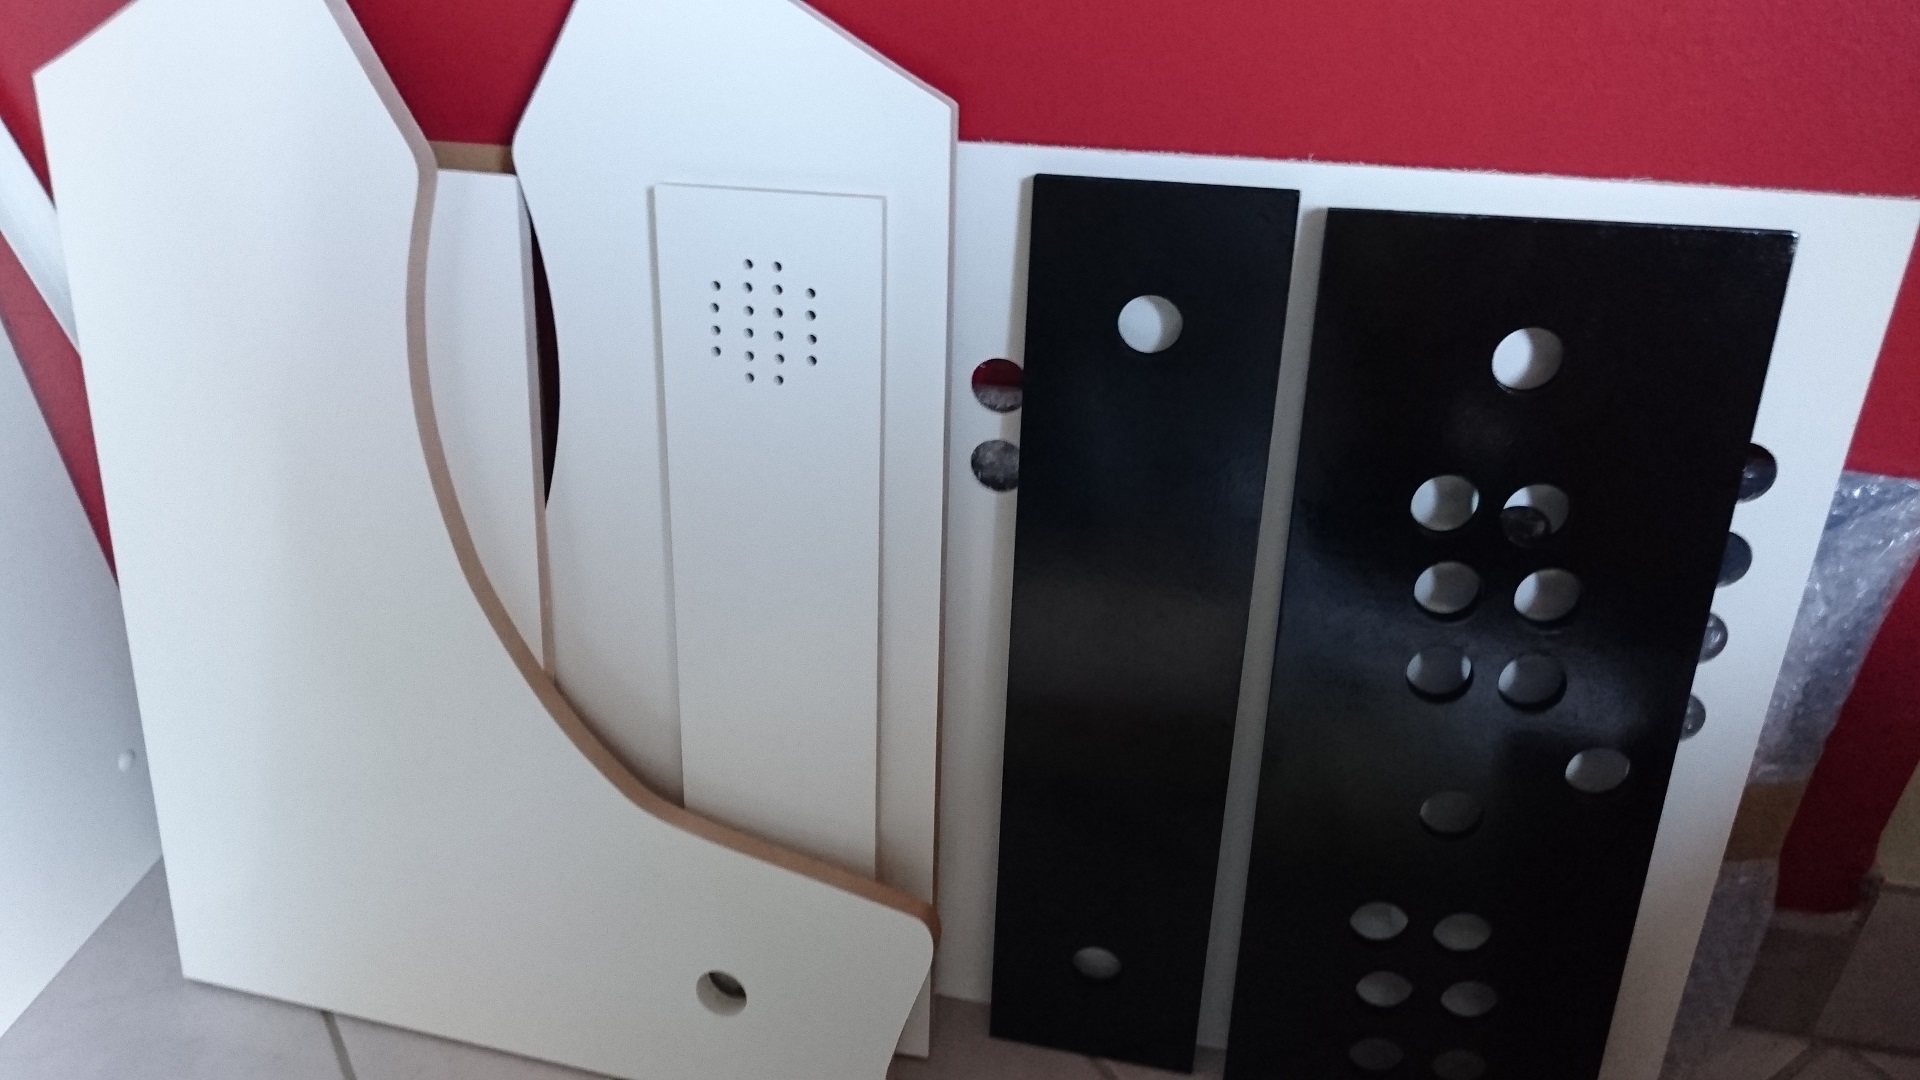
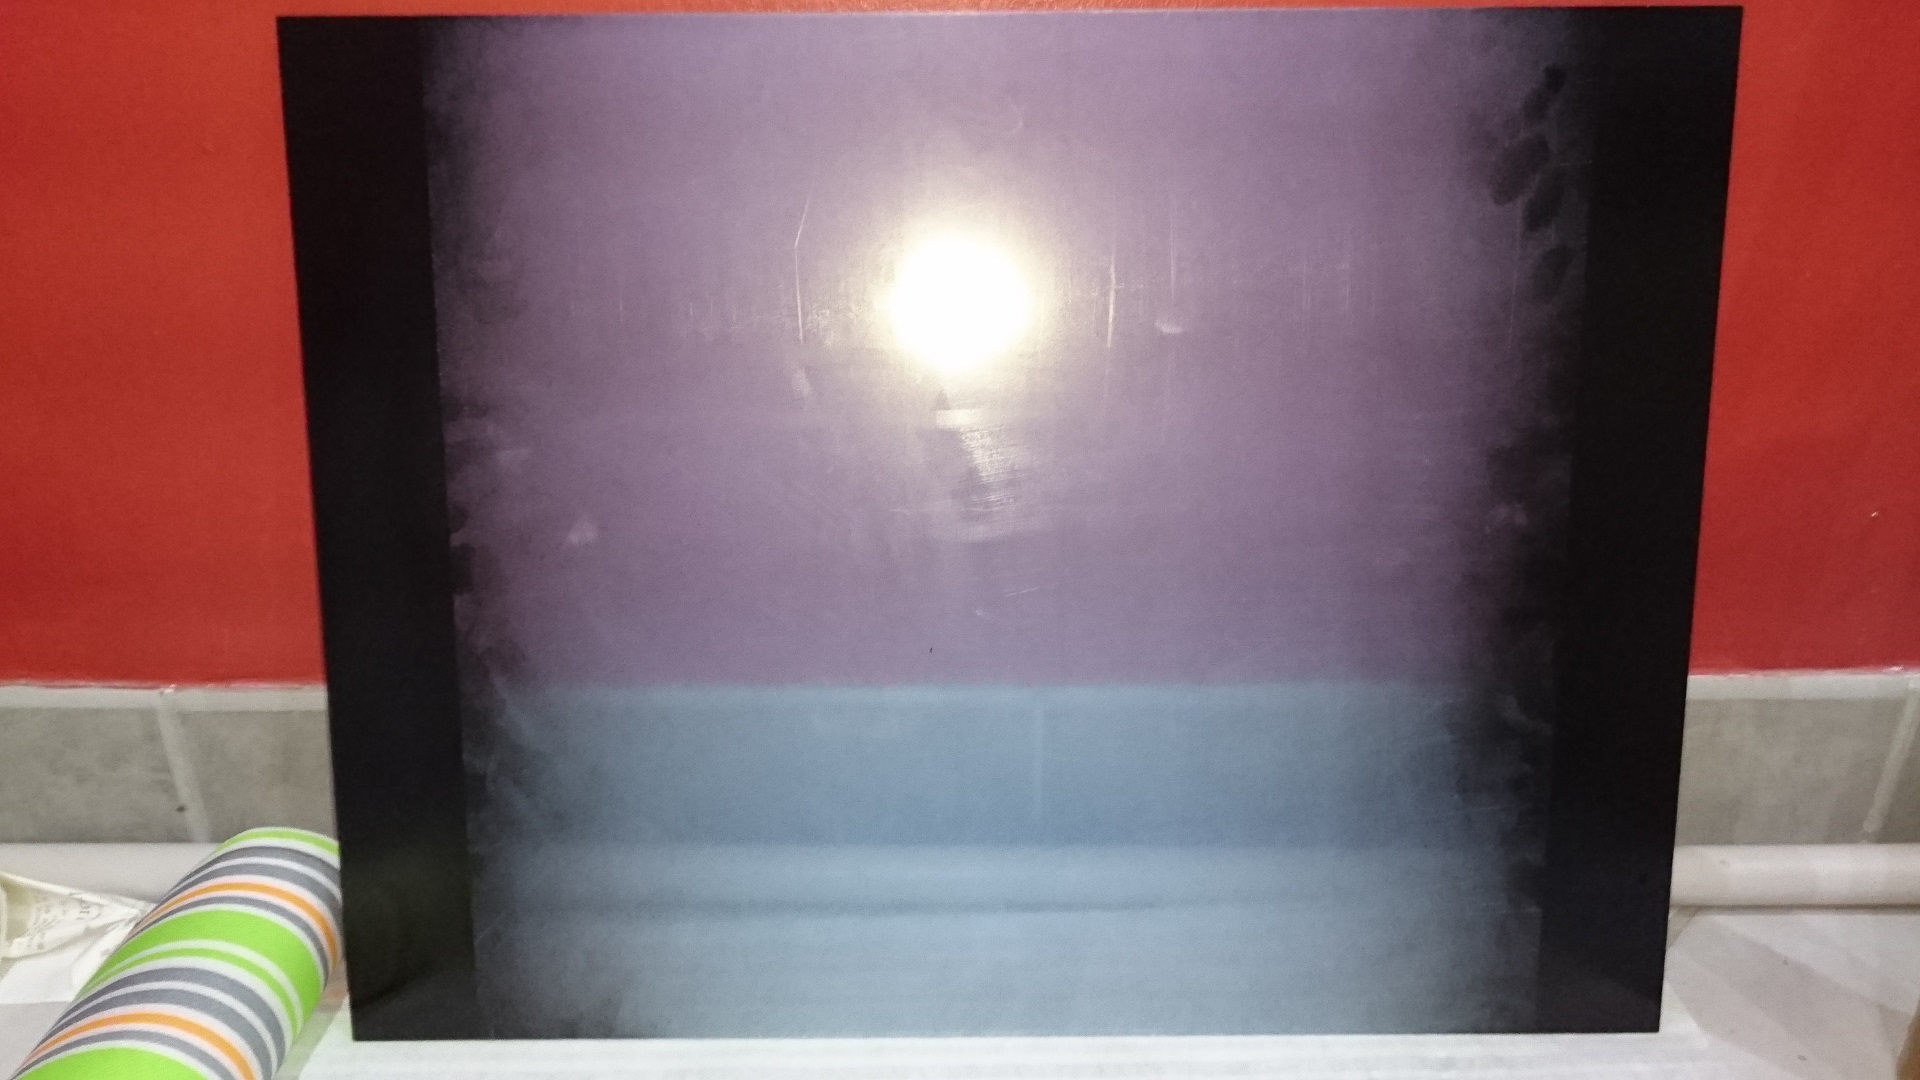
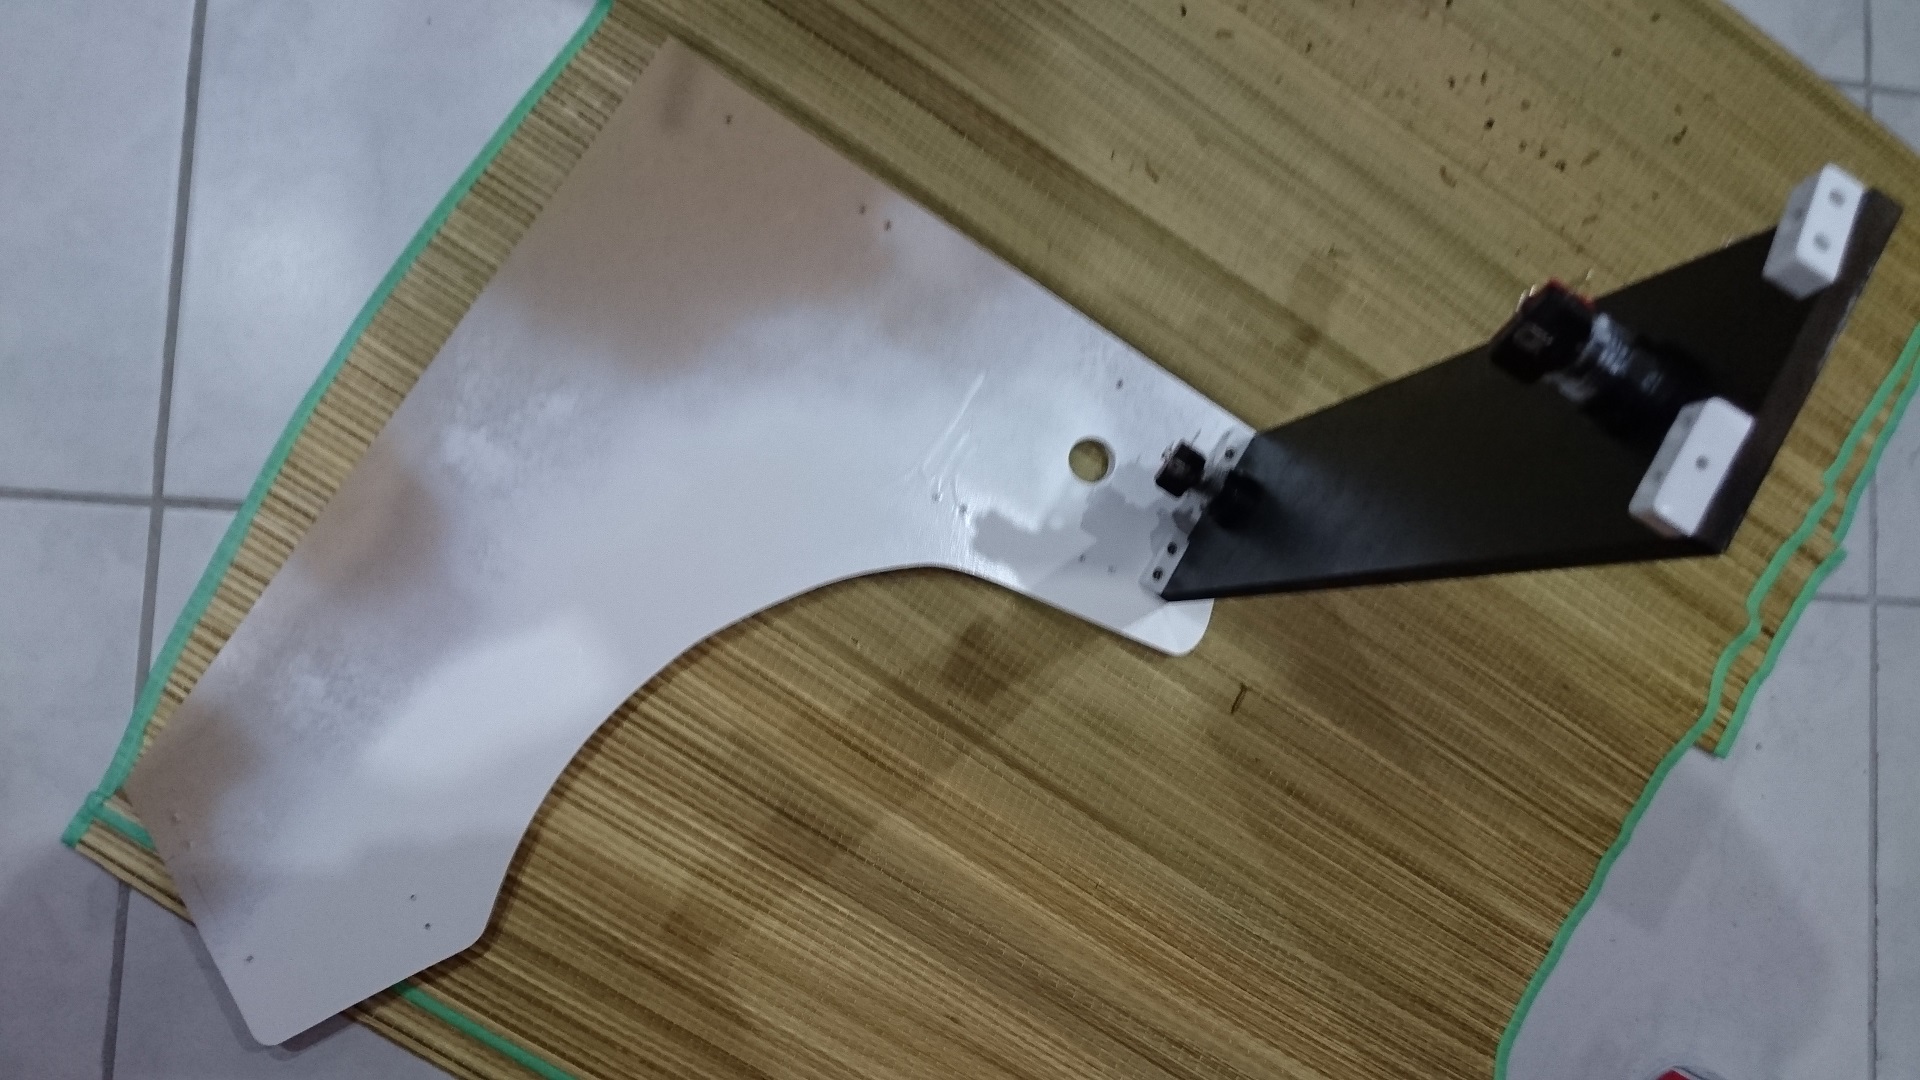
Painting
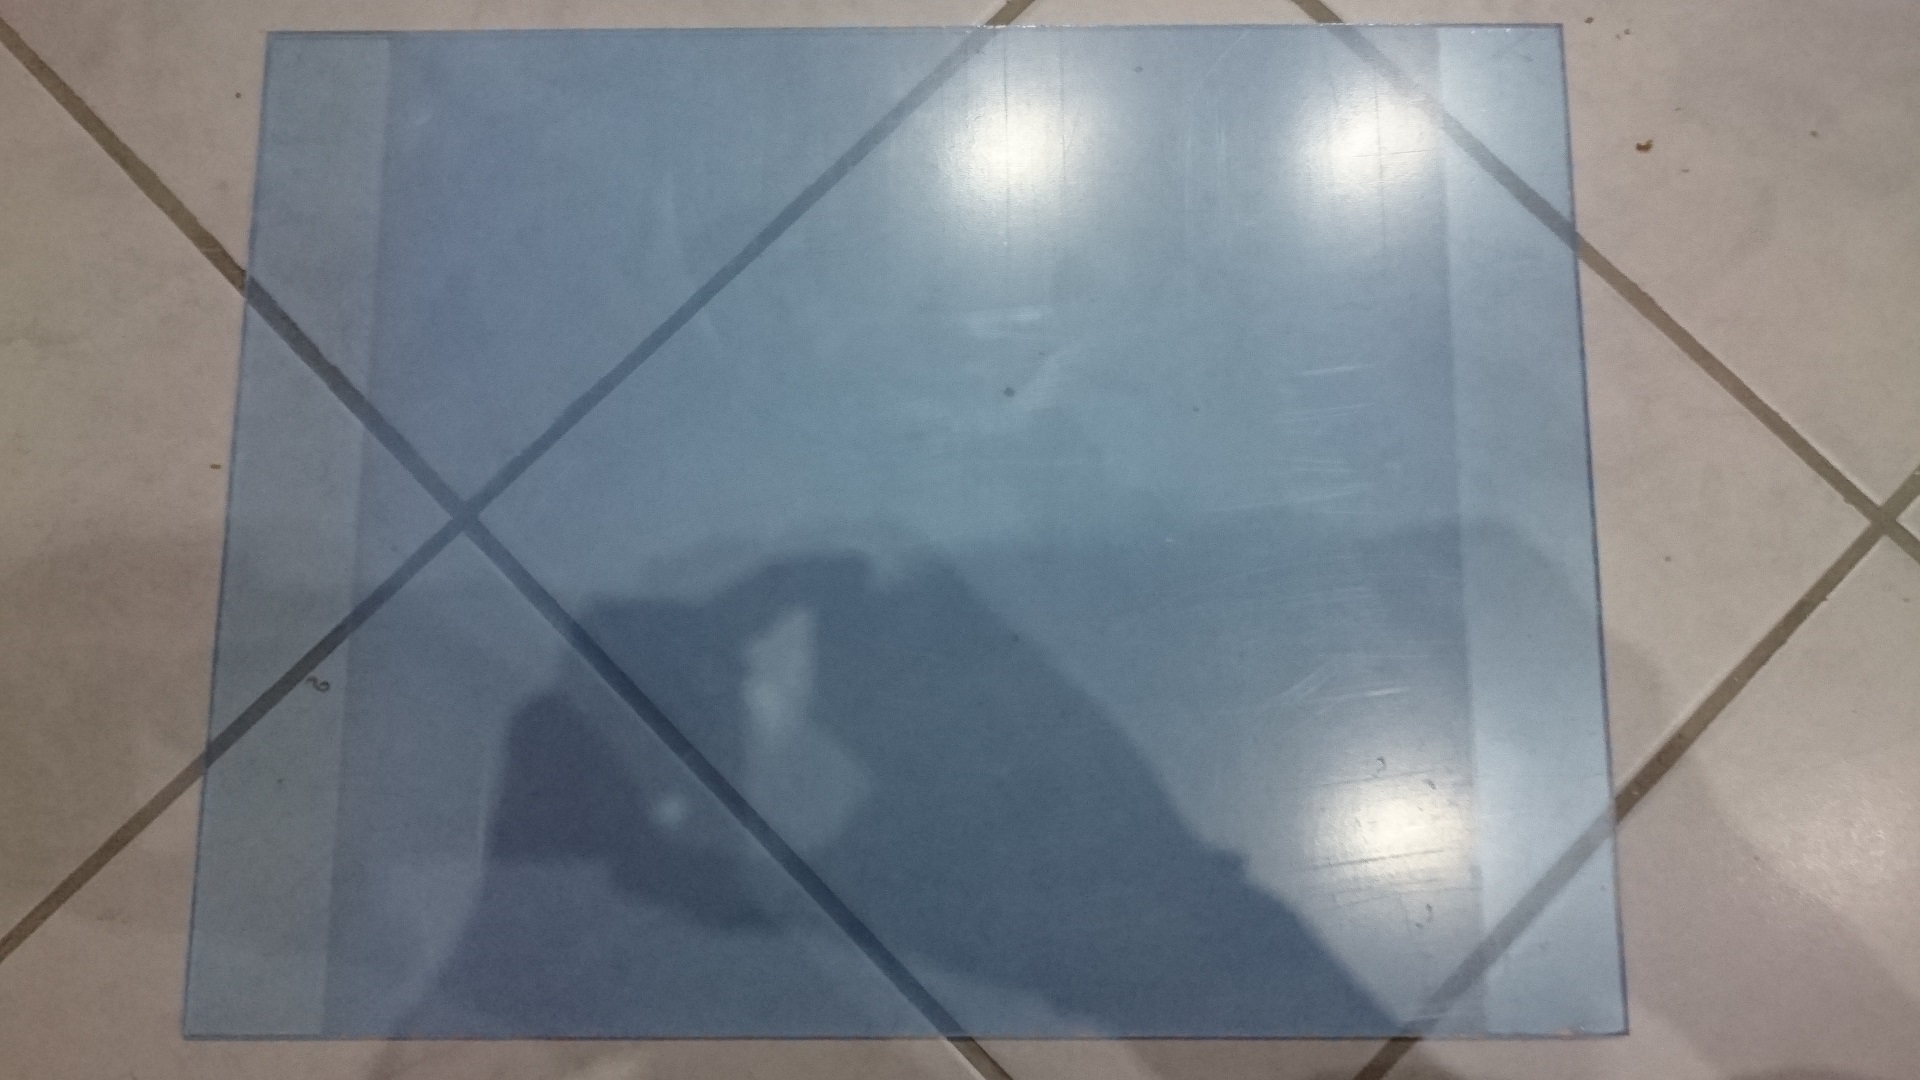
I first started to paint all visible parts. For the plexiglass used as bezel, as it was protected by a plastic film, I just removed the some plastic film on both sides before painting.
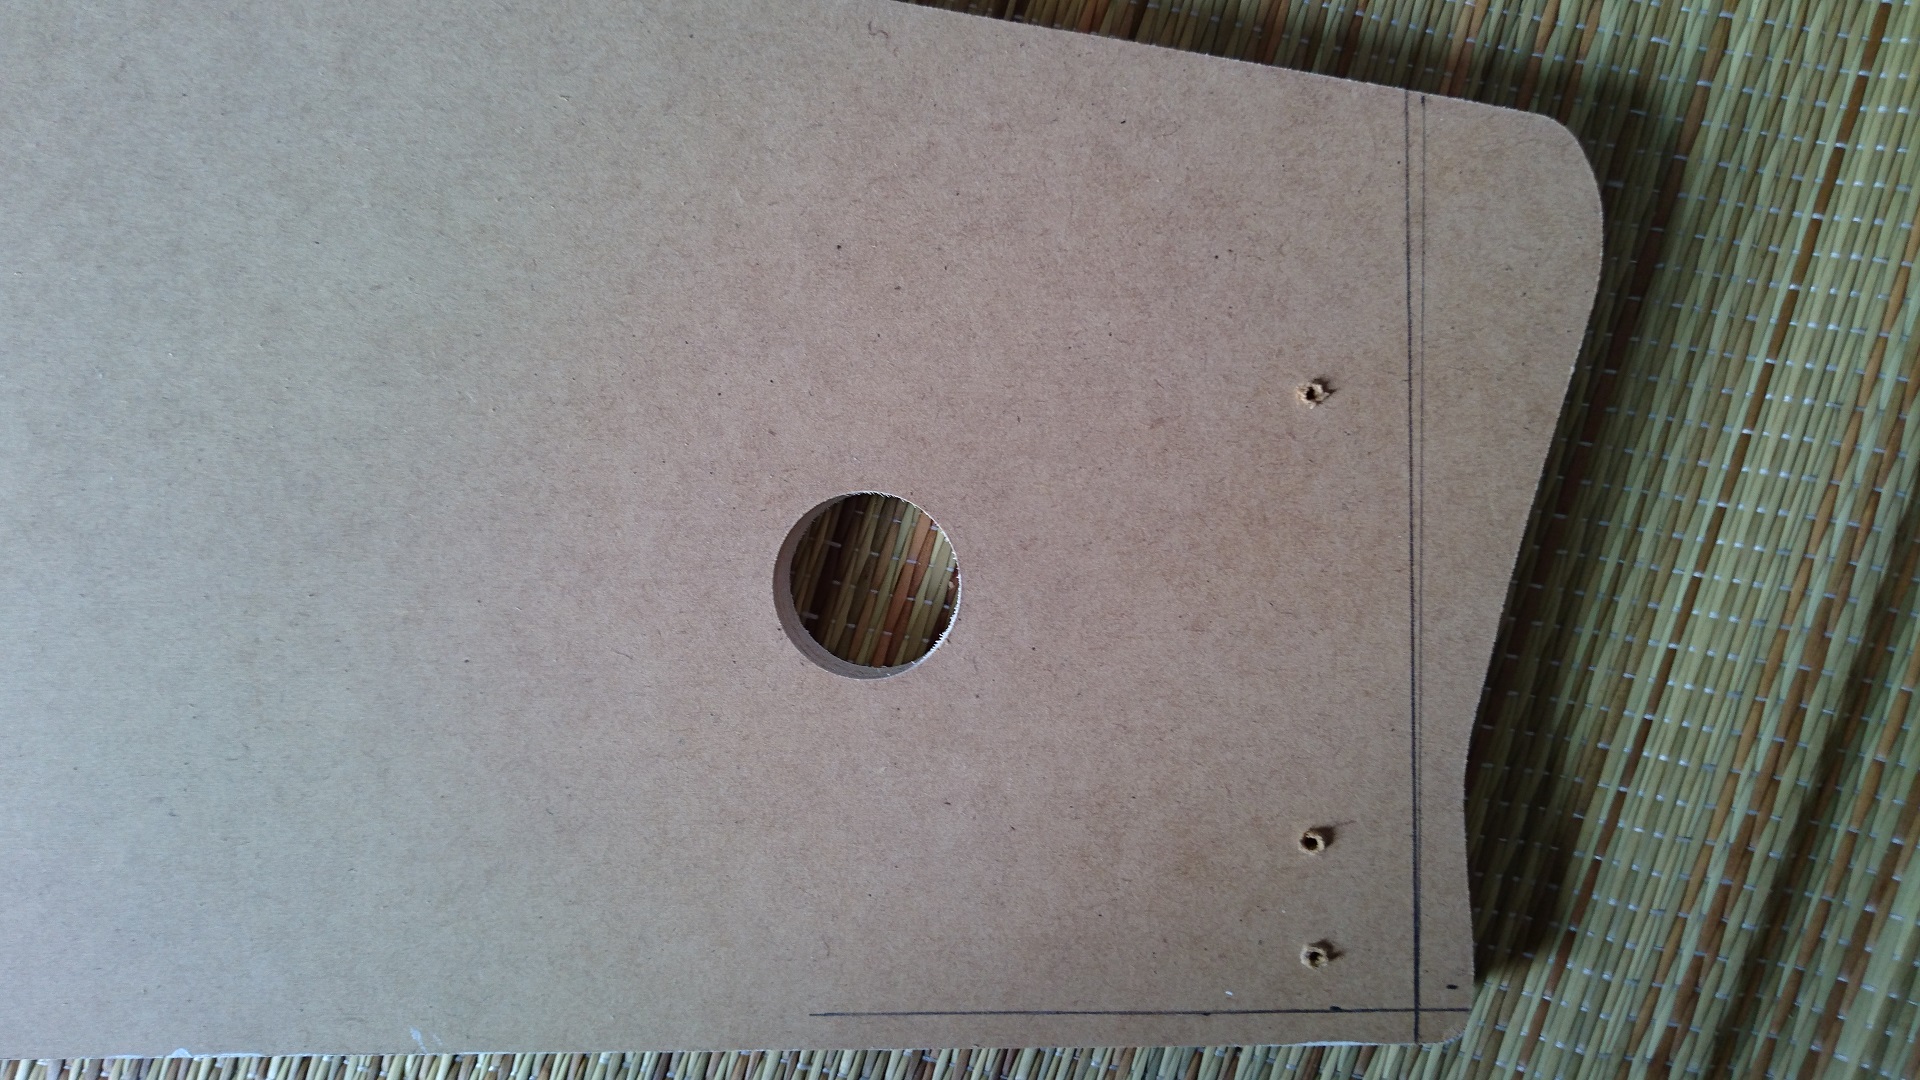
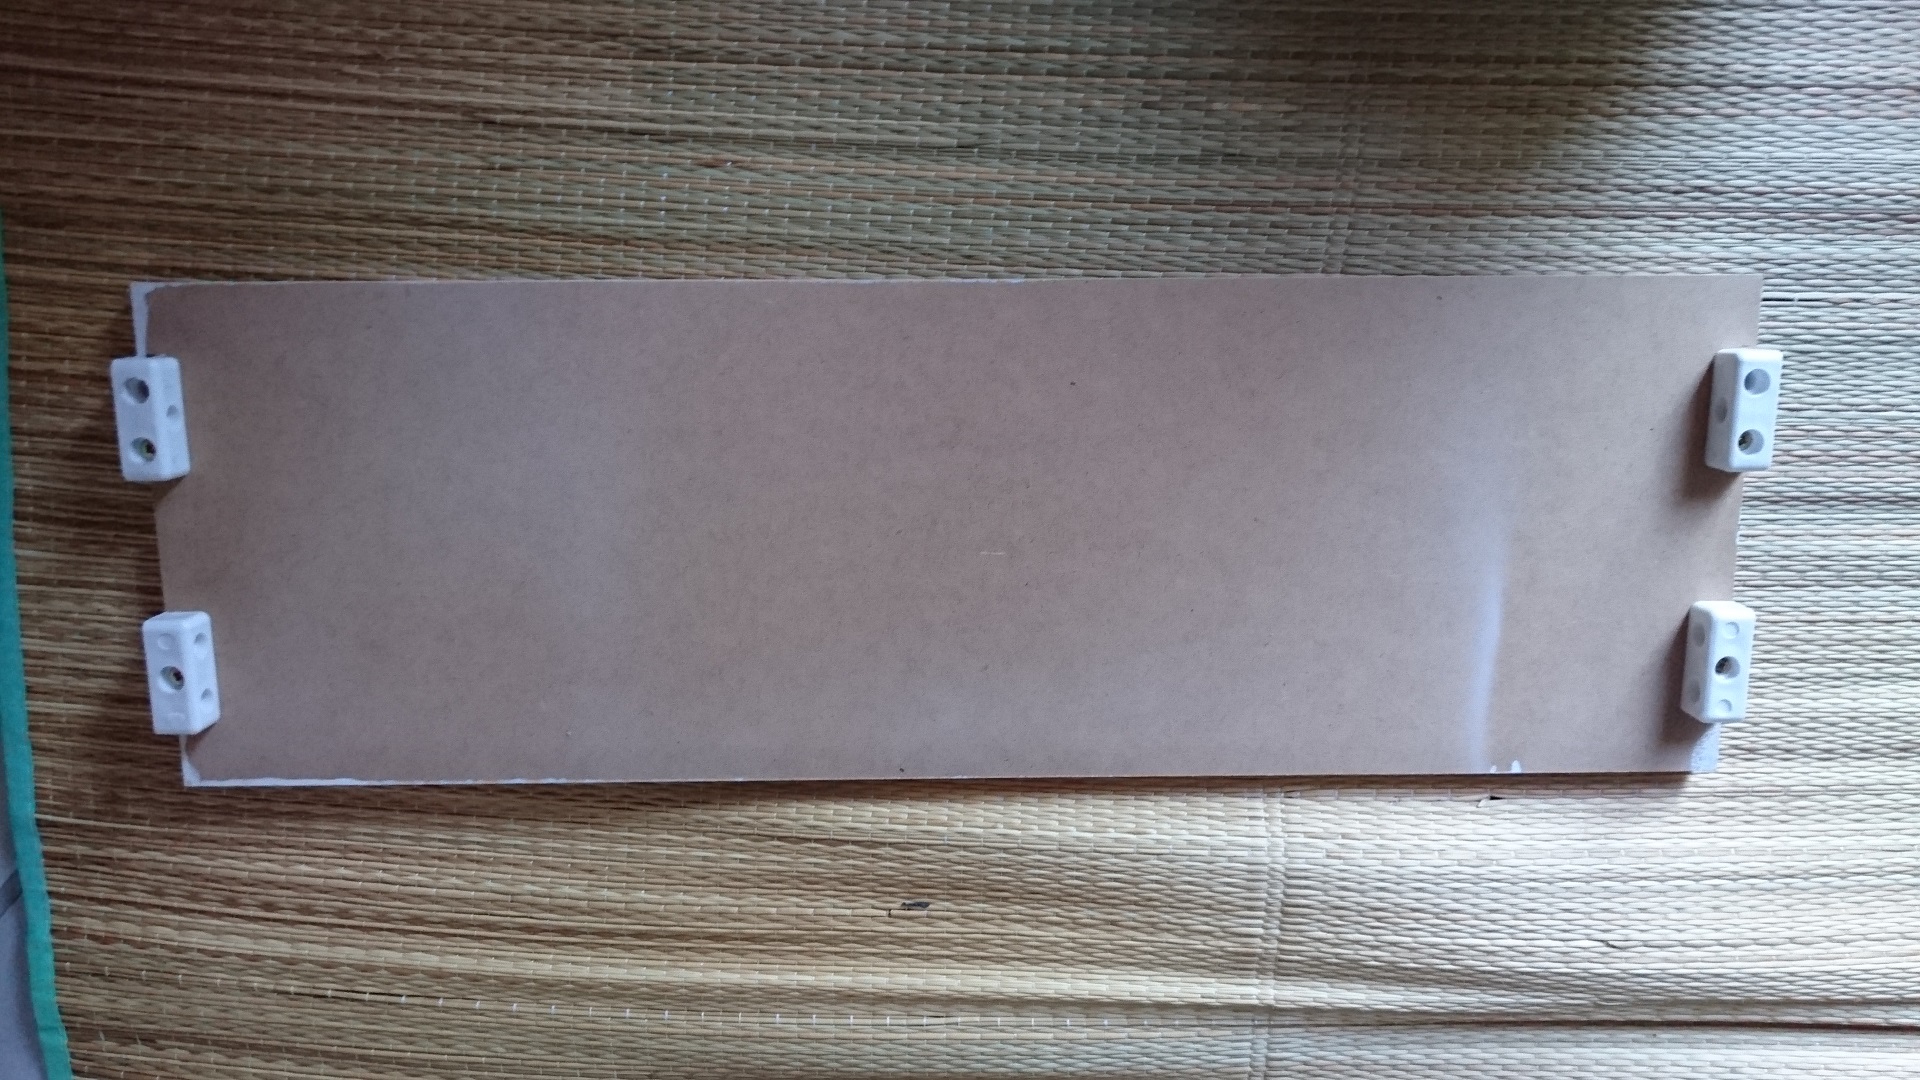
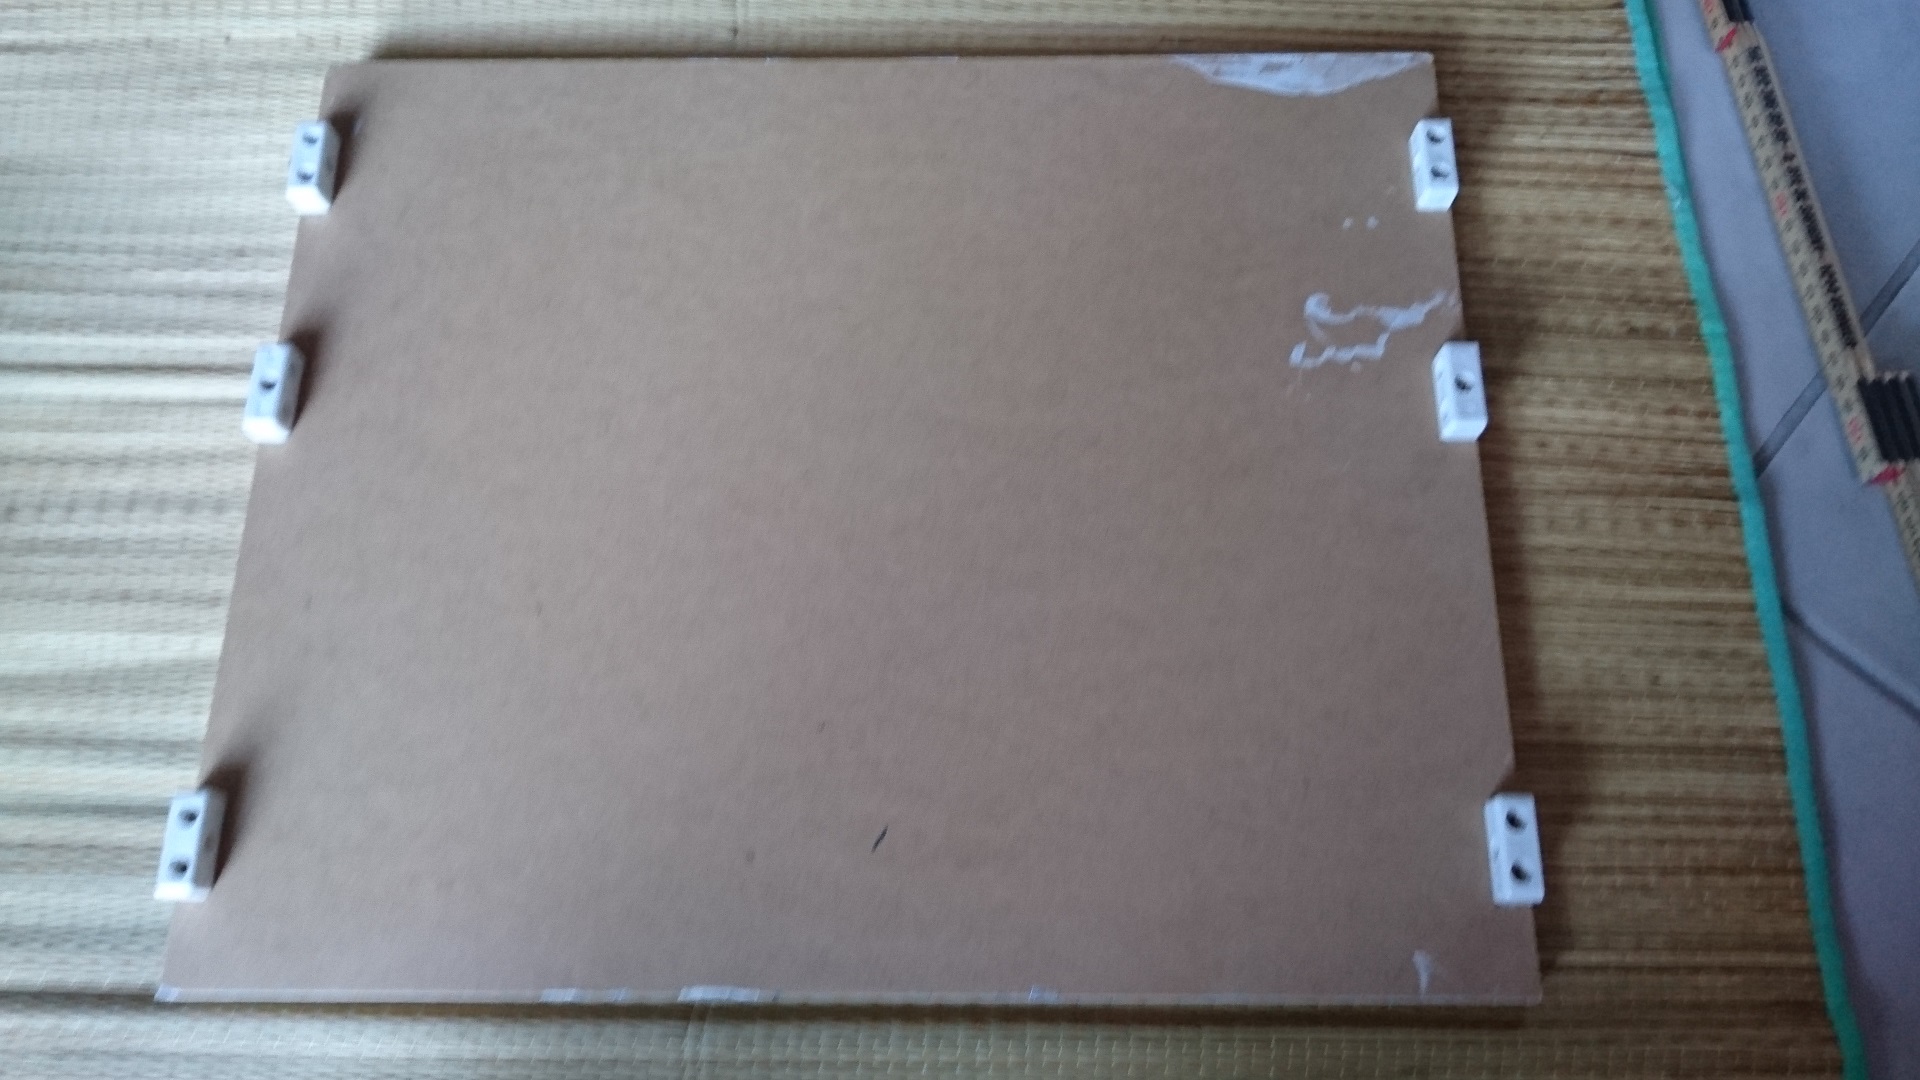
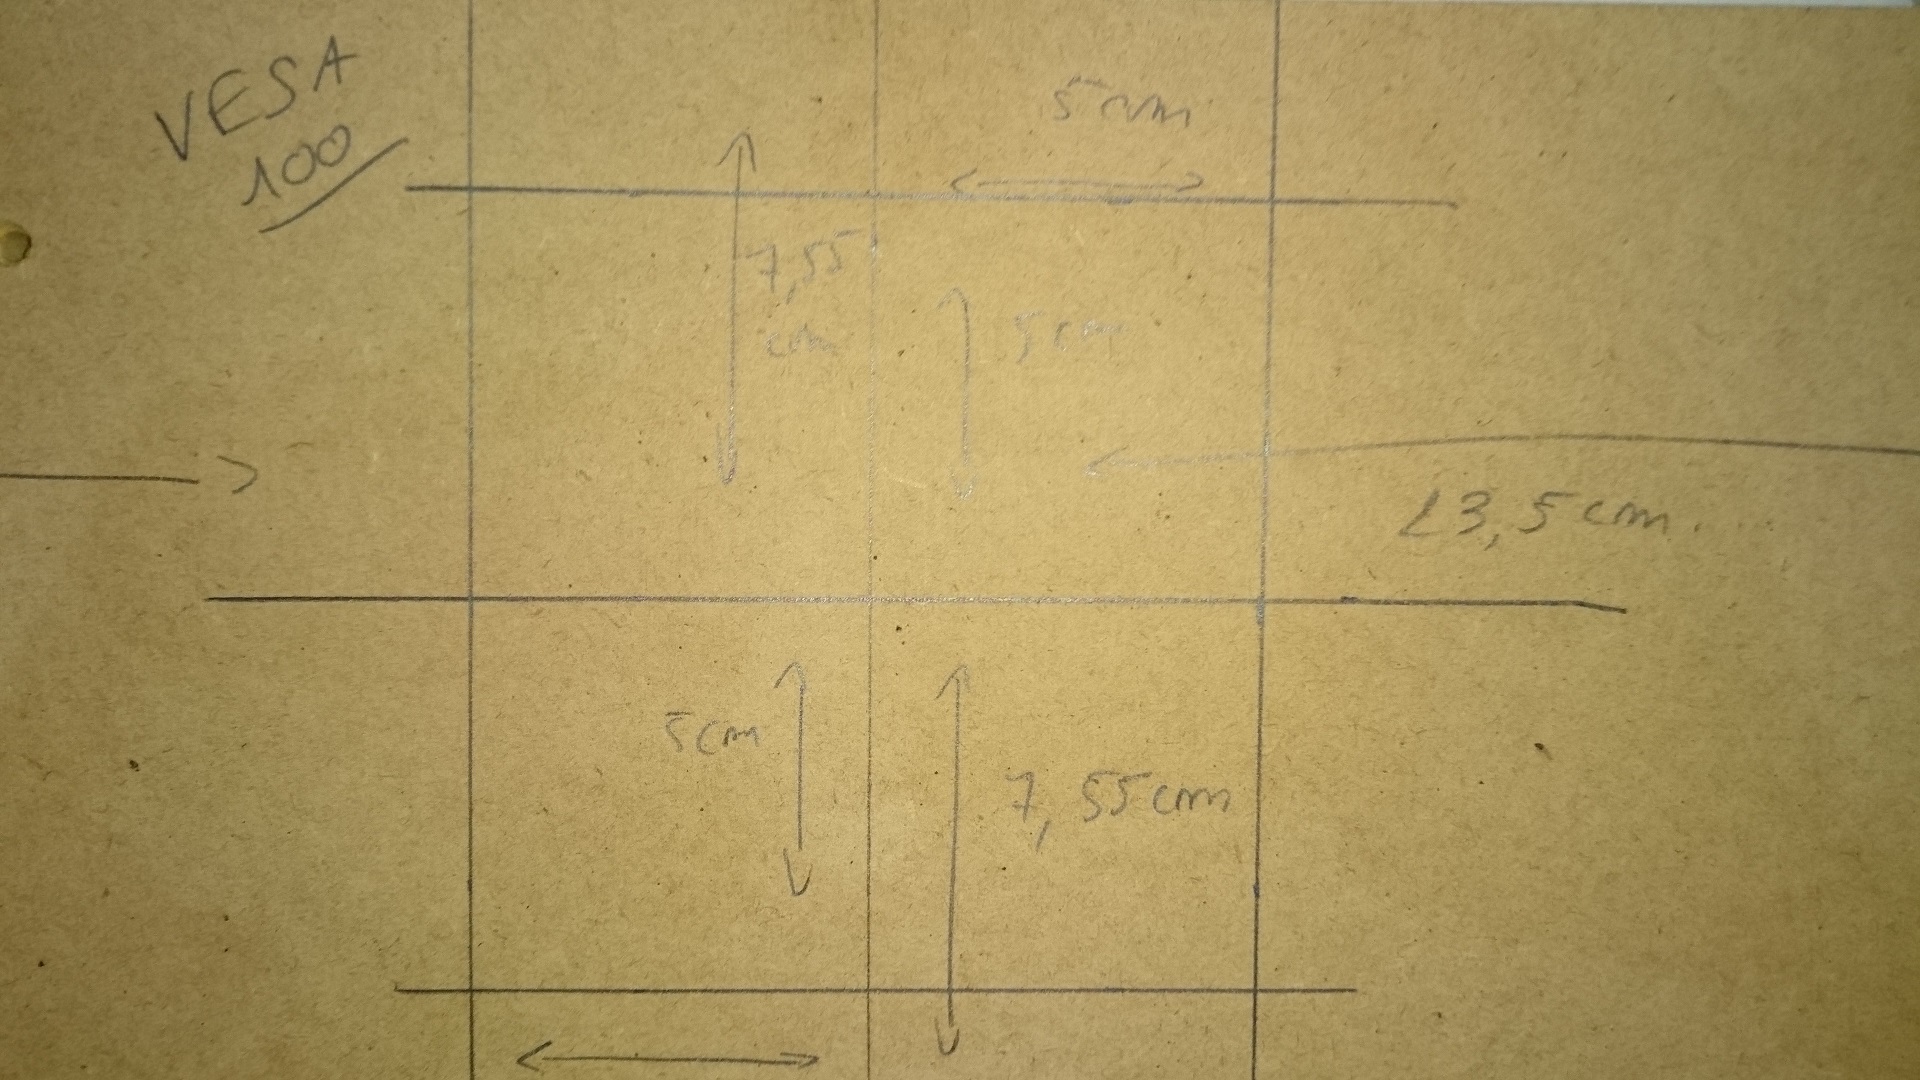
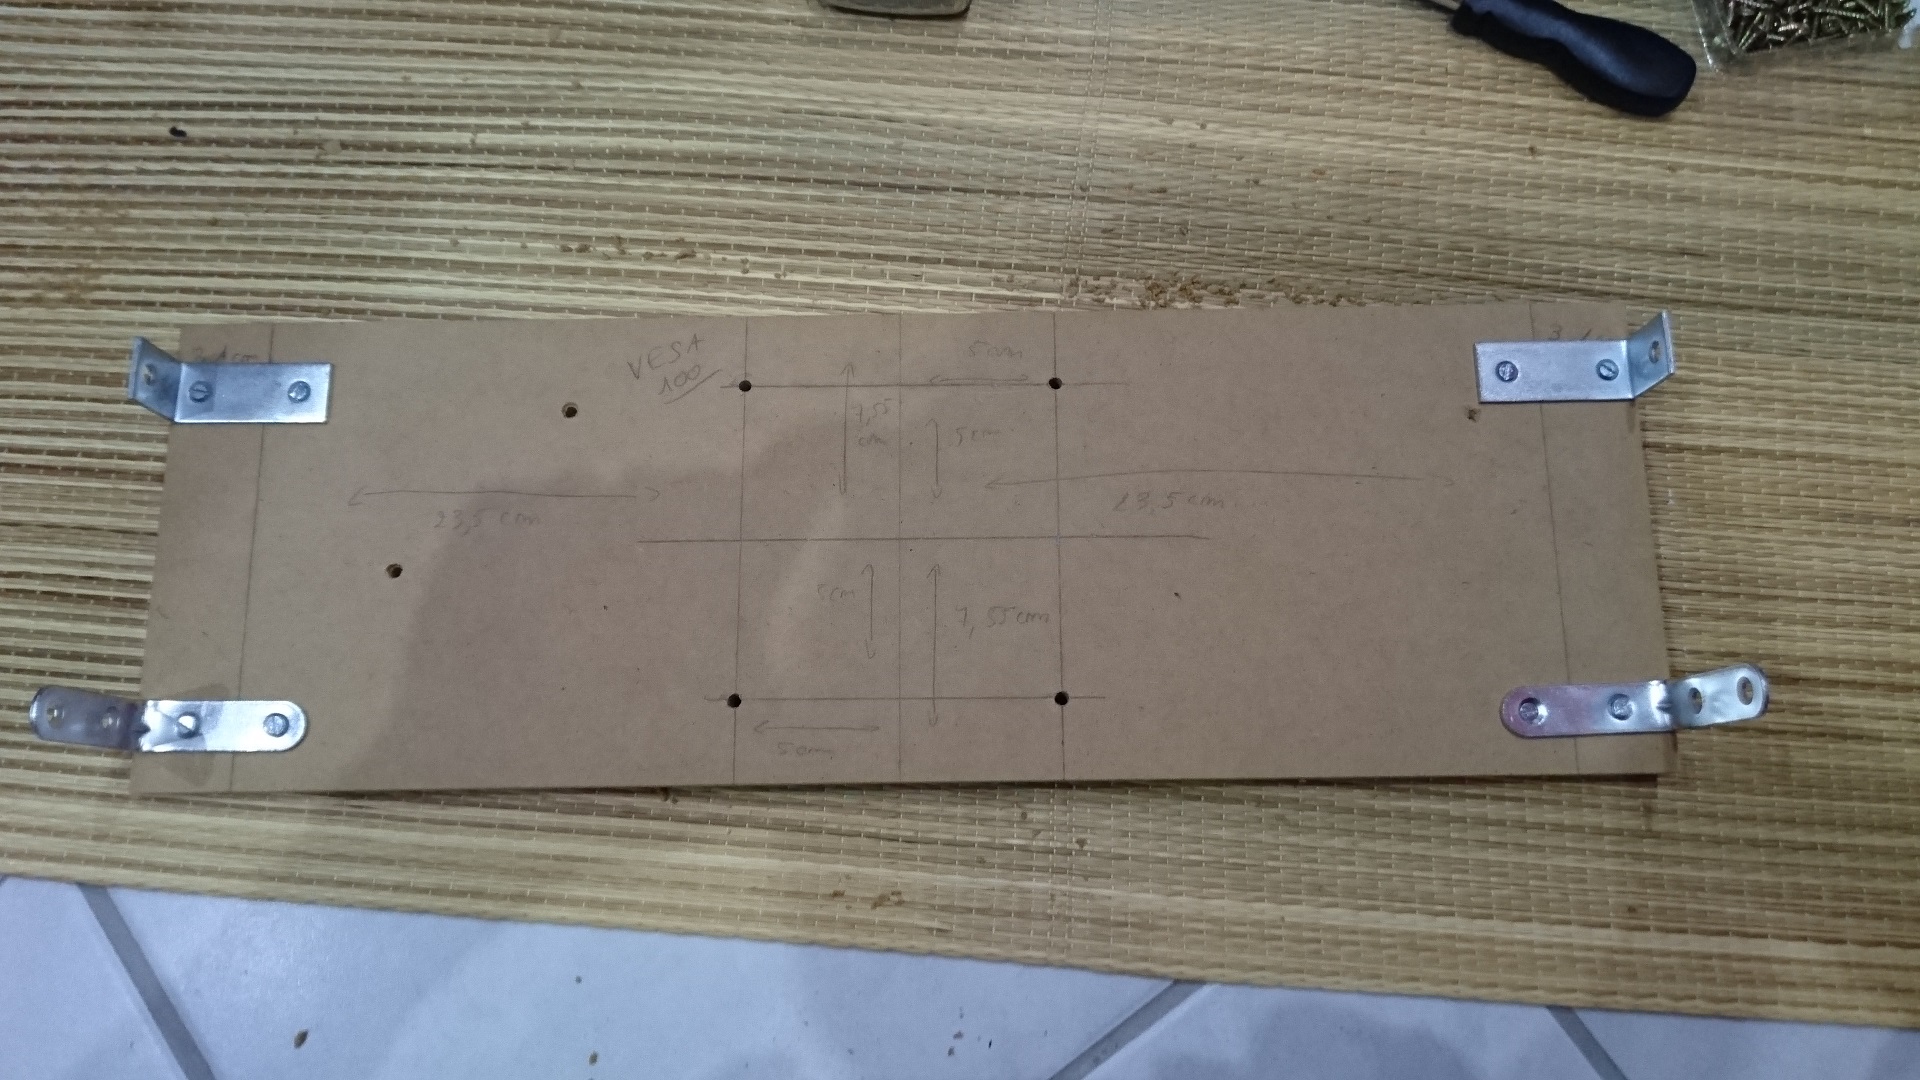
Assembly Preparation
Assembly preparation consisted in measuring, do some “pre-holes” and fixes HETTICH plastic assembly parts

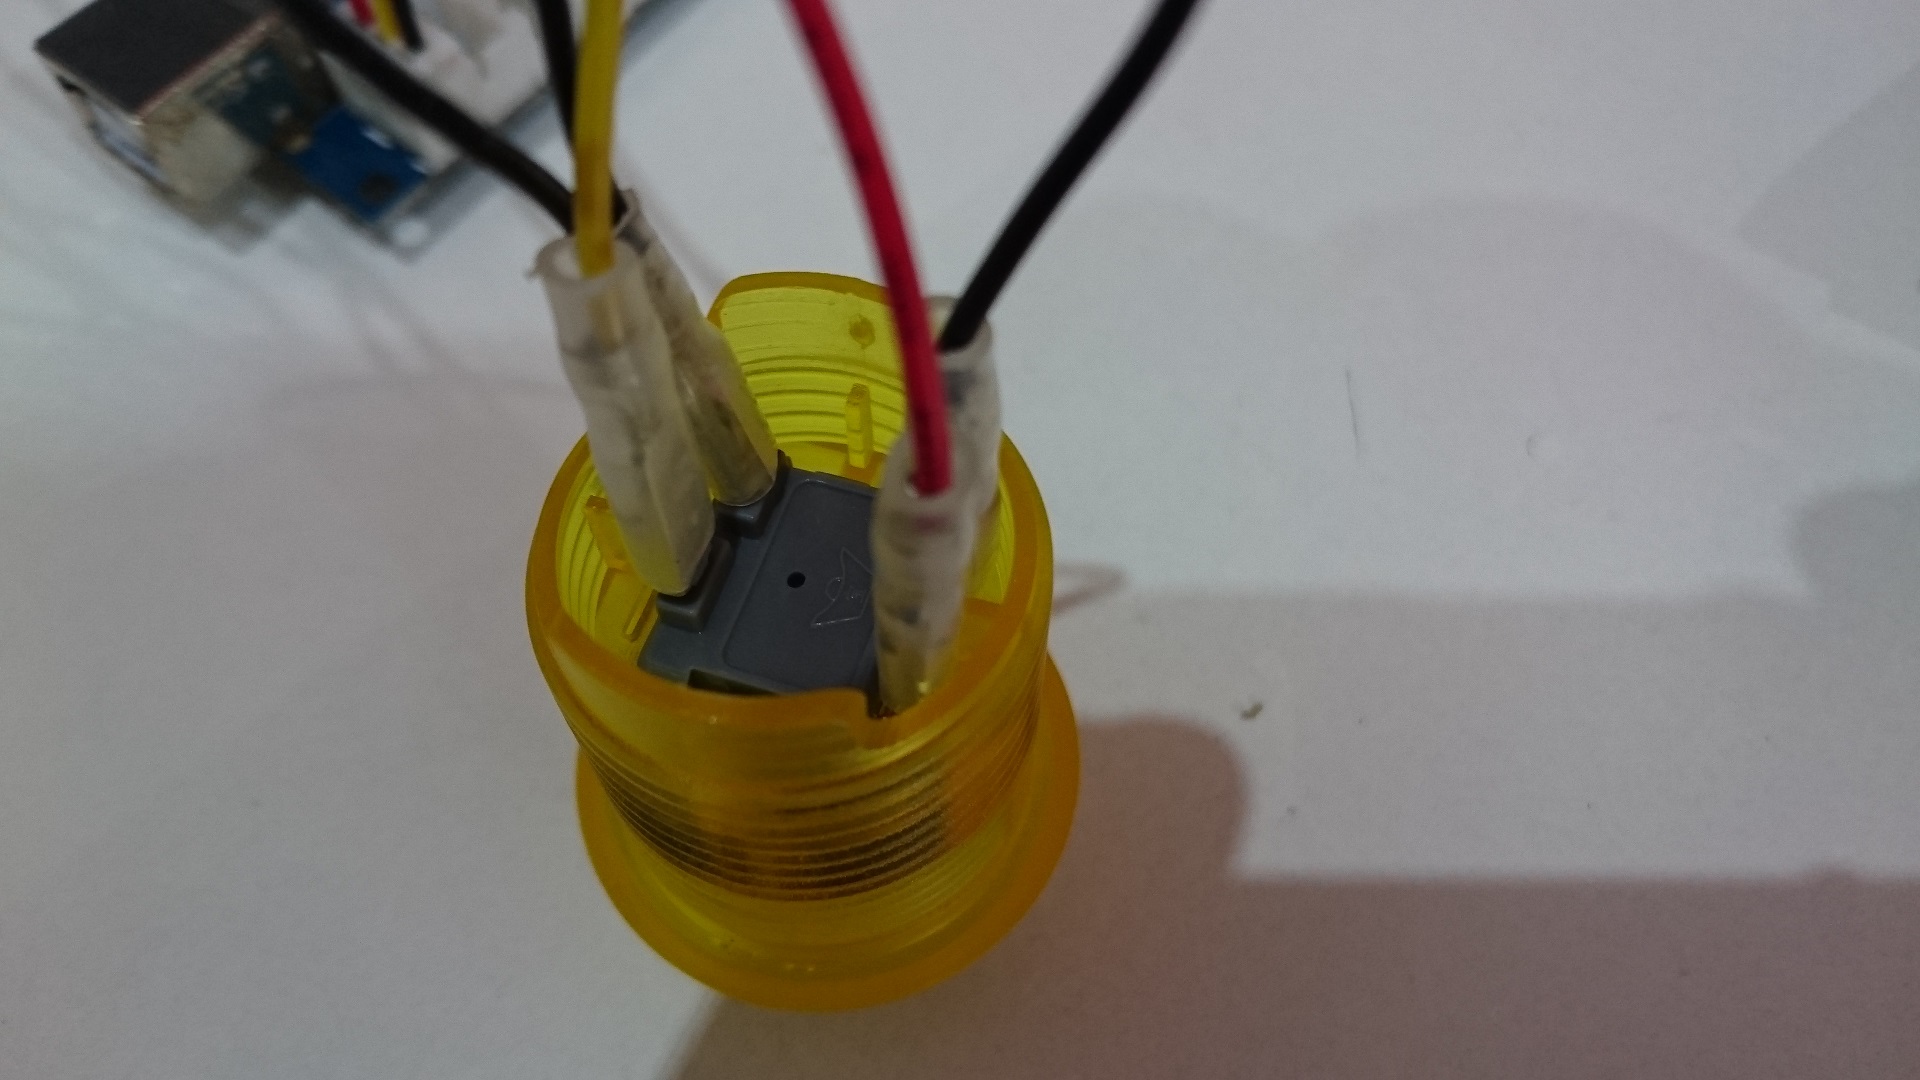
Buttons “hack”
Before mounting buttons on the control pannel, I had to modify a little bit every wire, because, by default, buttons were back-lit only when pressed and I wanted them to be always back-lit.
Below is the modification : left plug is the orignal, right plug is the modified one:

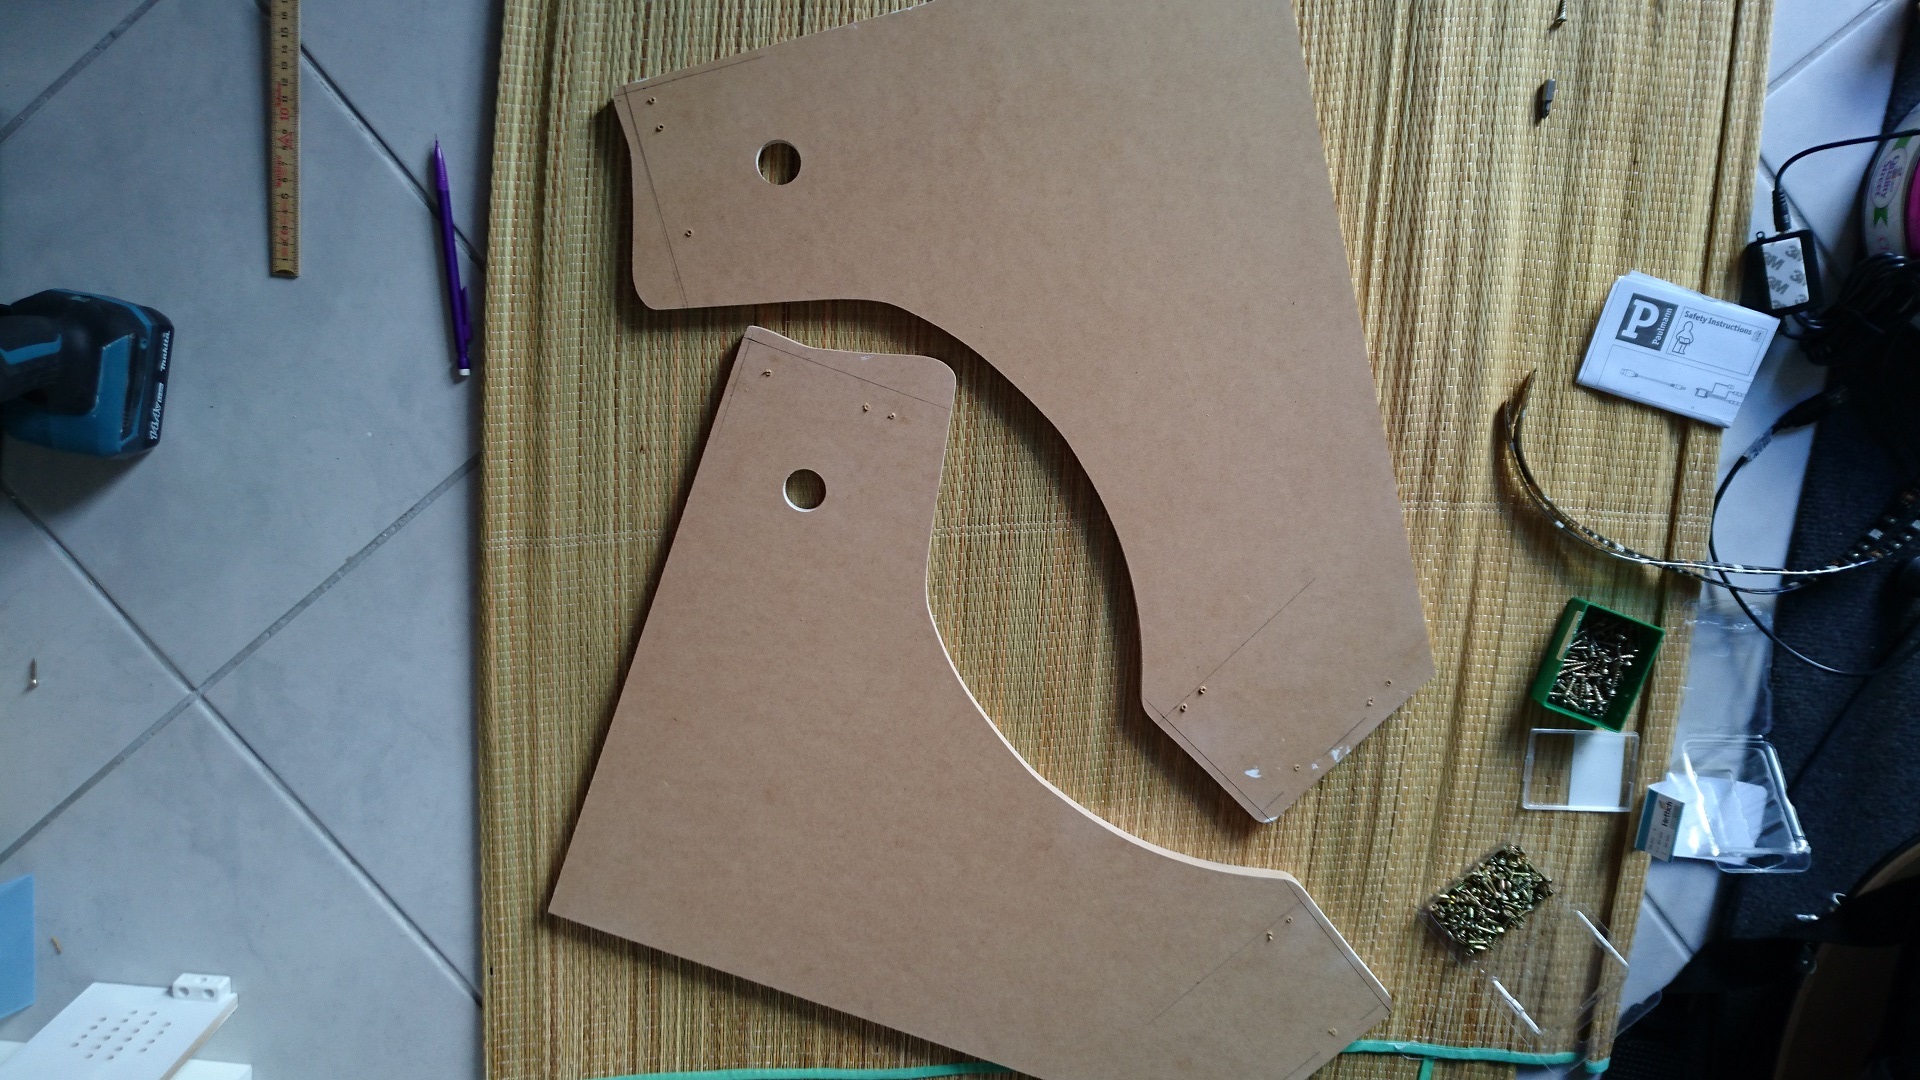
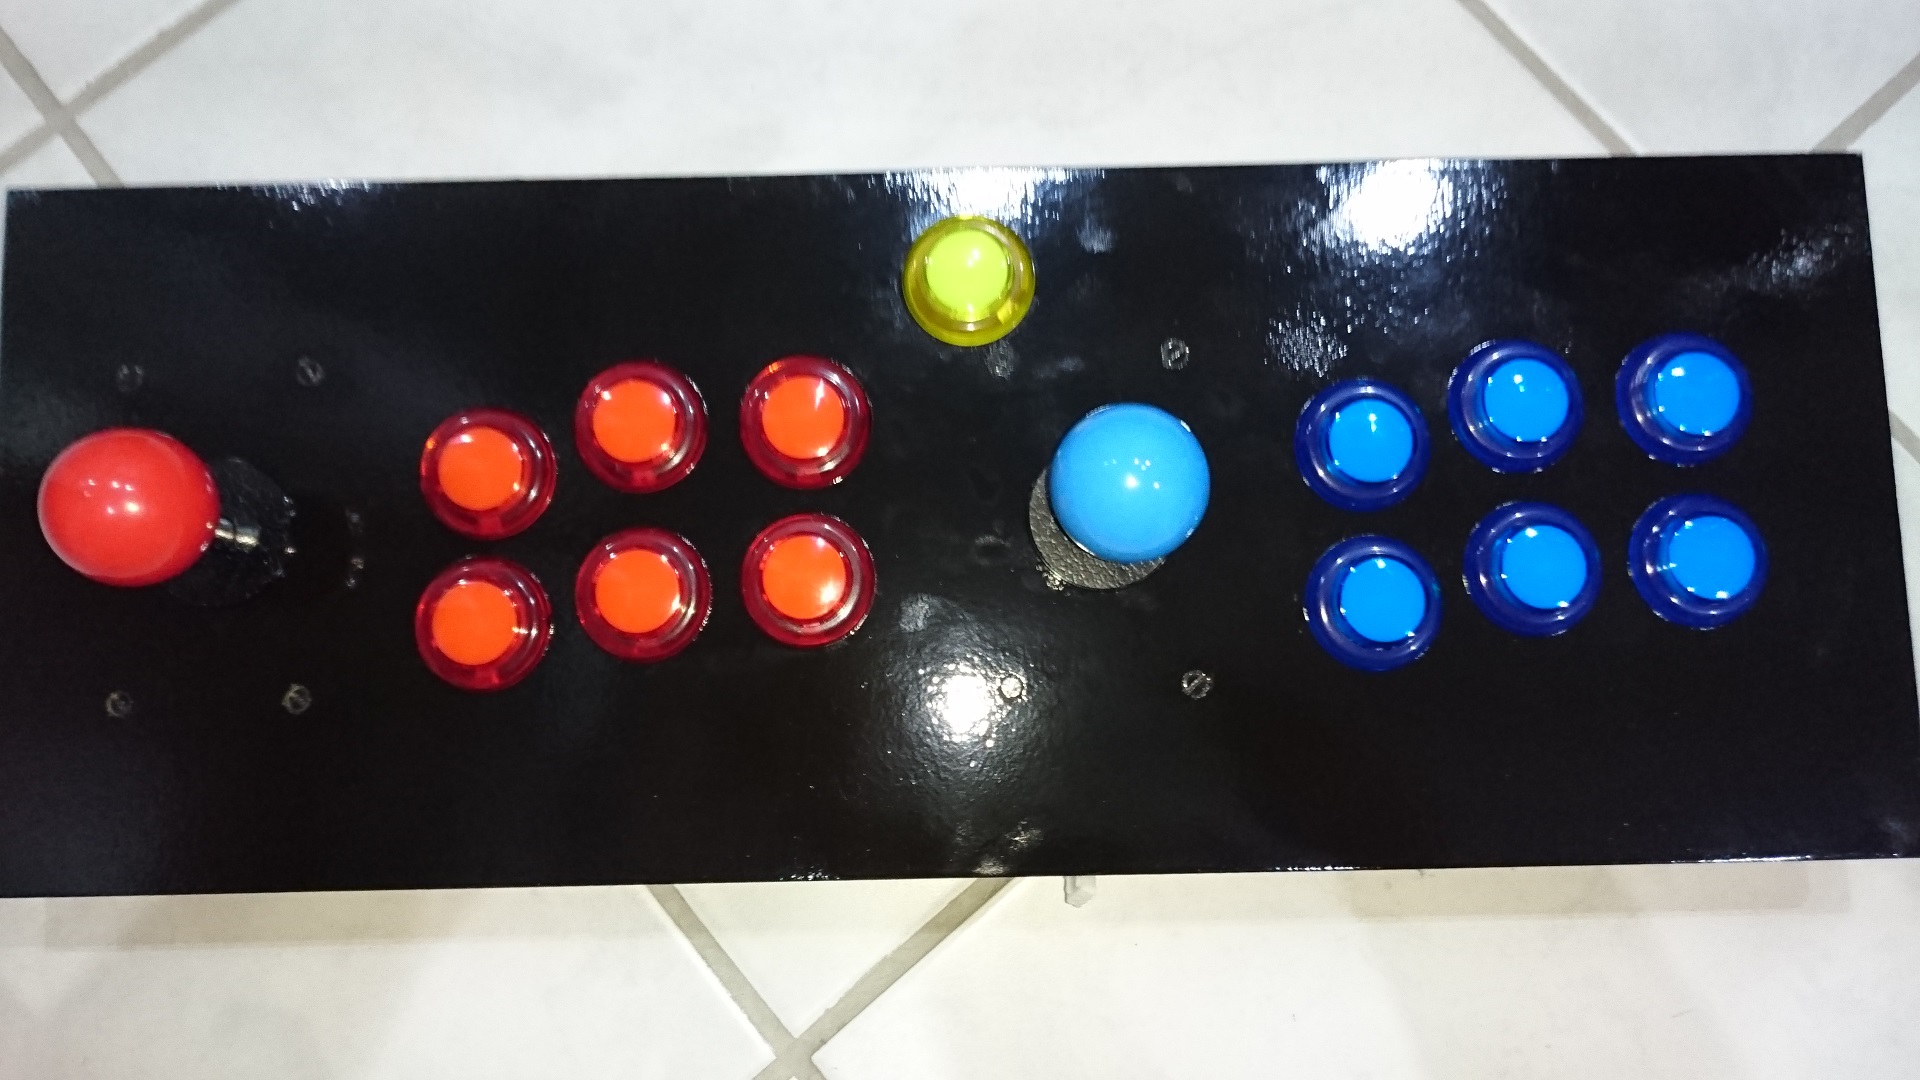
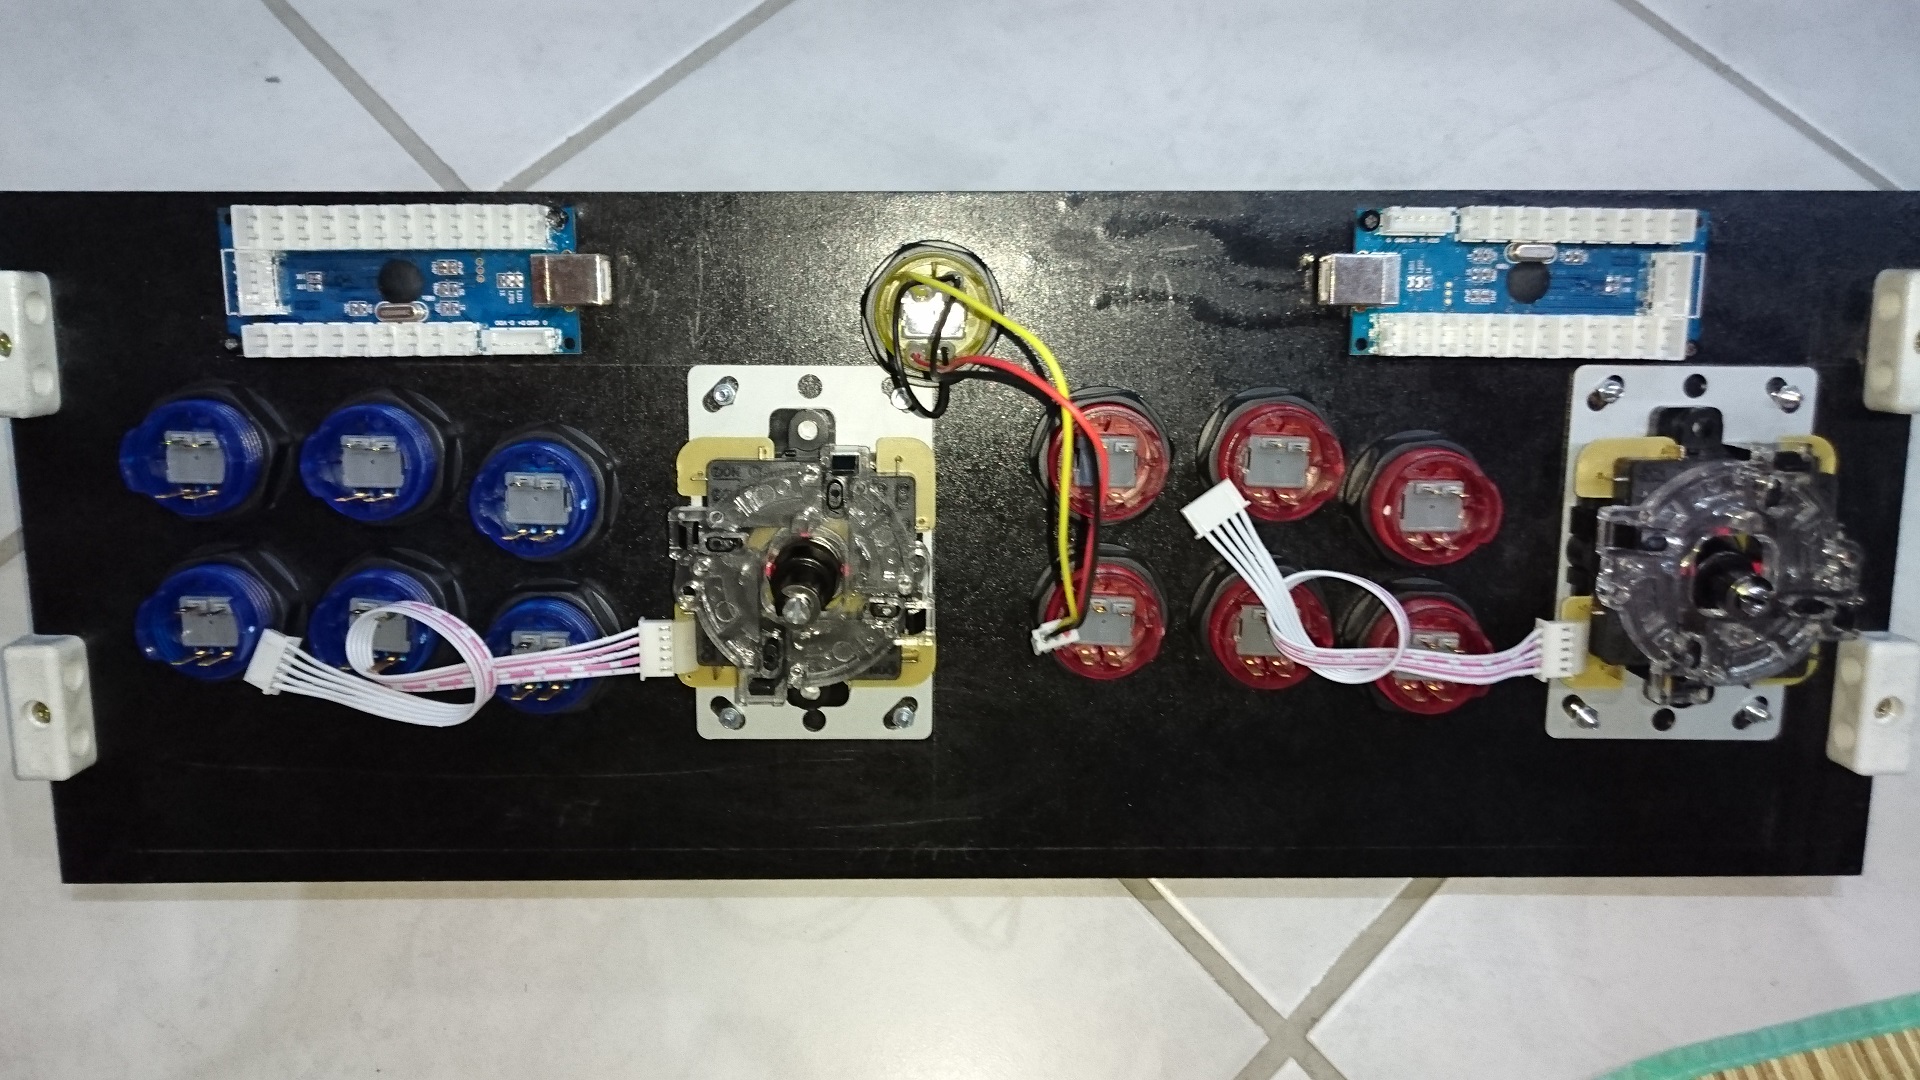
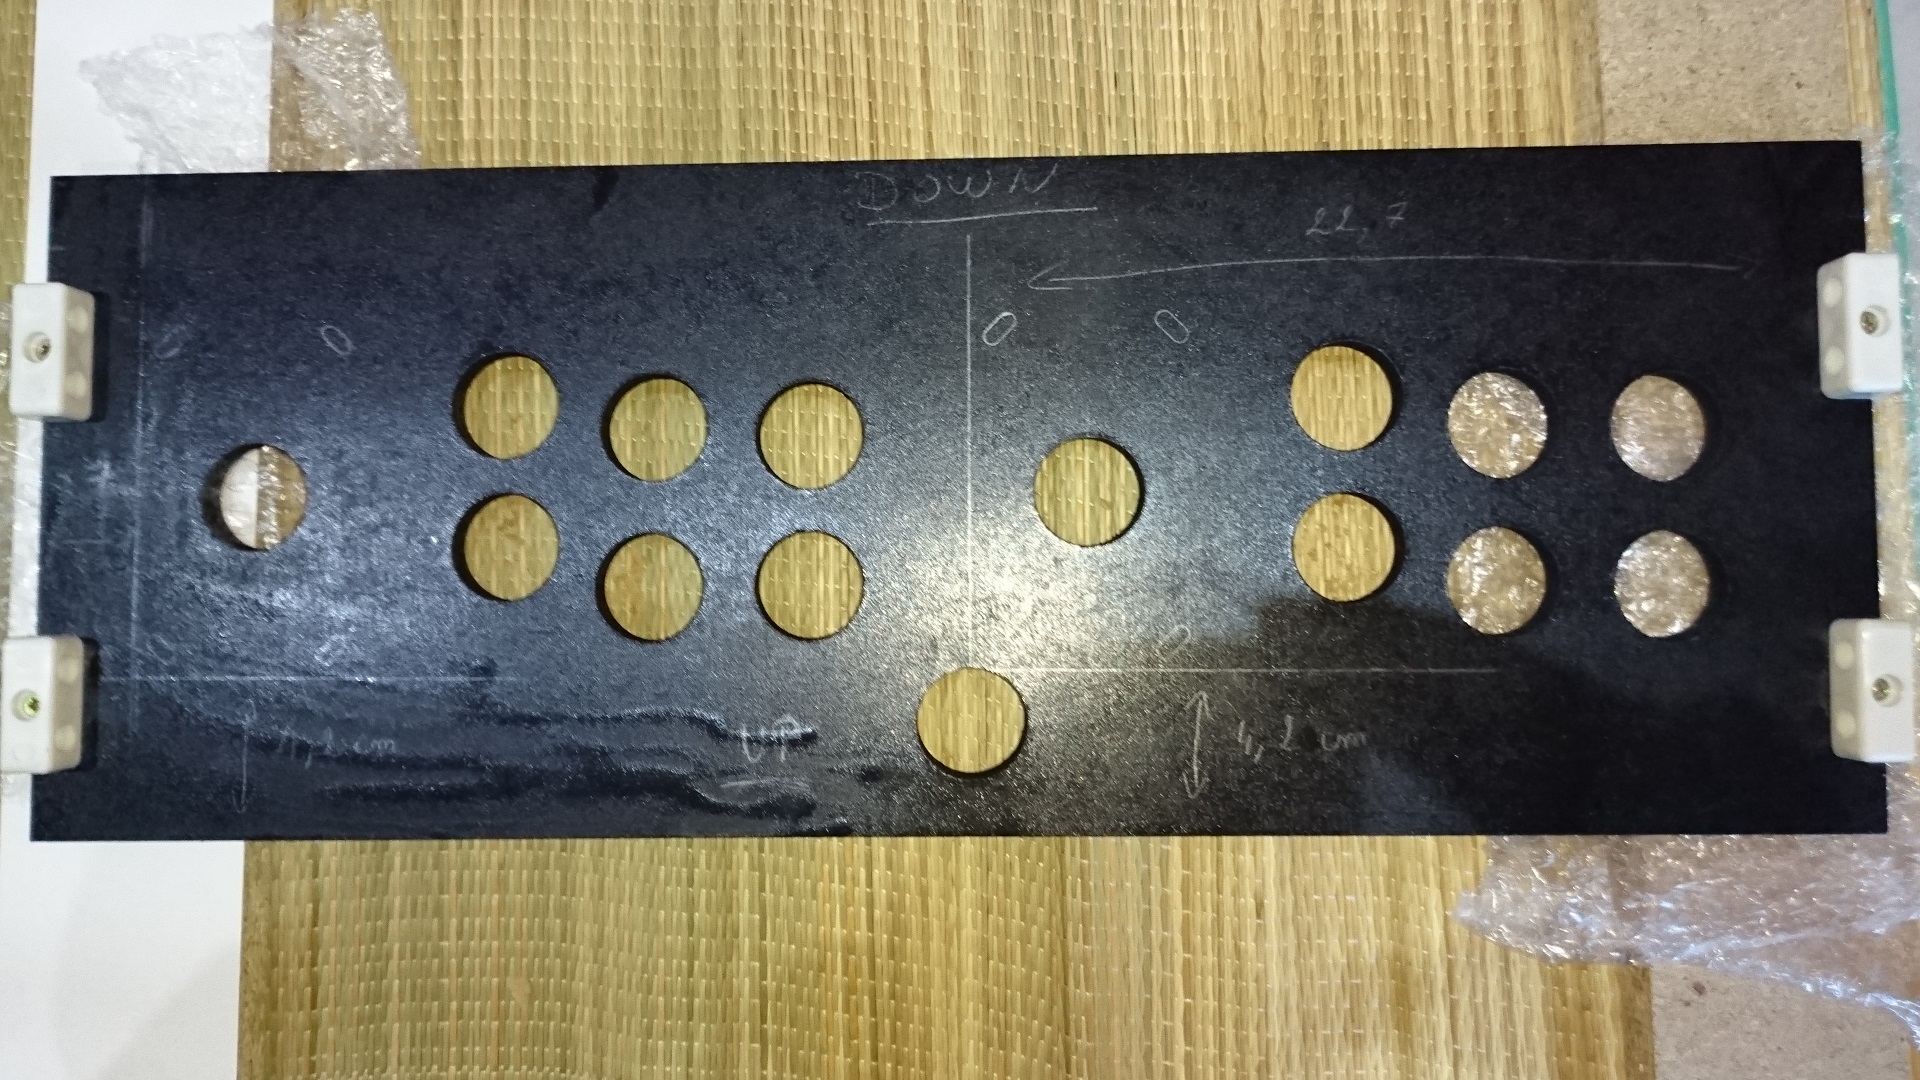
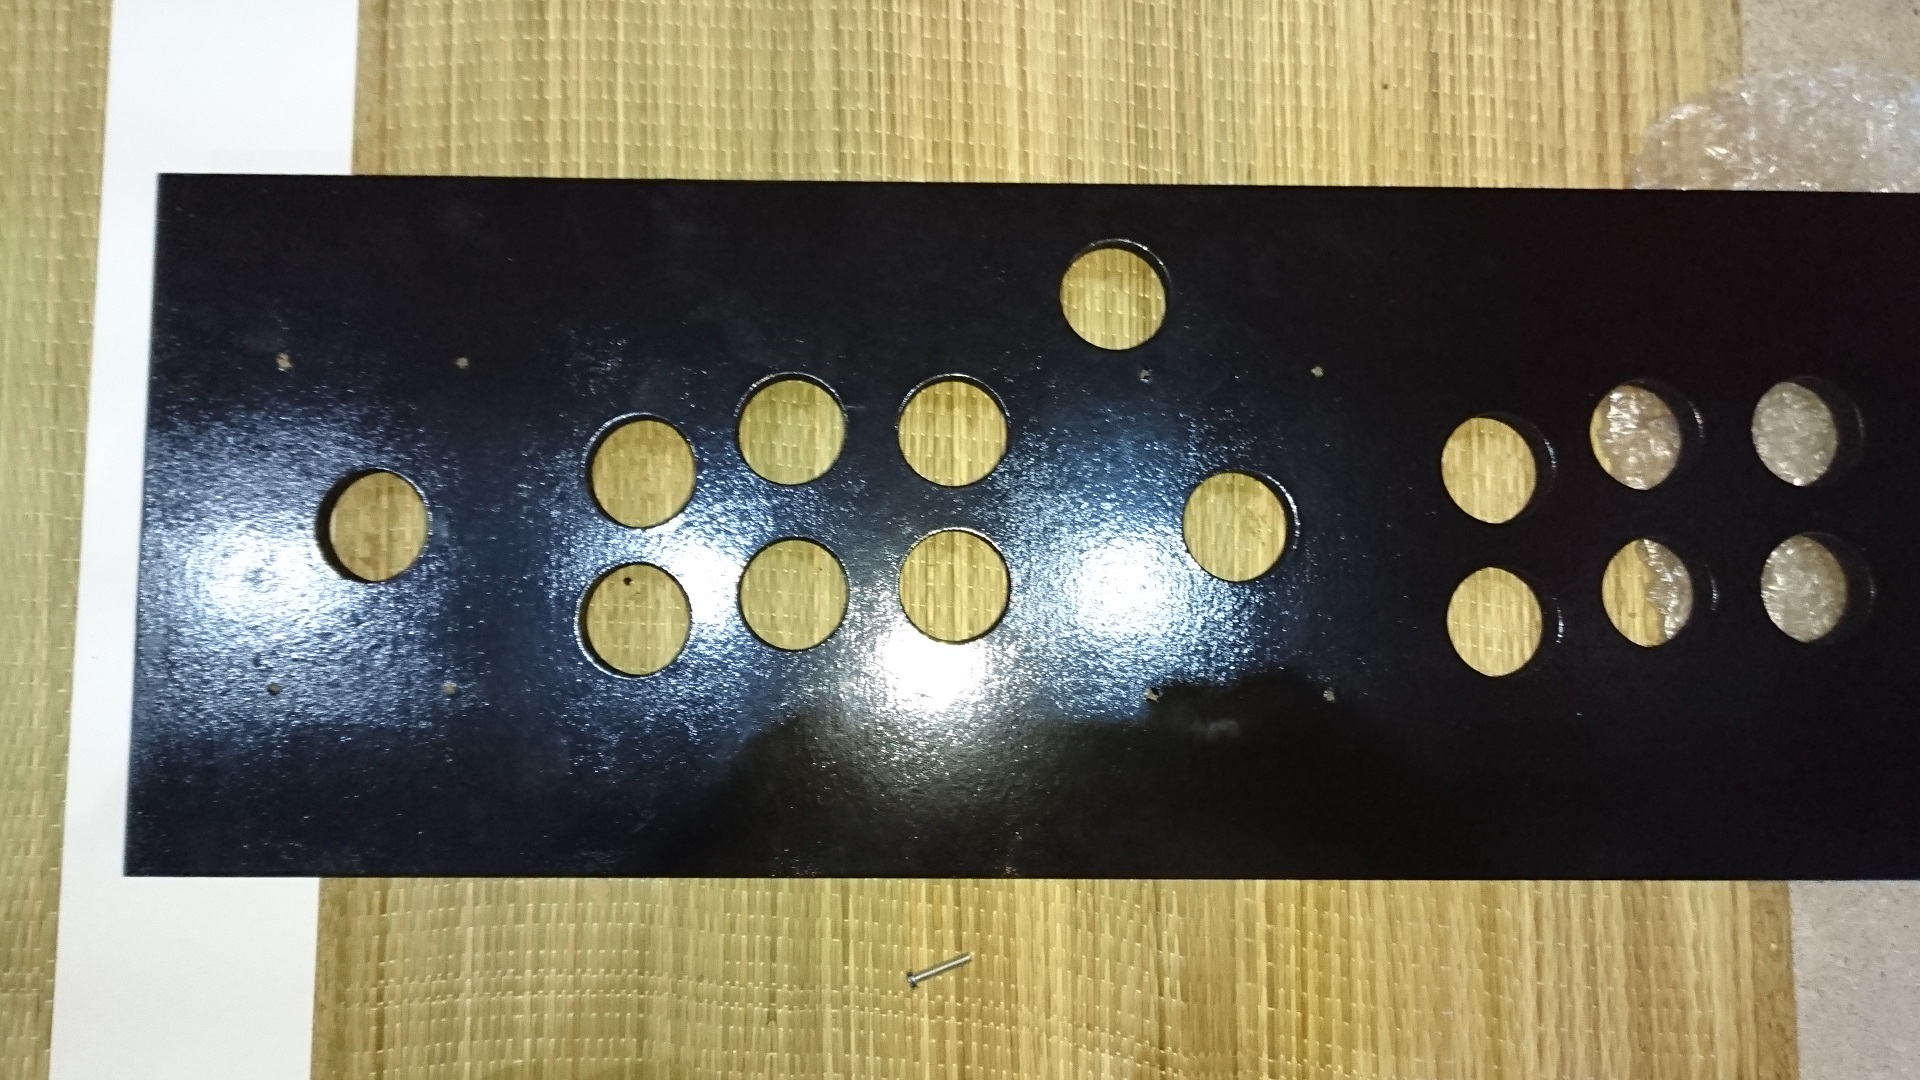
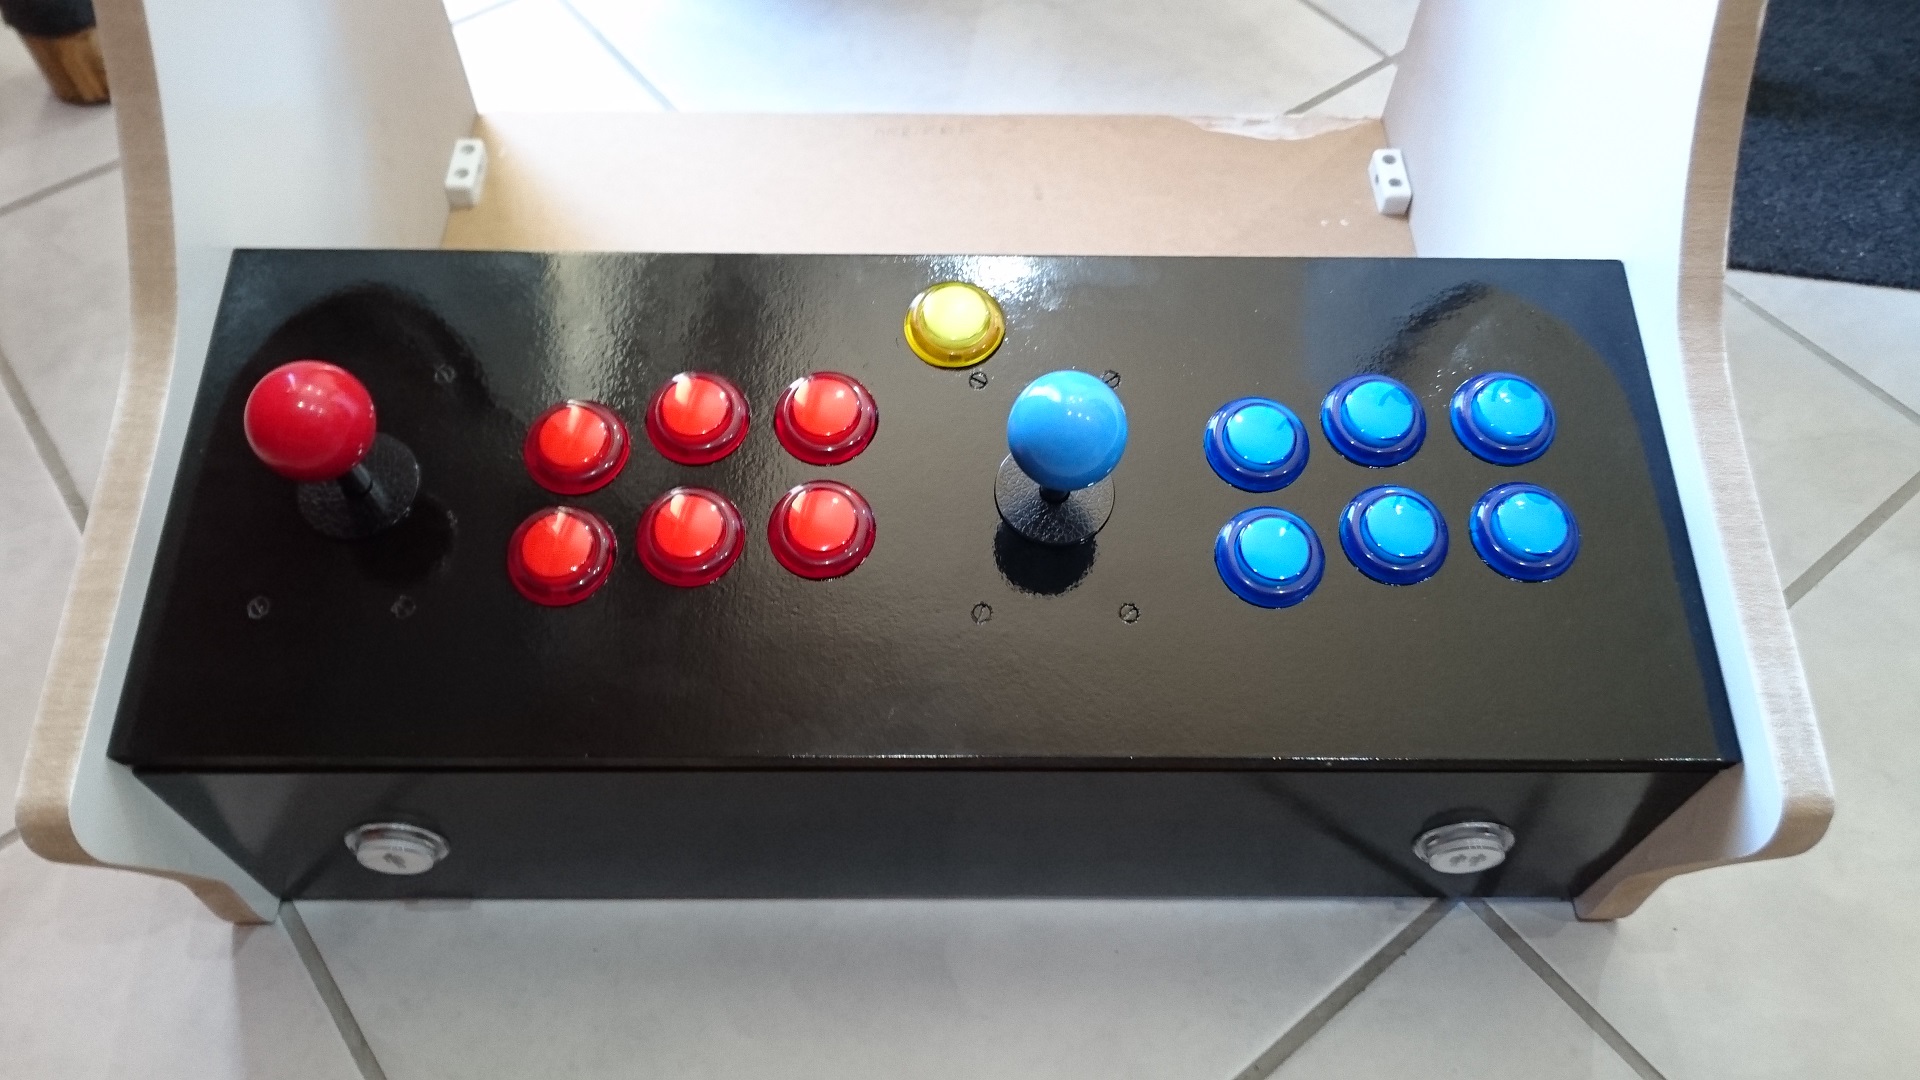
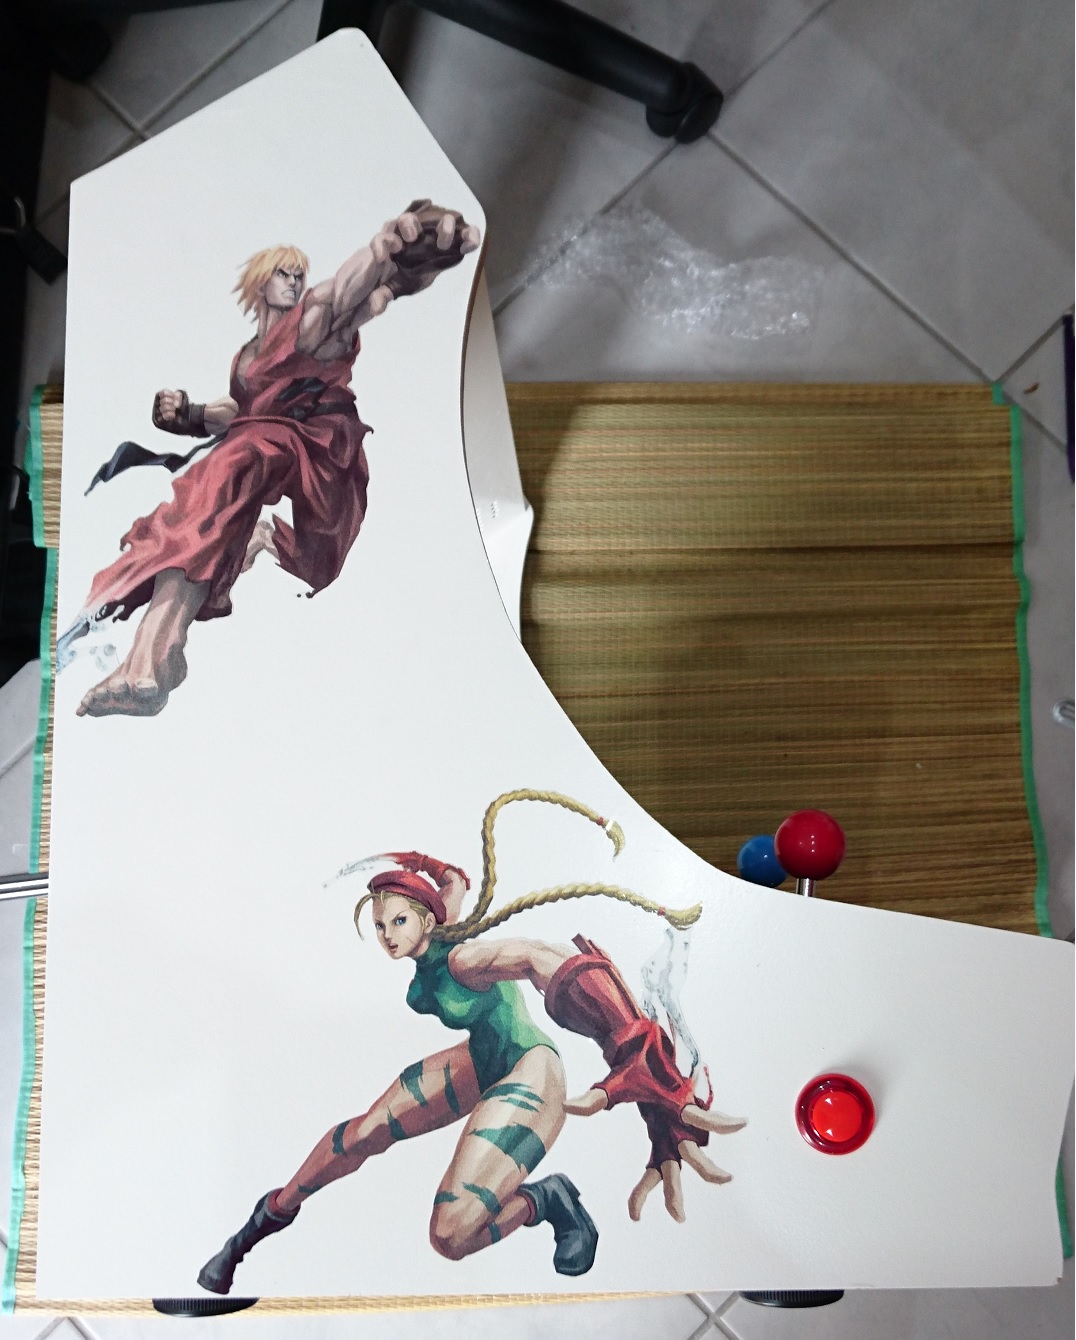
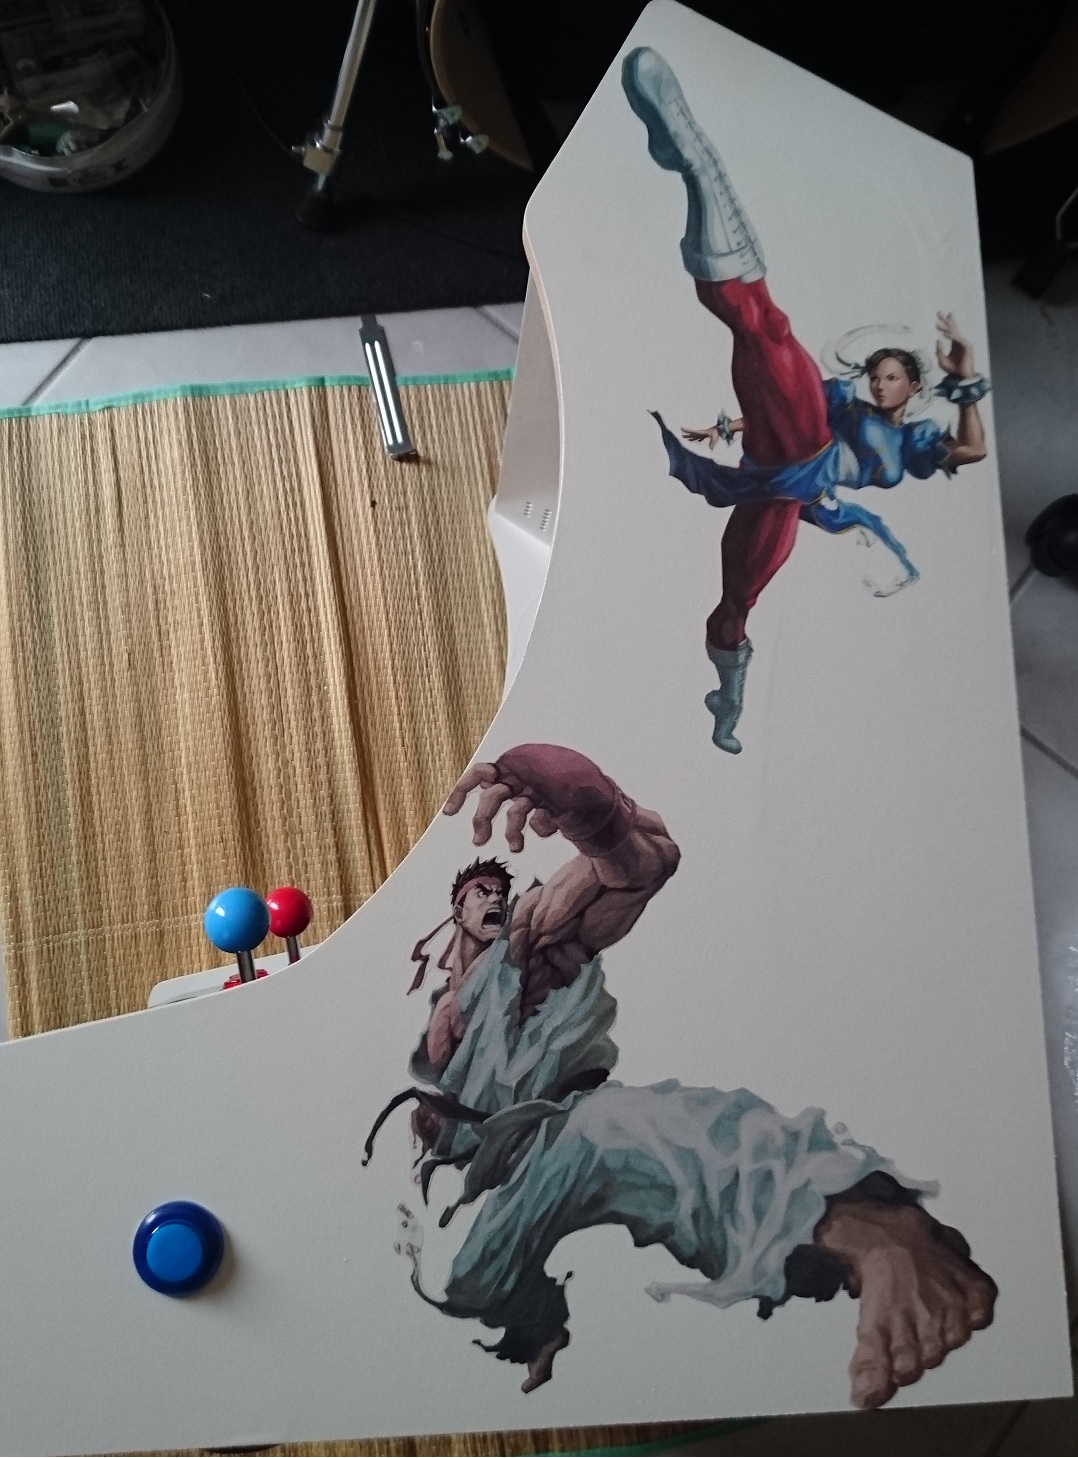
Control pannel
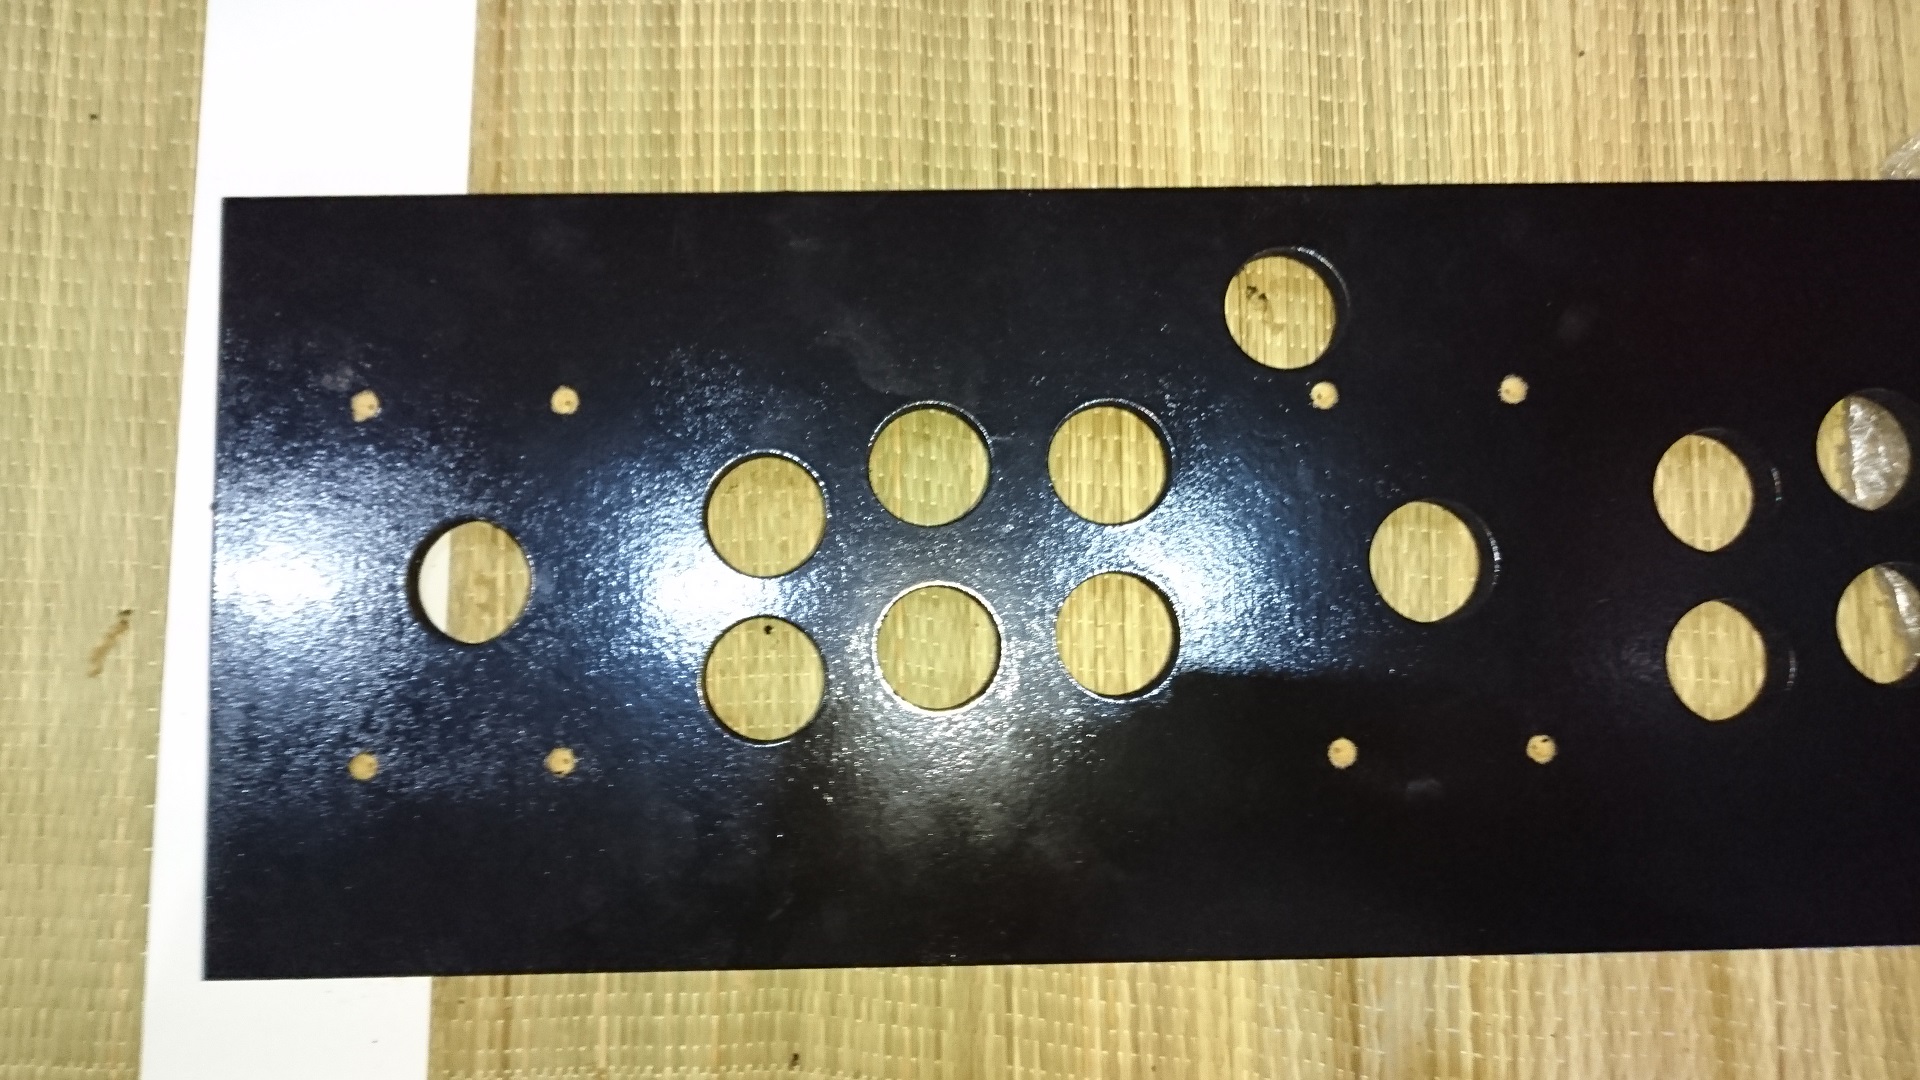
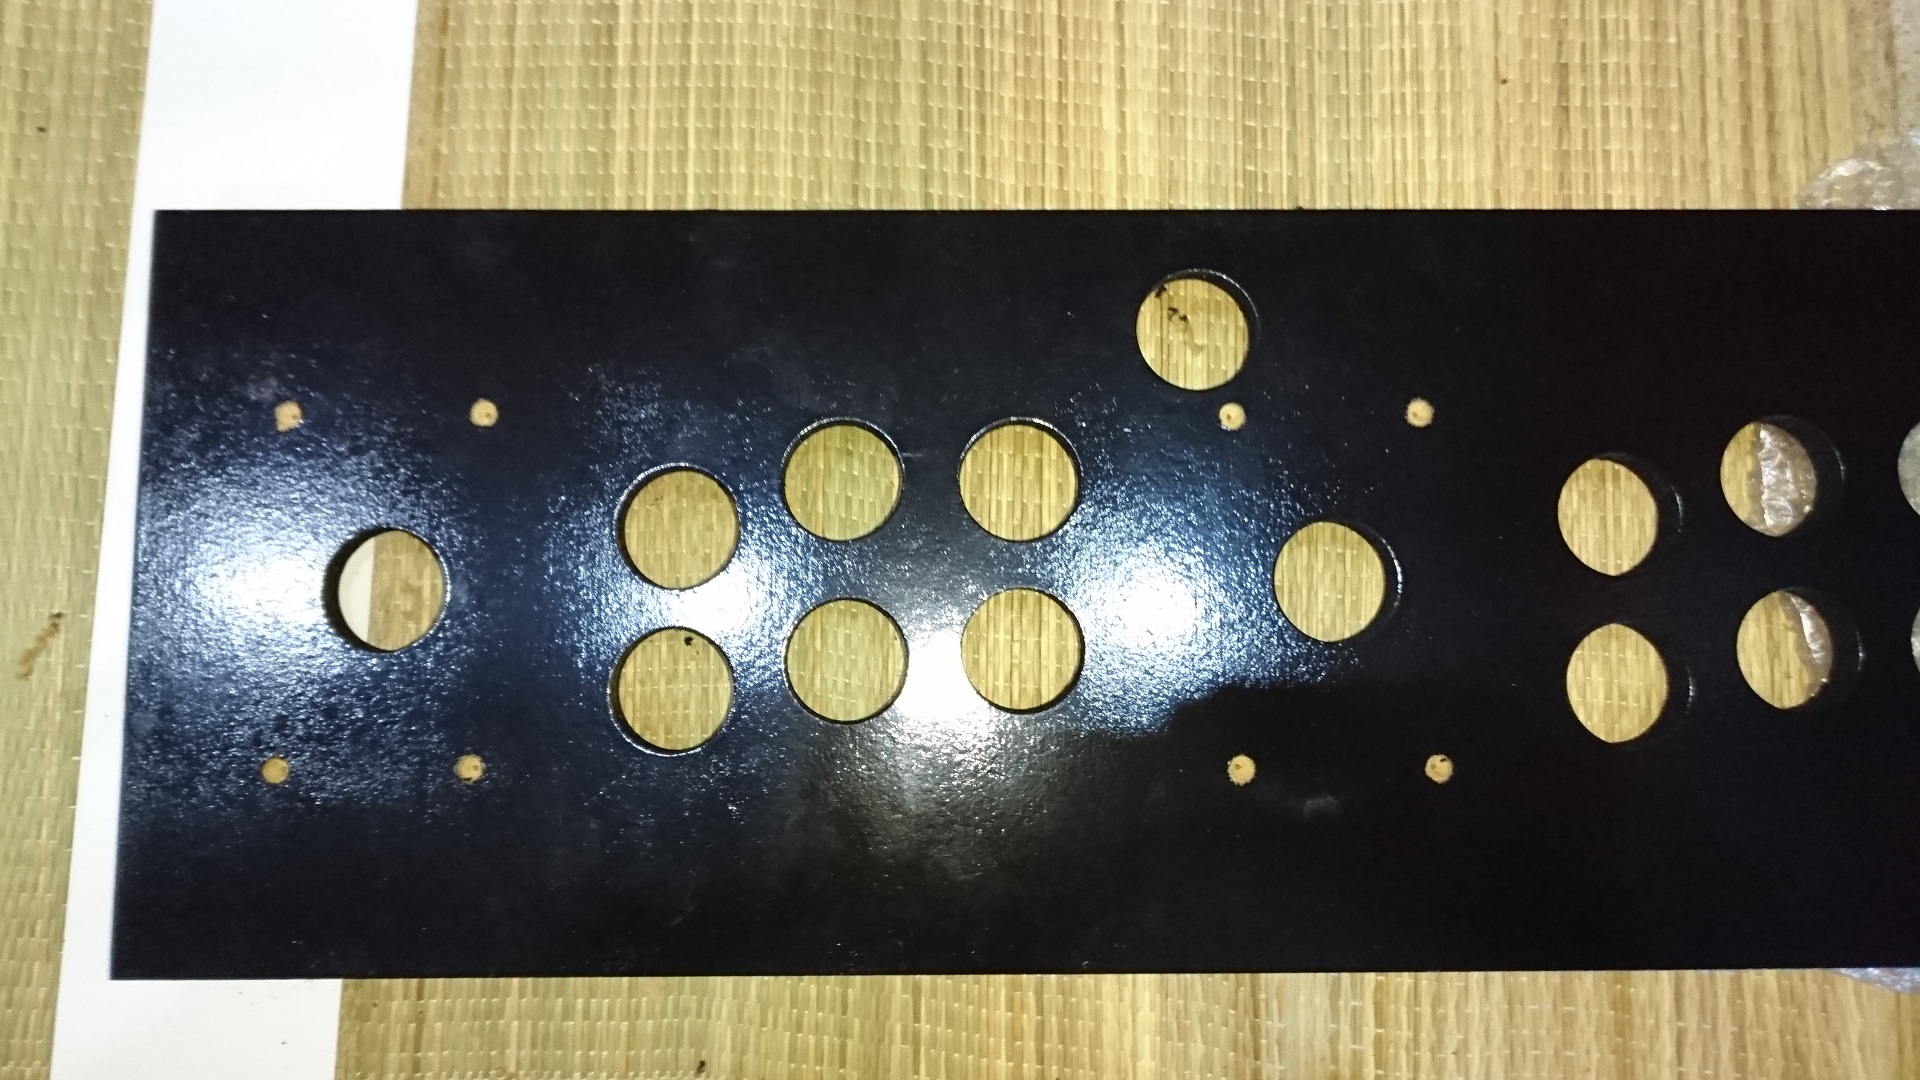
For the control pannel, the main important part was to center correctly joysticks and arrange screw holes to make same as less visible as possible.
To do so, I did some very small hole from the back, where I drew my measures. Then I did a bigger hole of the same size as skrew head on the top. Finaly, I did a hole of the same size of skrew body from the top.
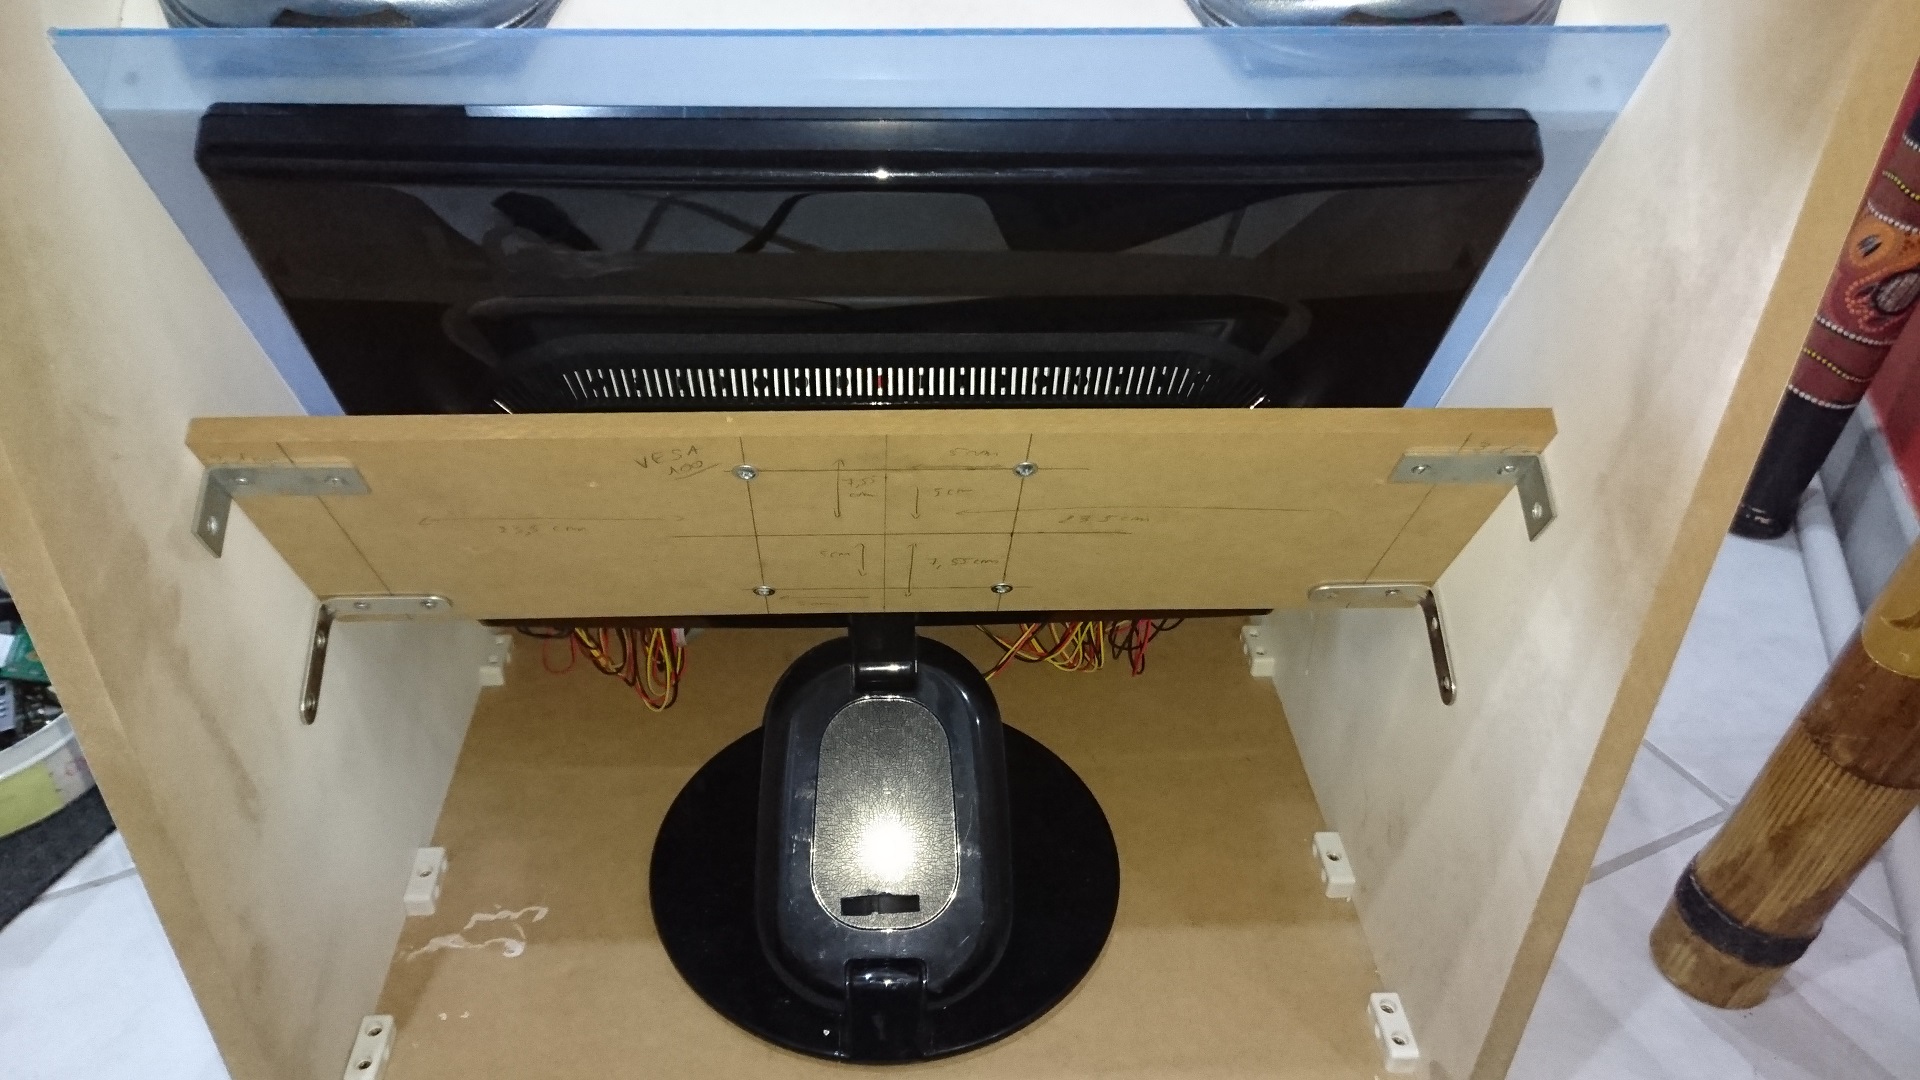
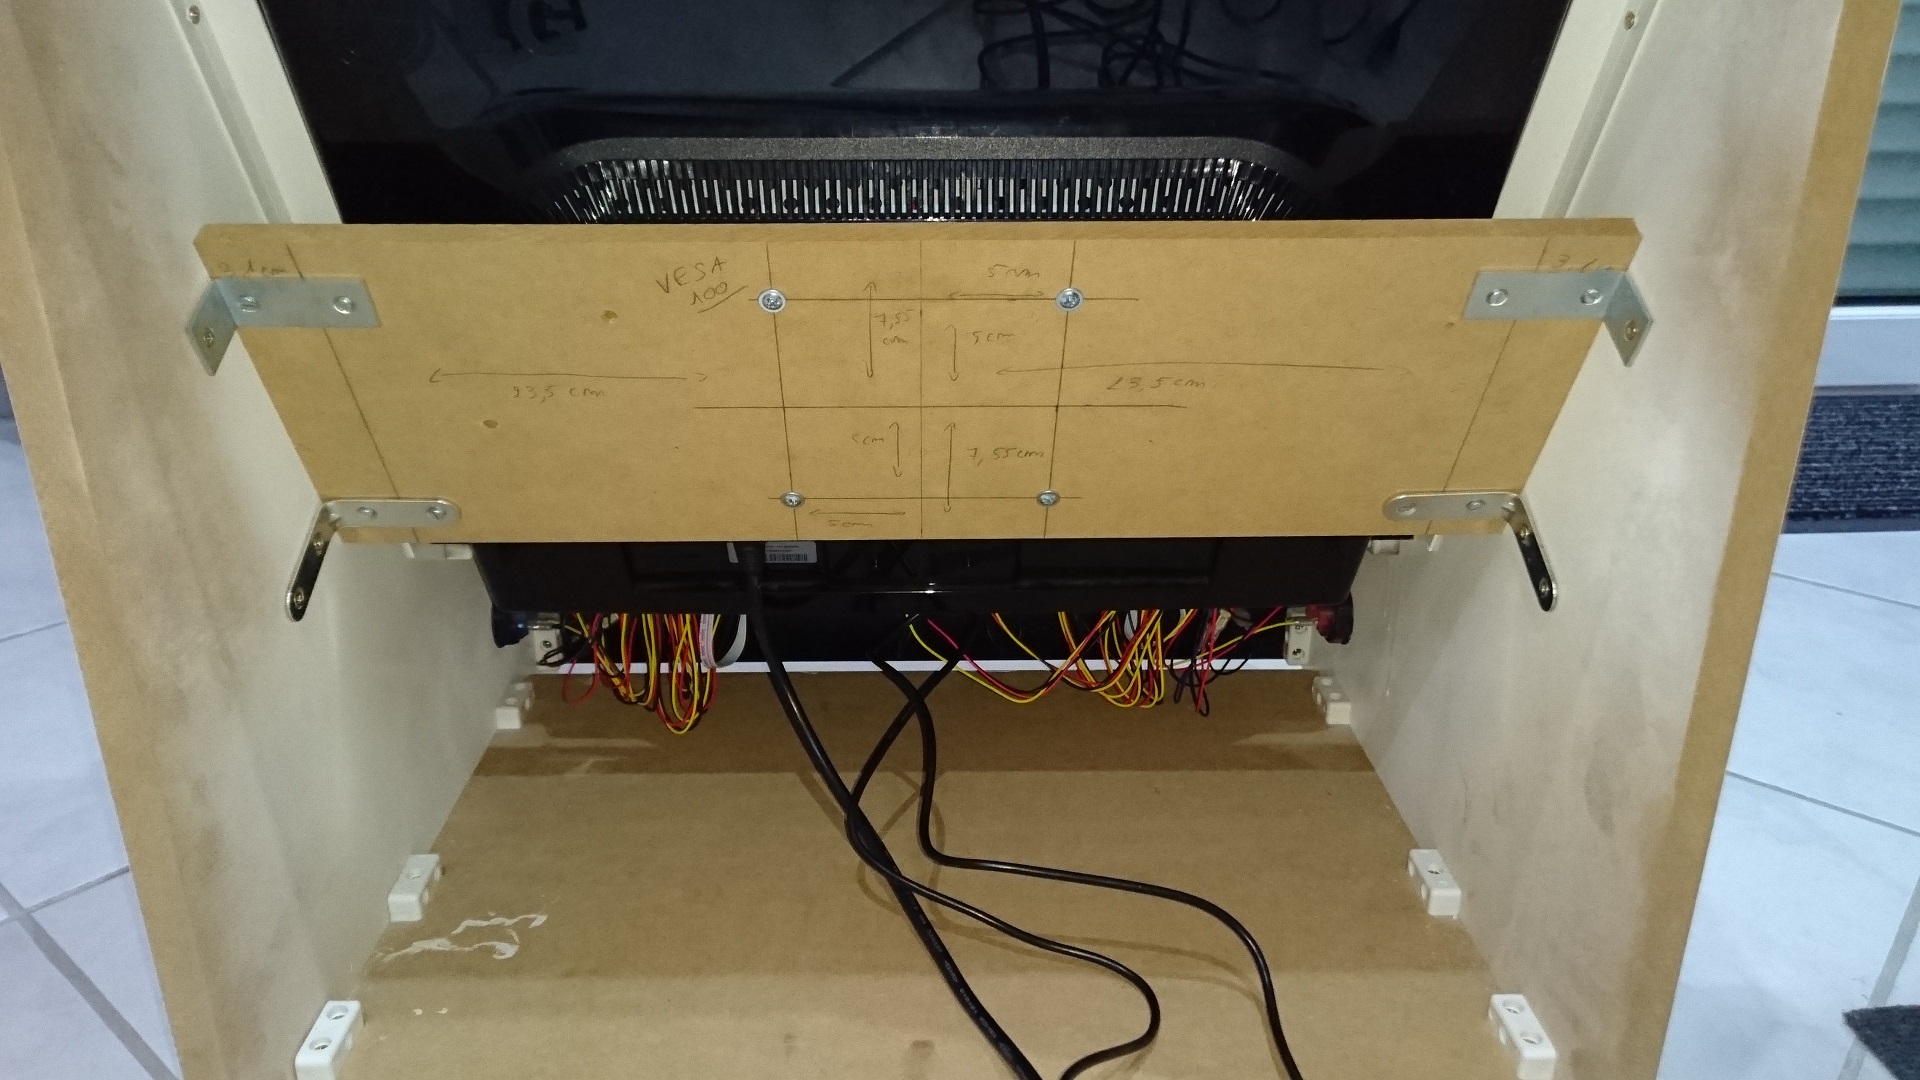
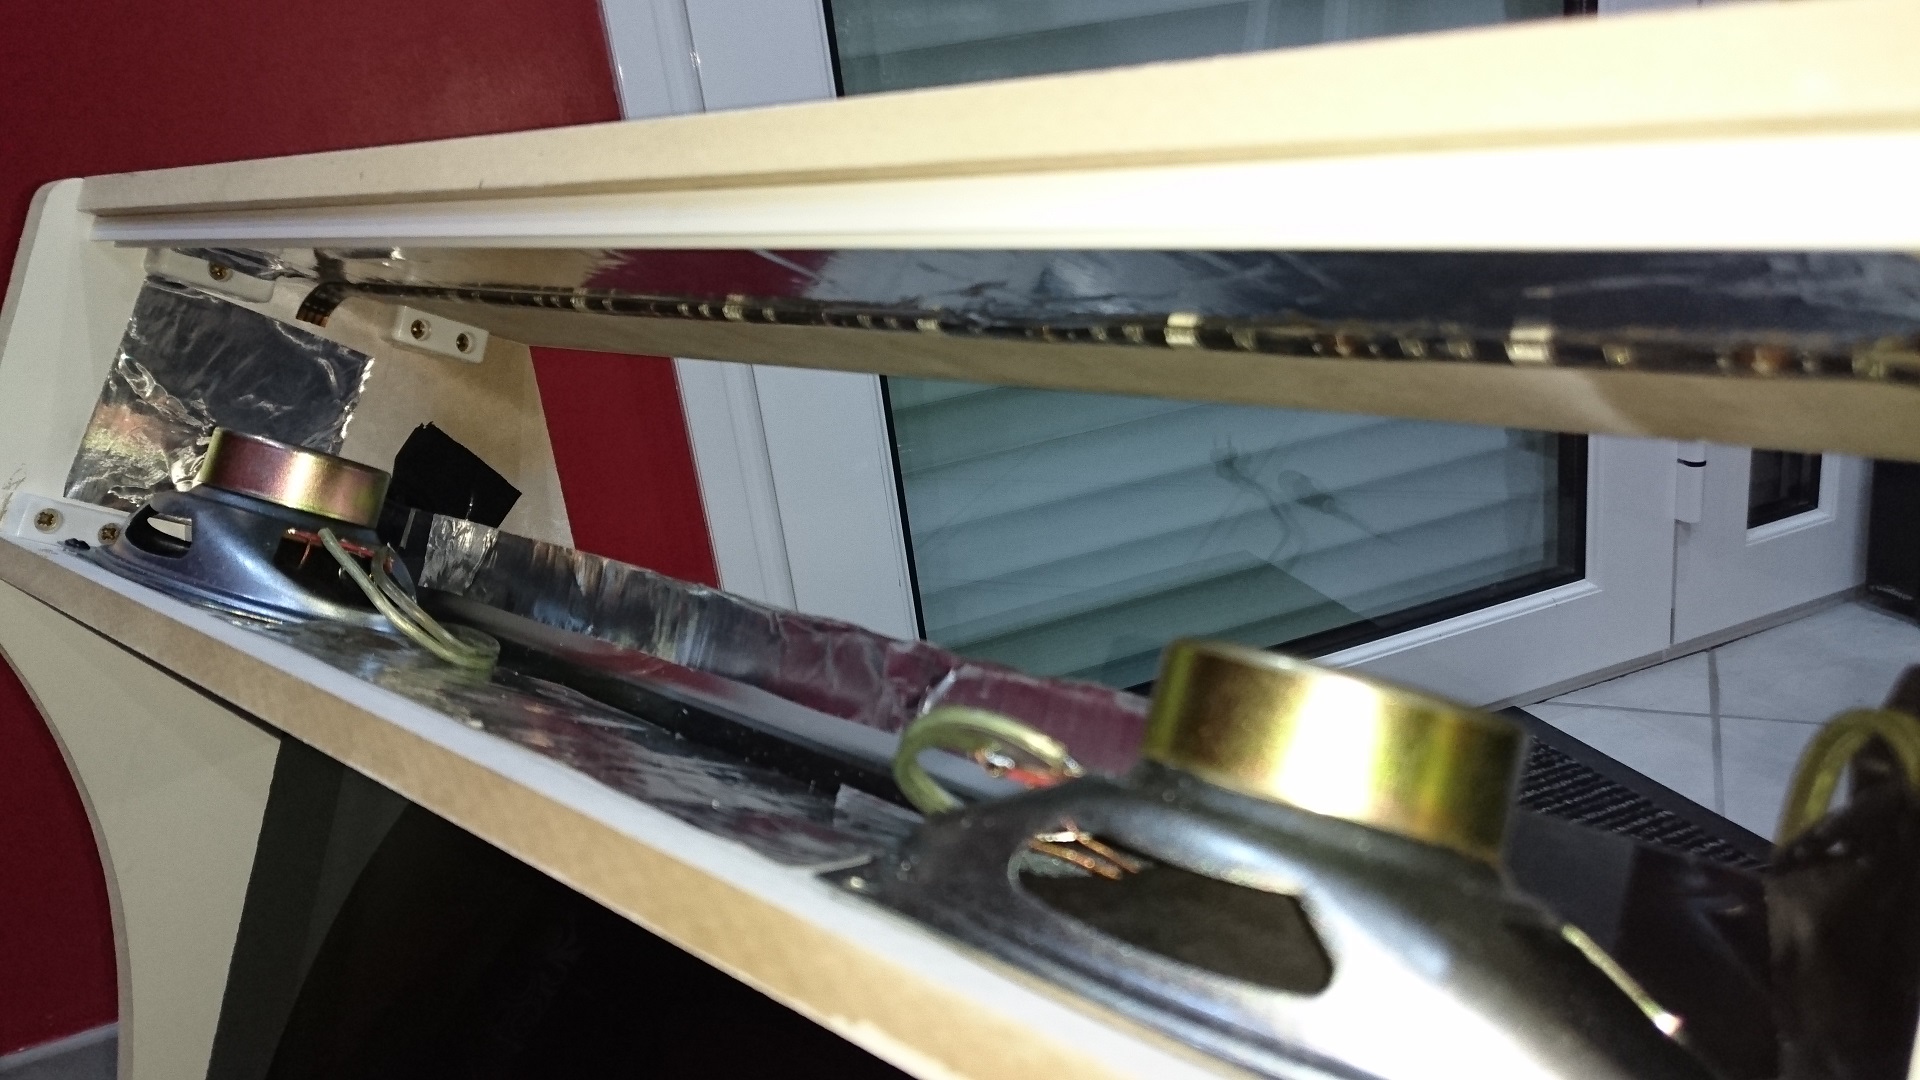
Assembly part 1
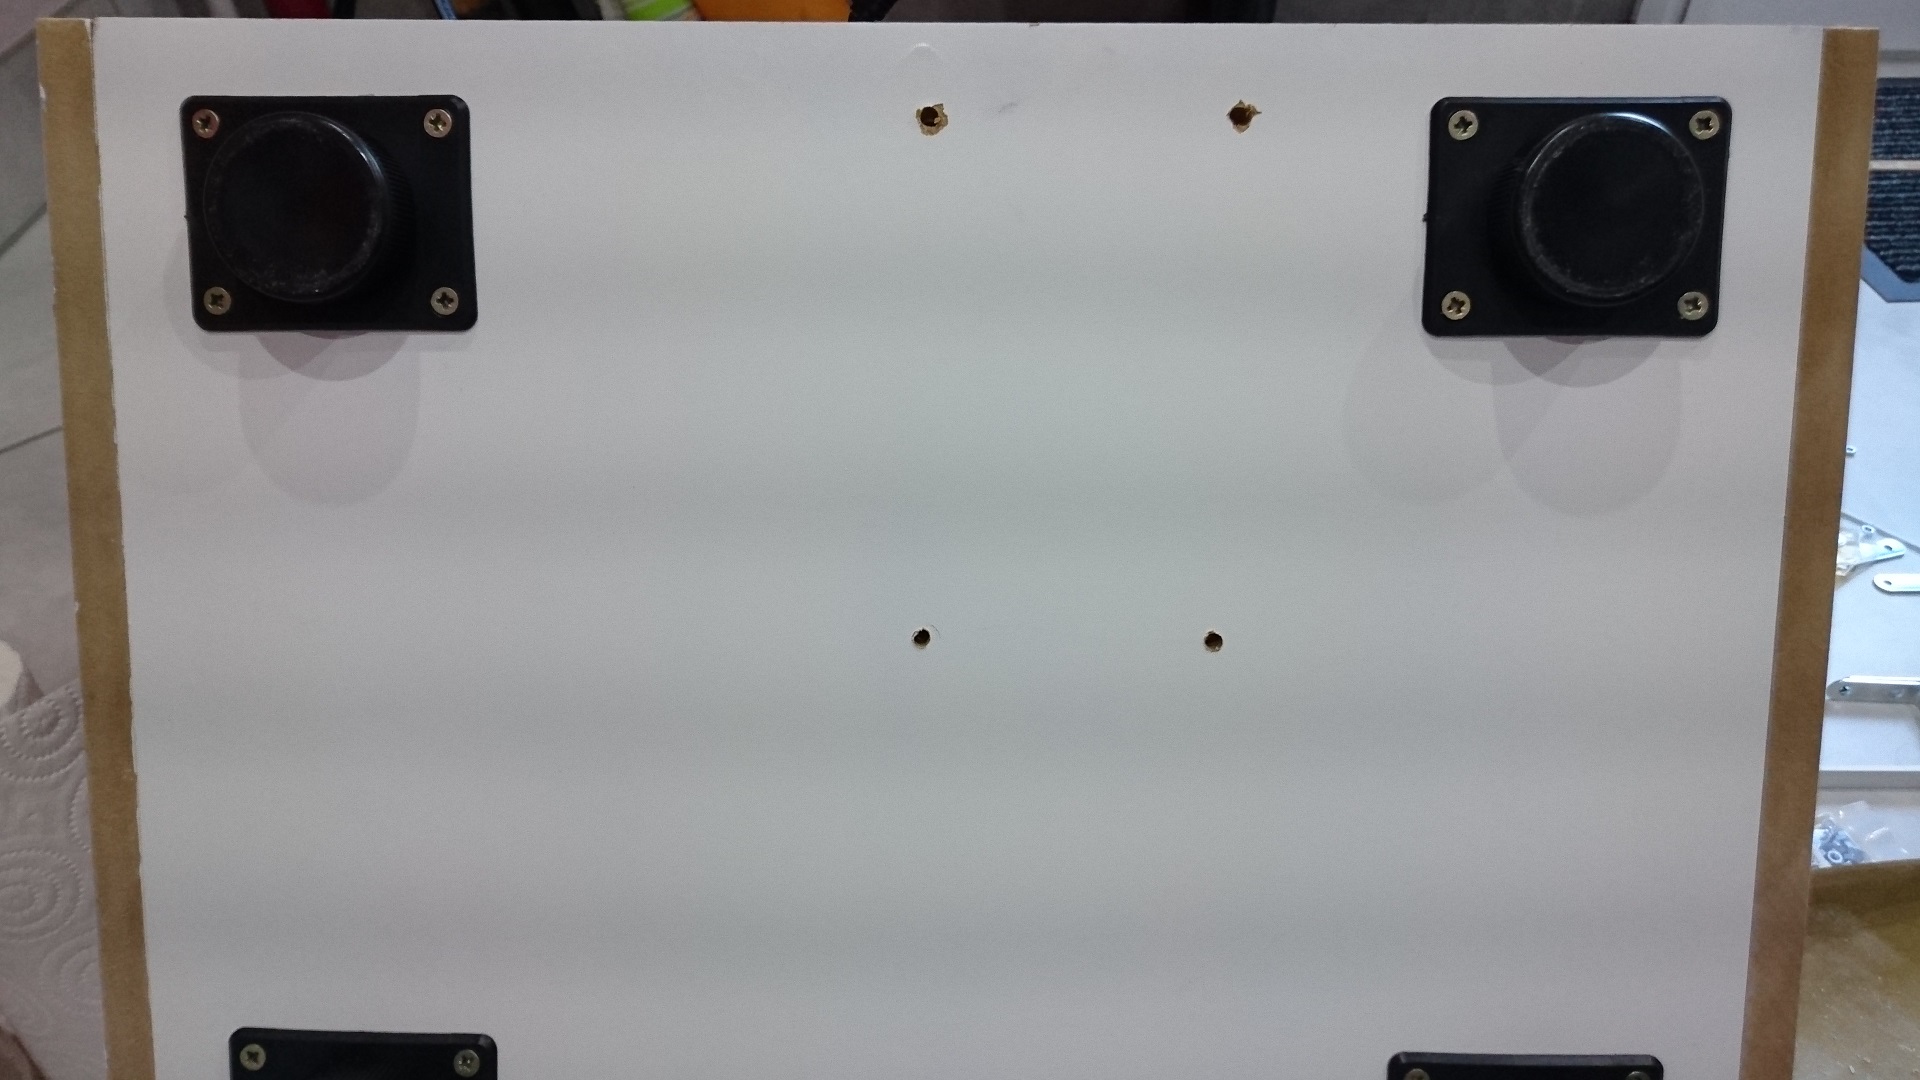
The first assembly part consisted in skrewing main parts, putting plastic foots on the bottom, cut and glue decorations, fix speakers and finaly mount the LCD pannel.
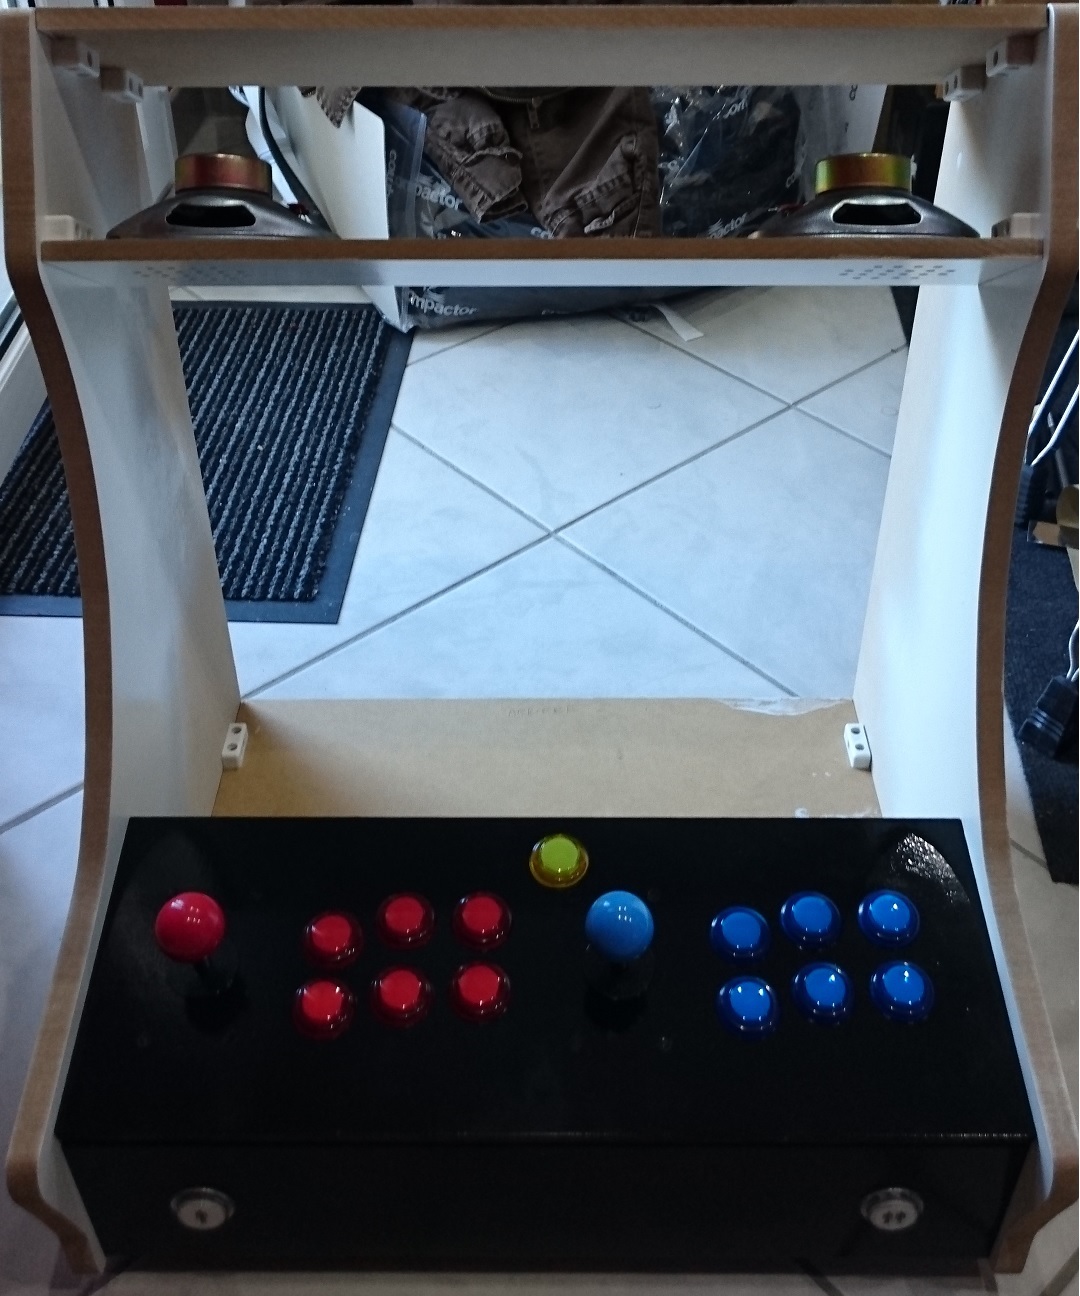
For the LCD panel, I first calibrated the position with its original foot, fixed the support and finaly removed the panel’s foot:

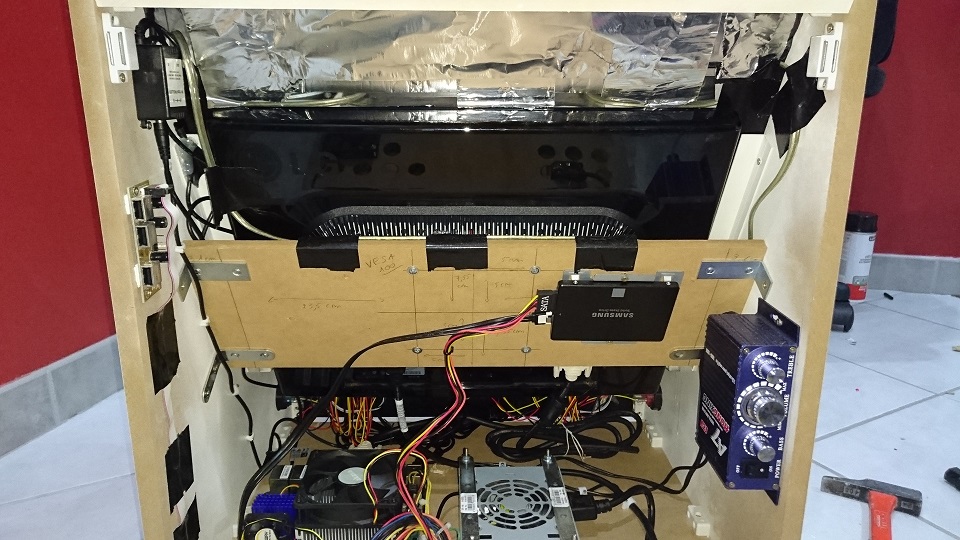
Put all inside
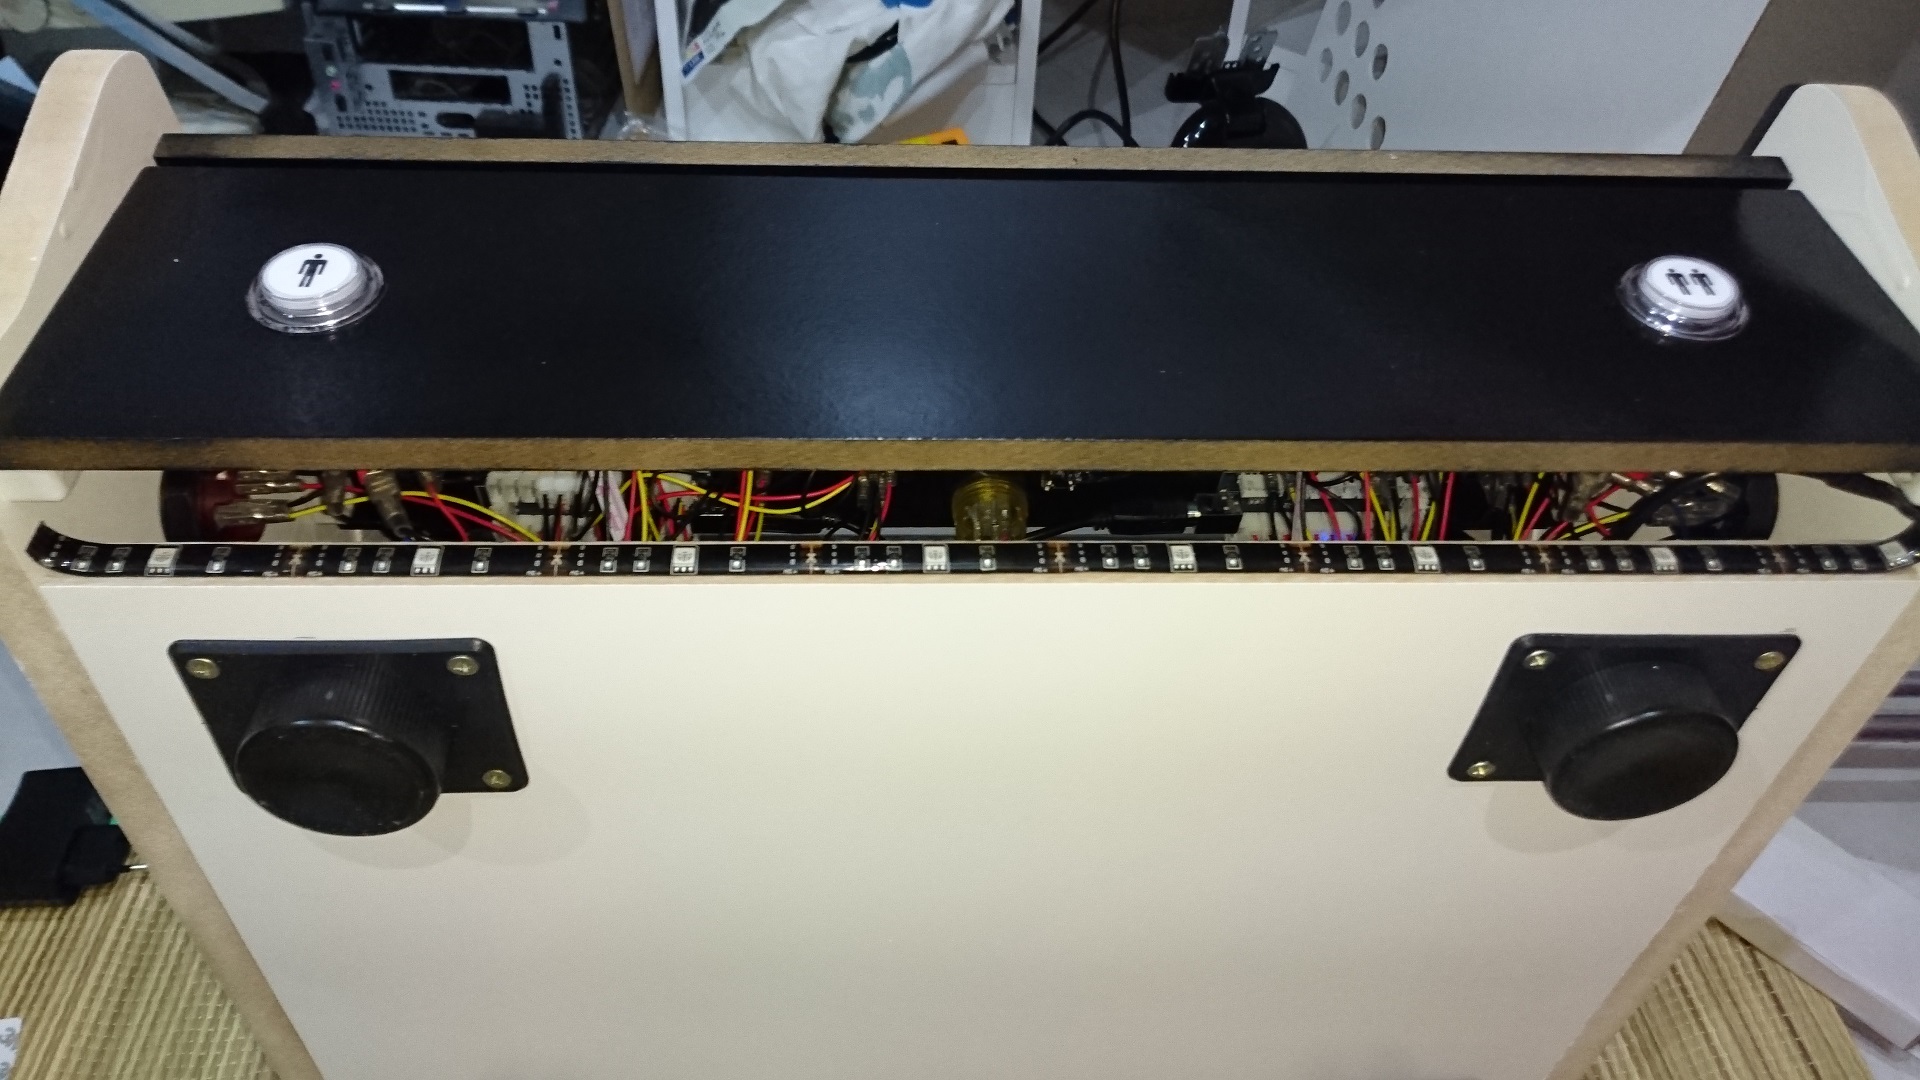
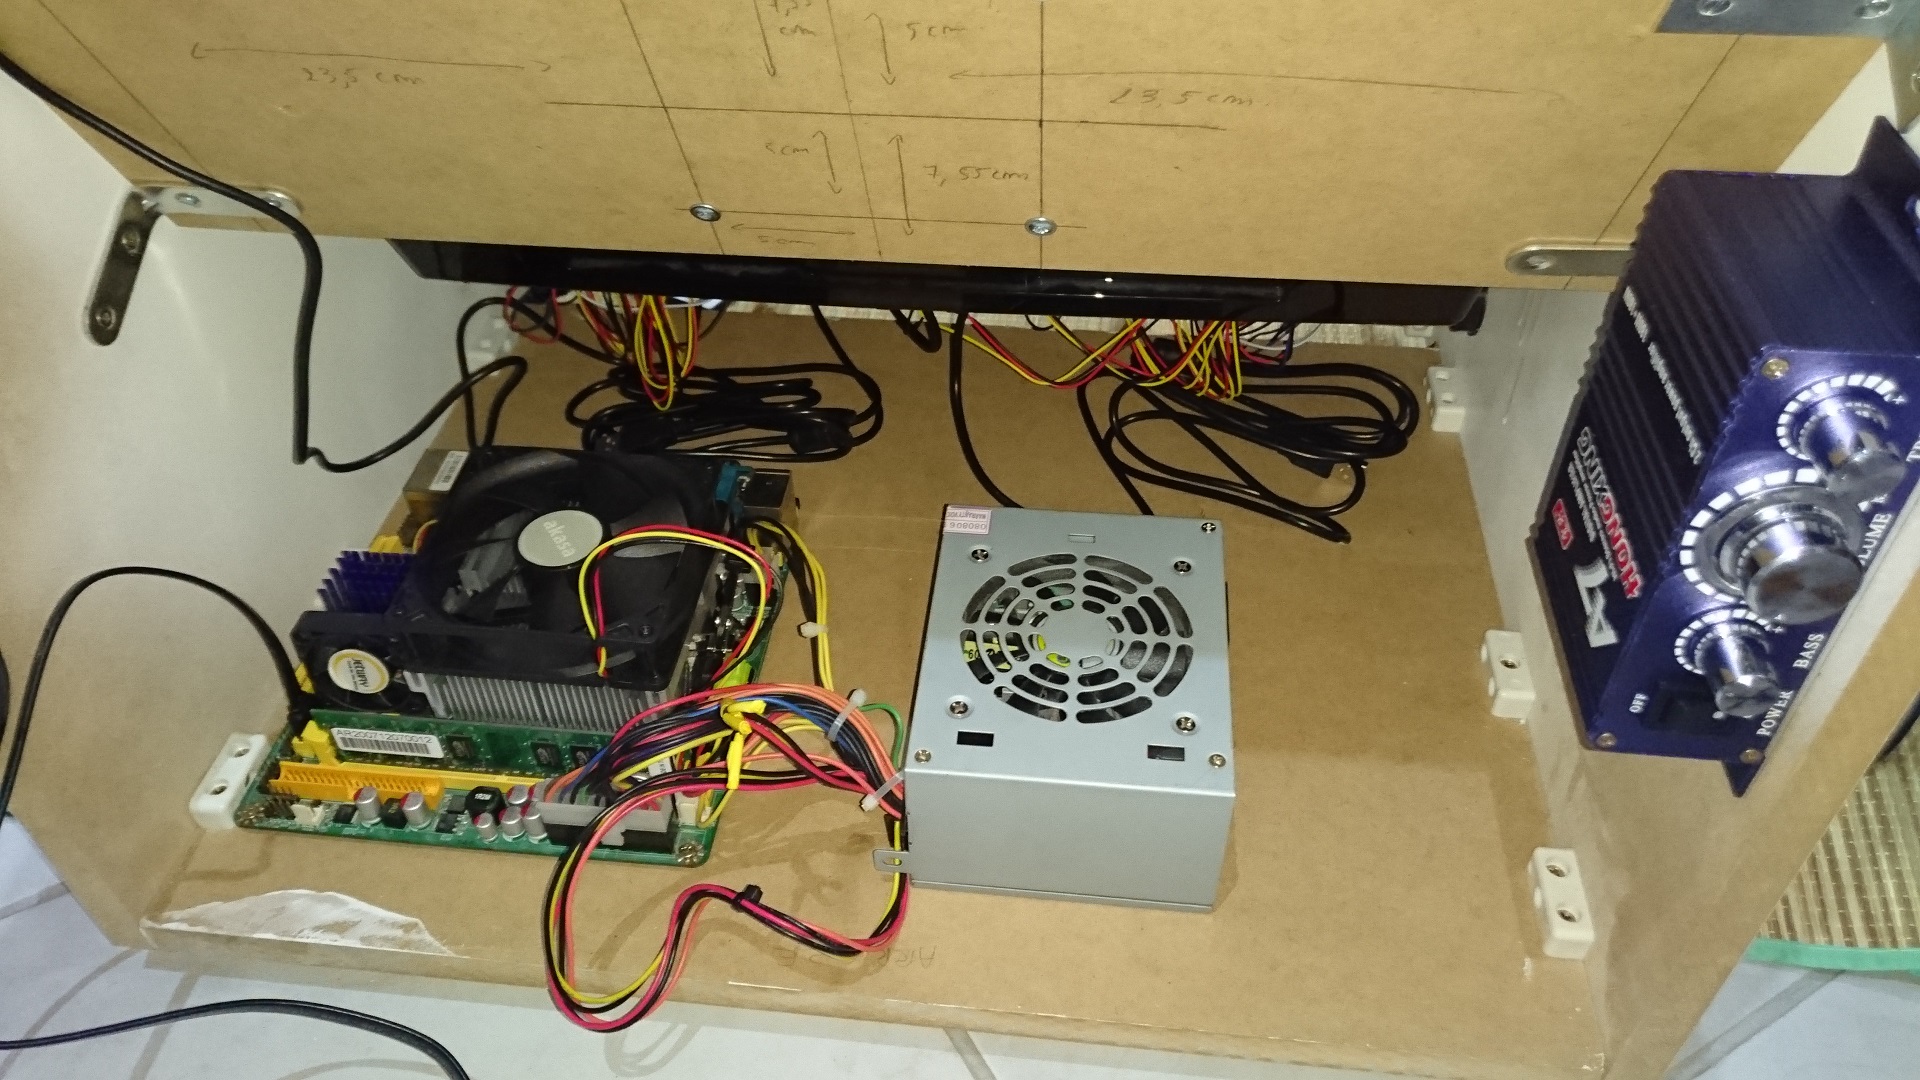
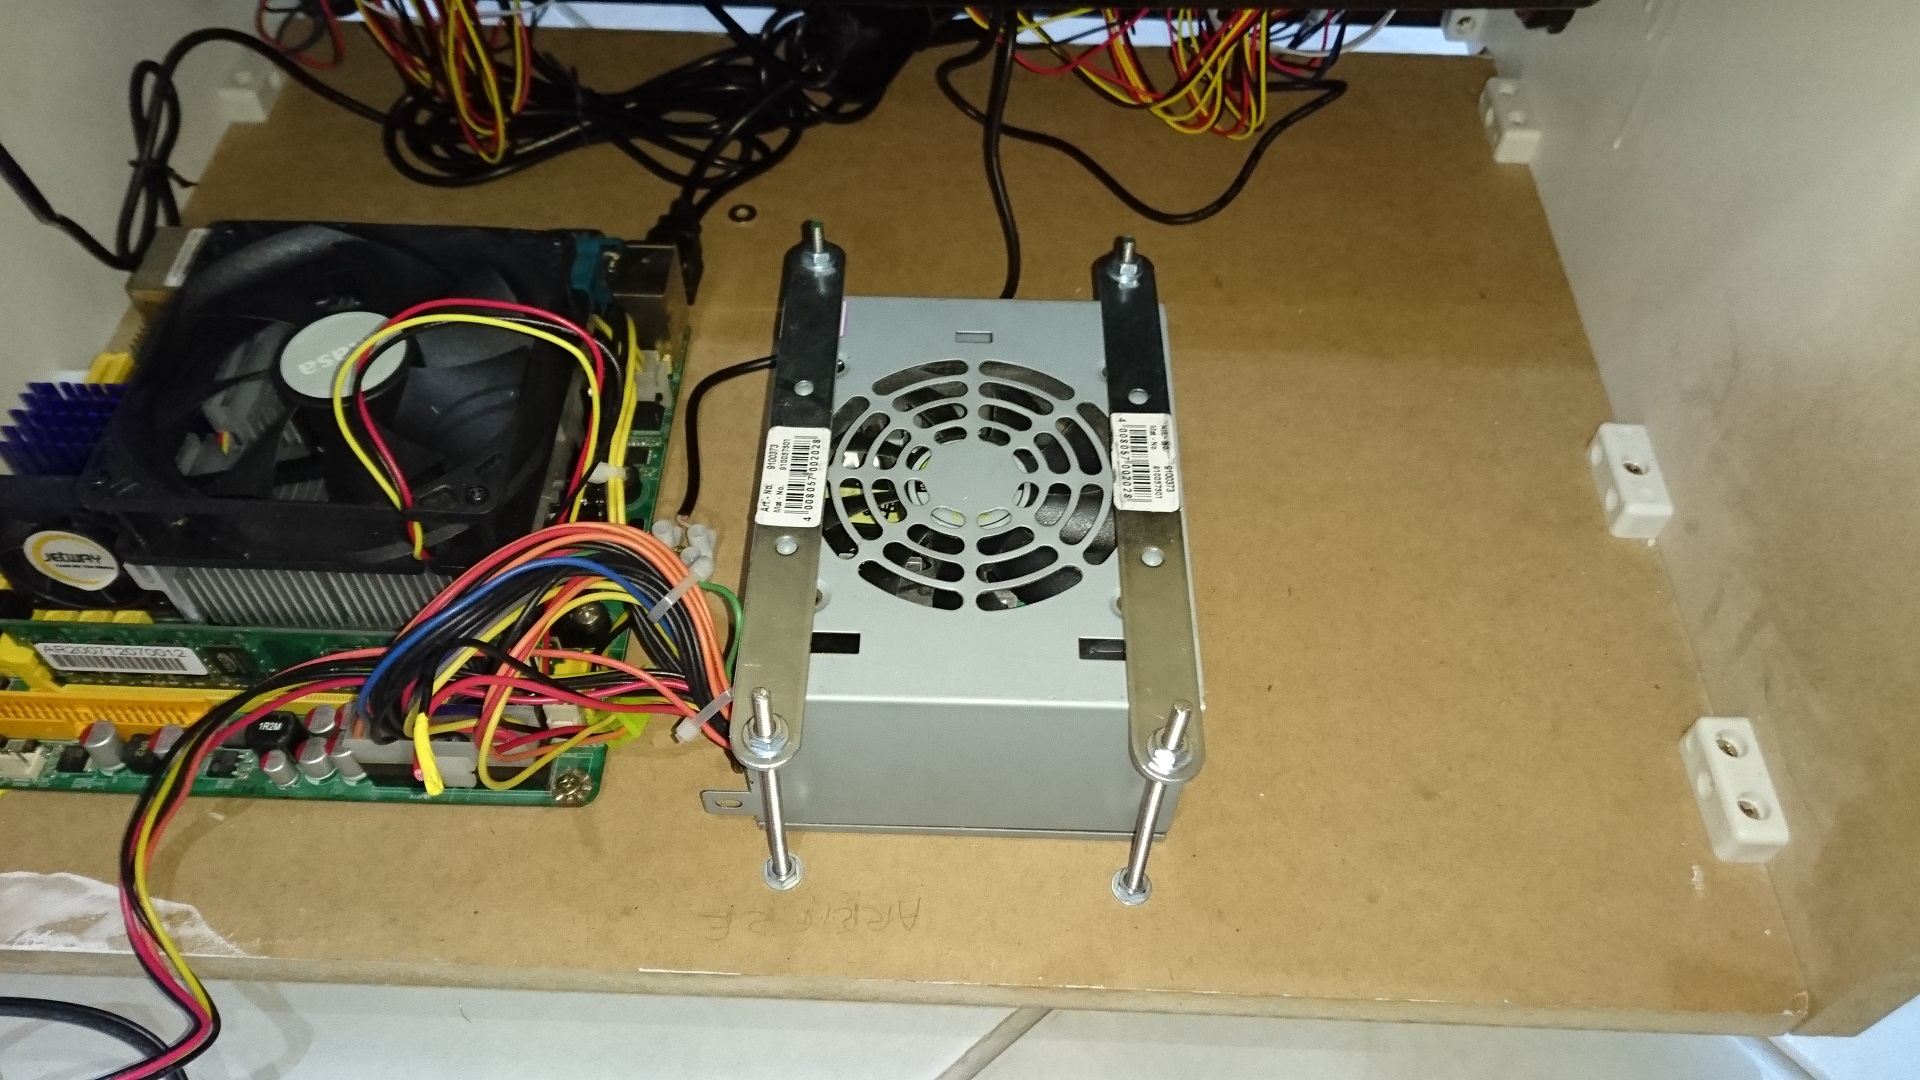
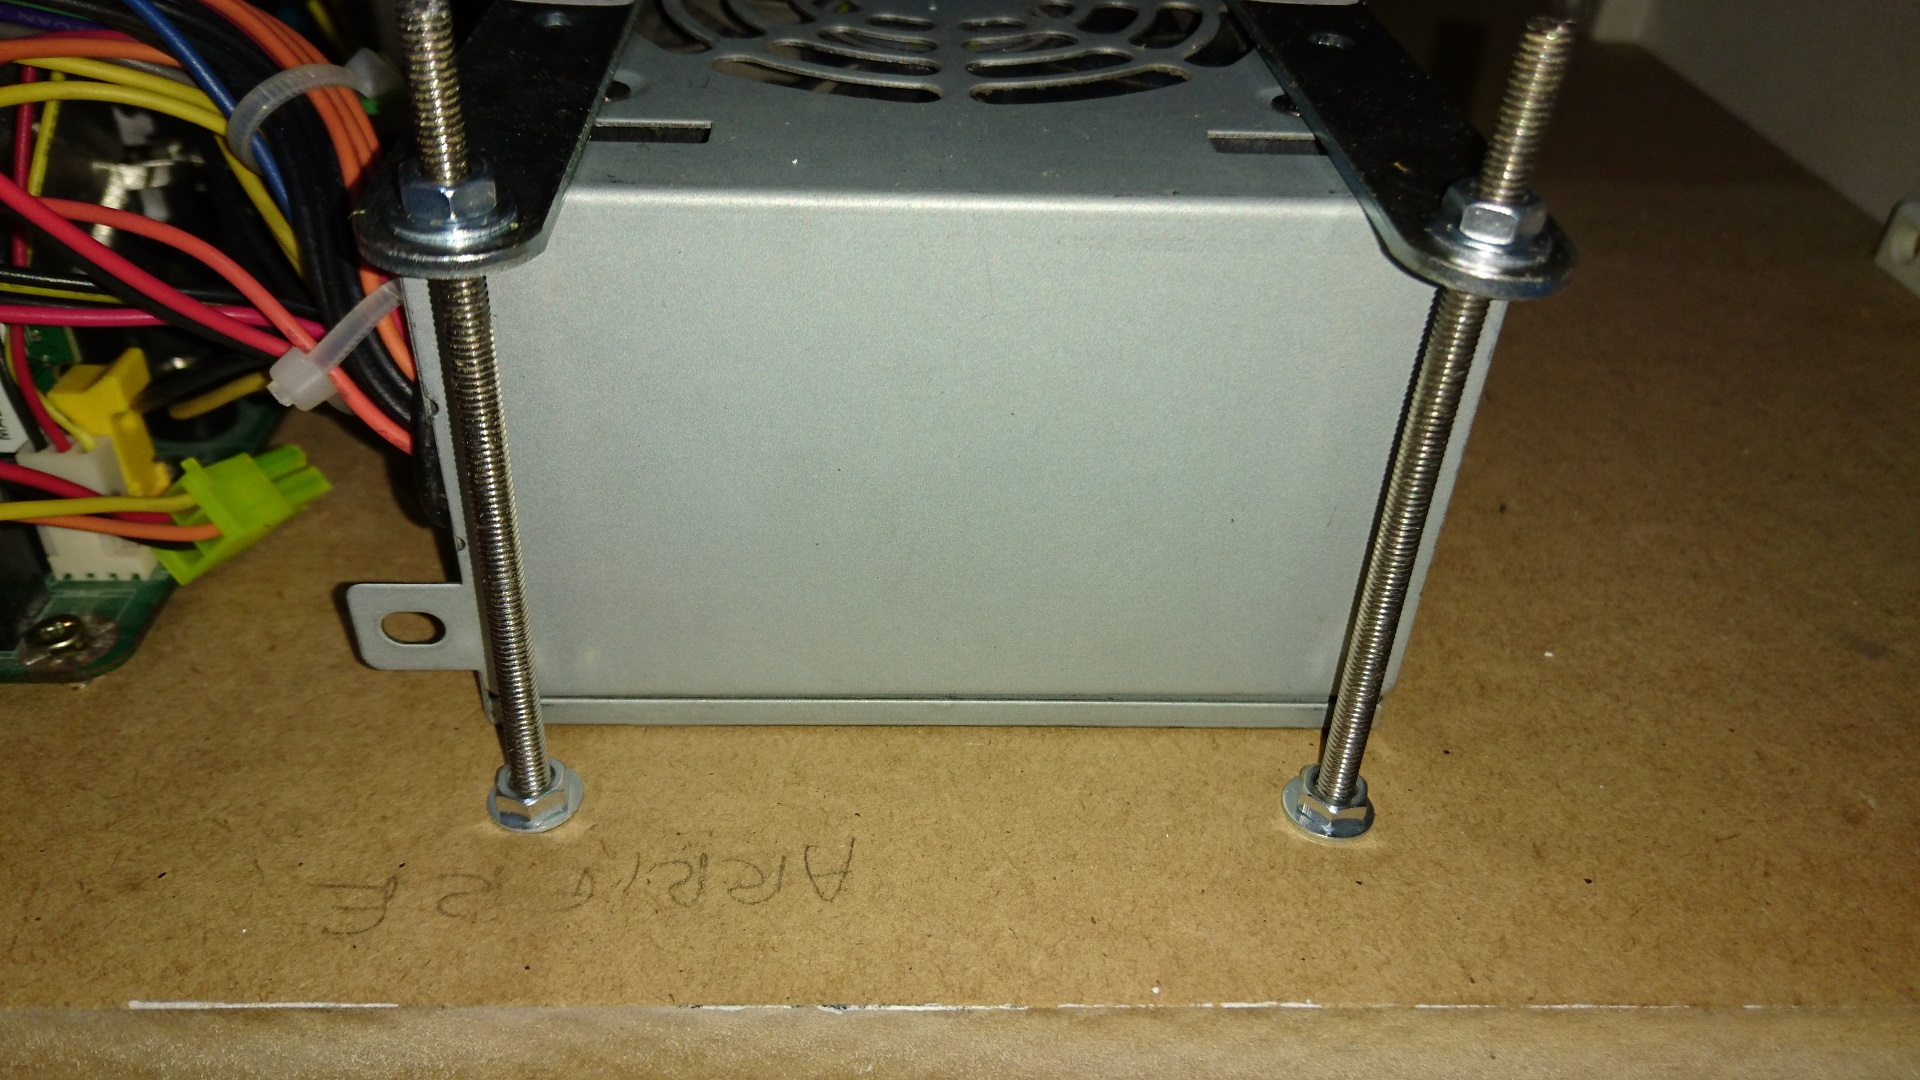
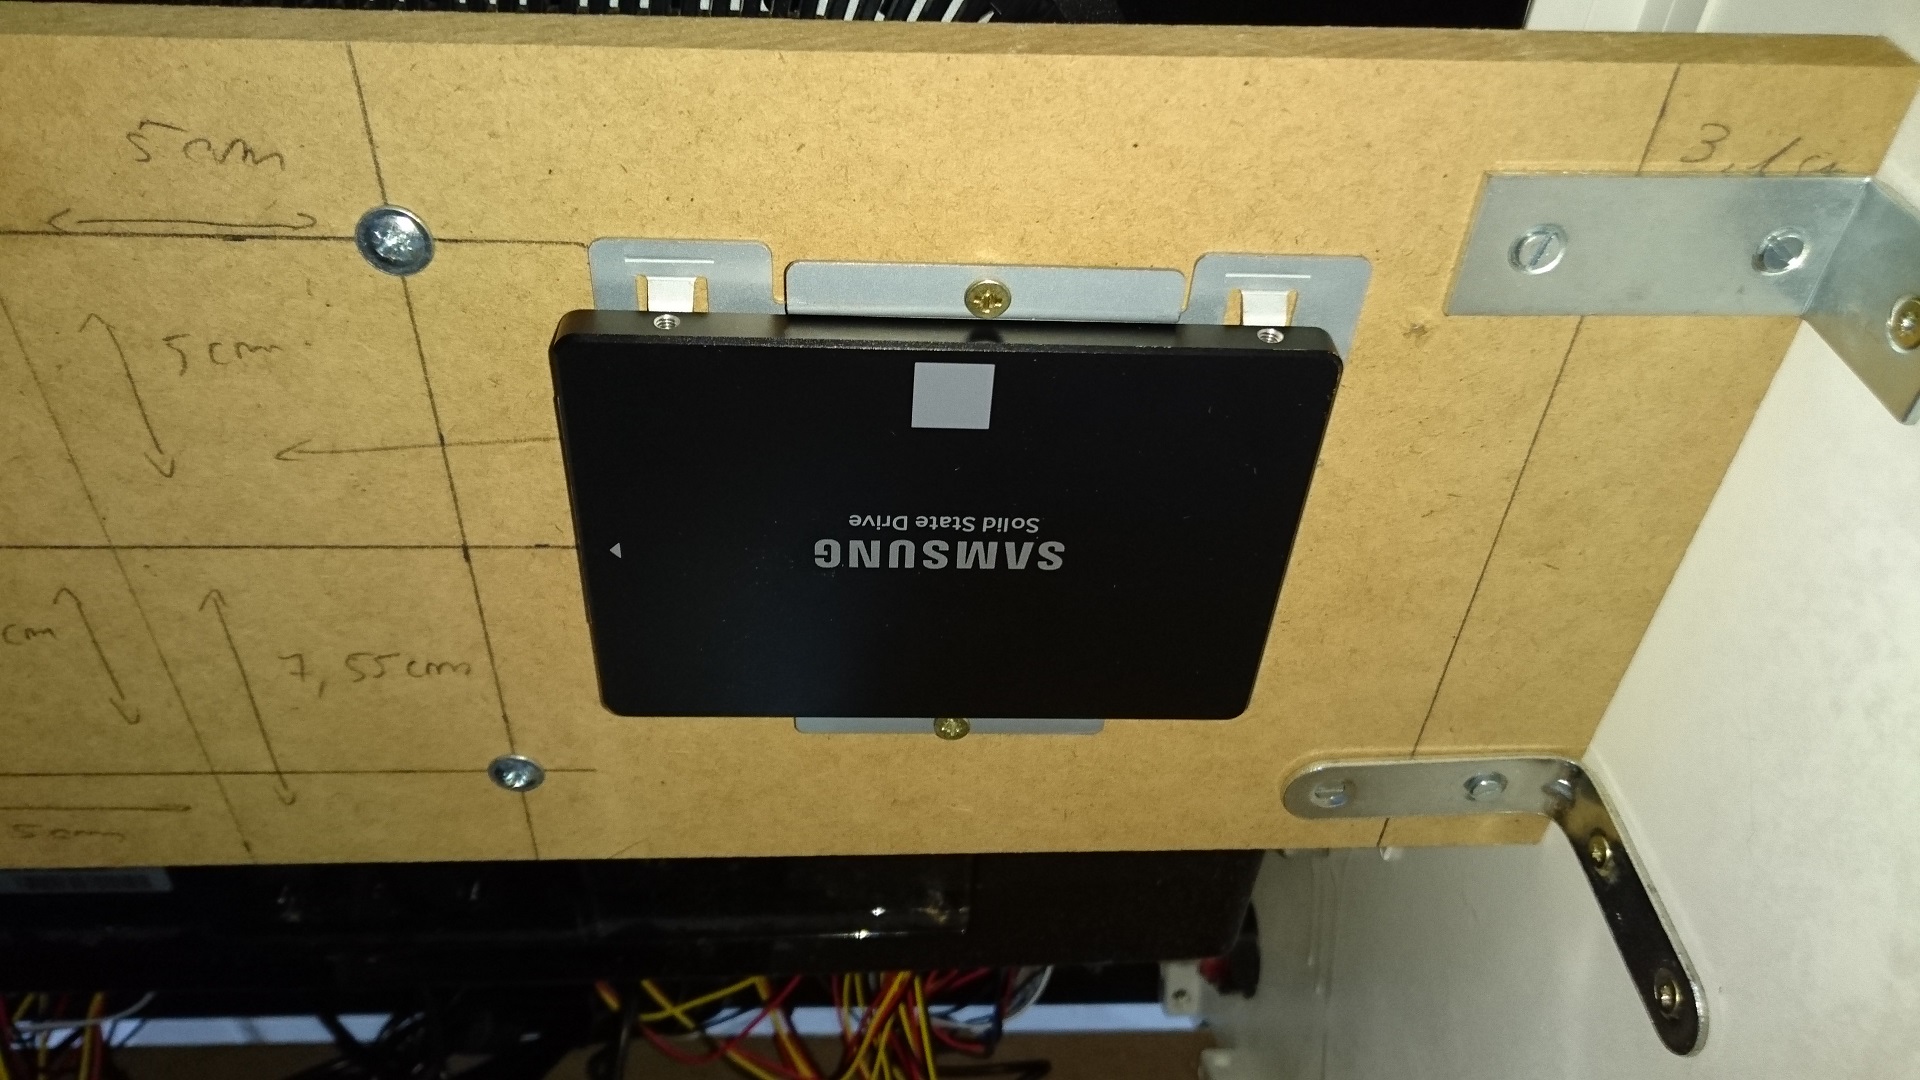
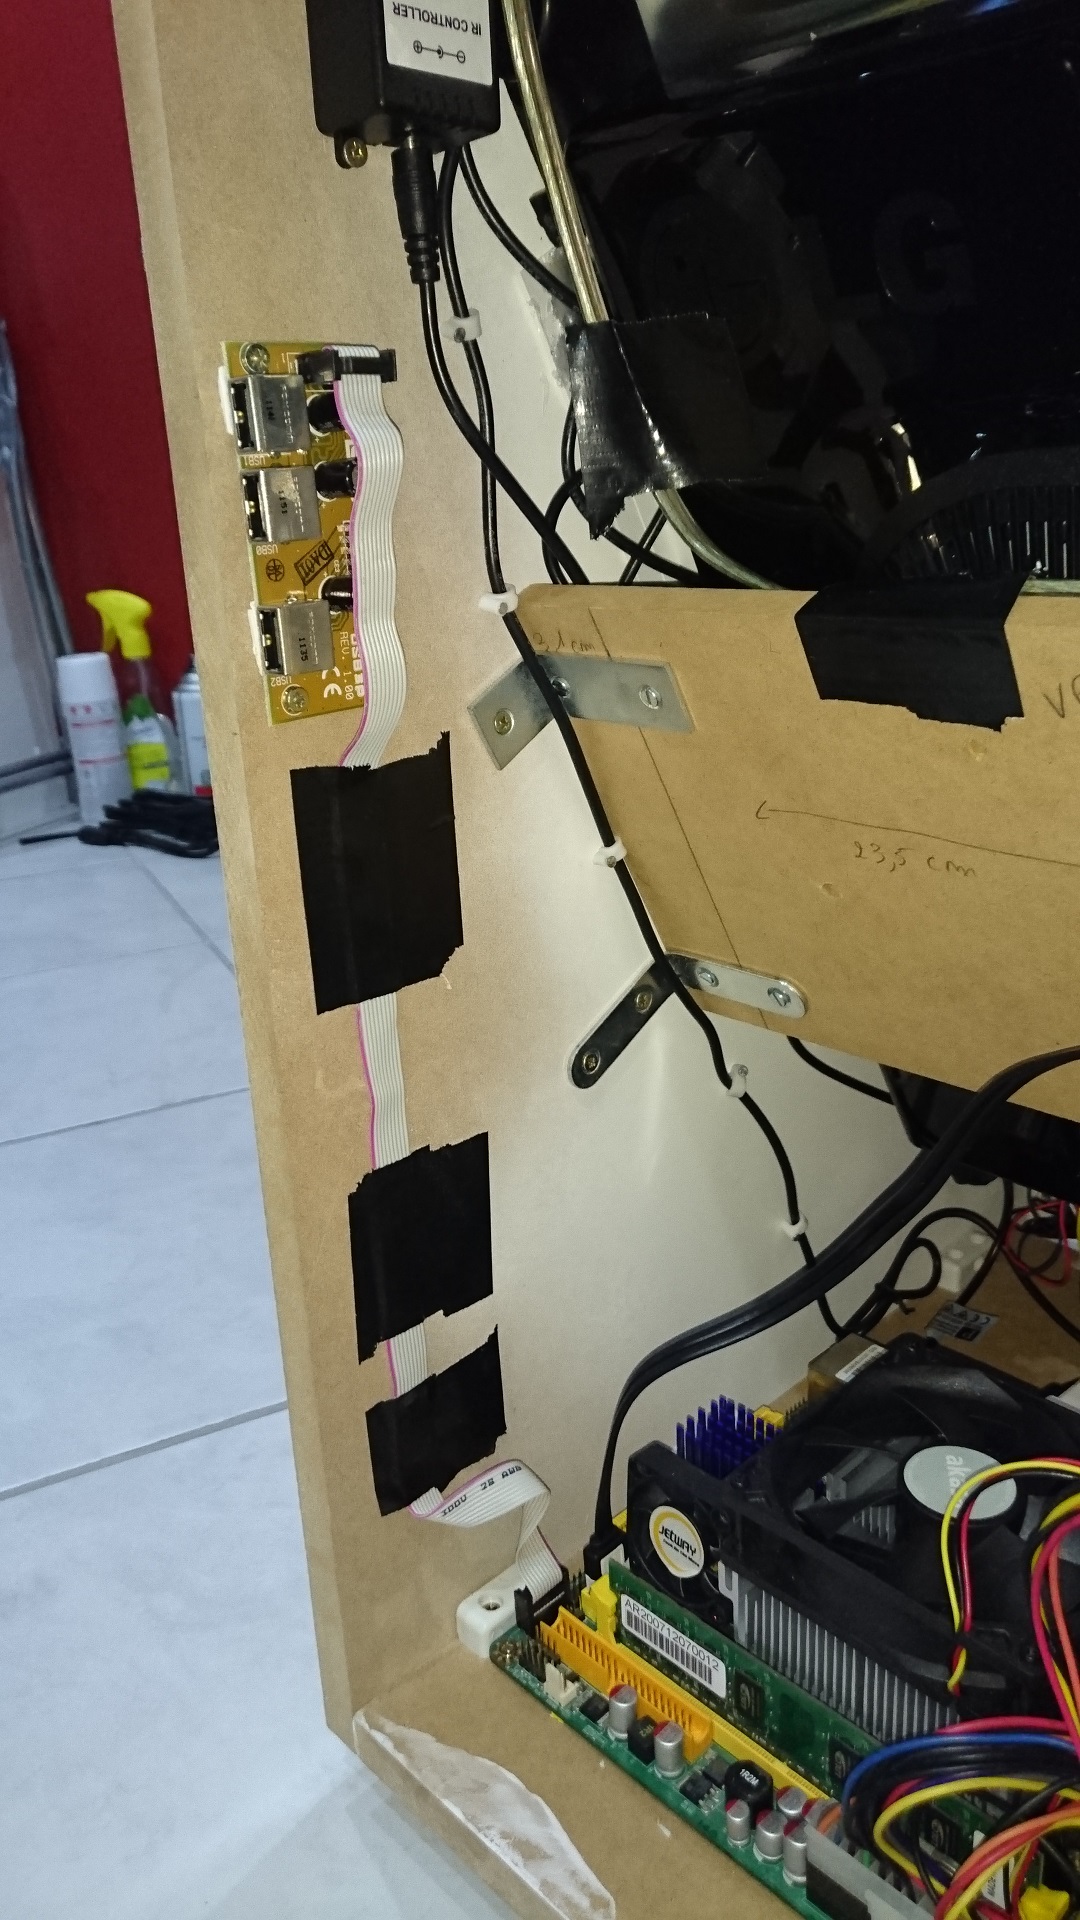
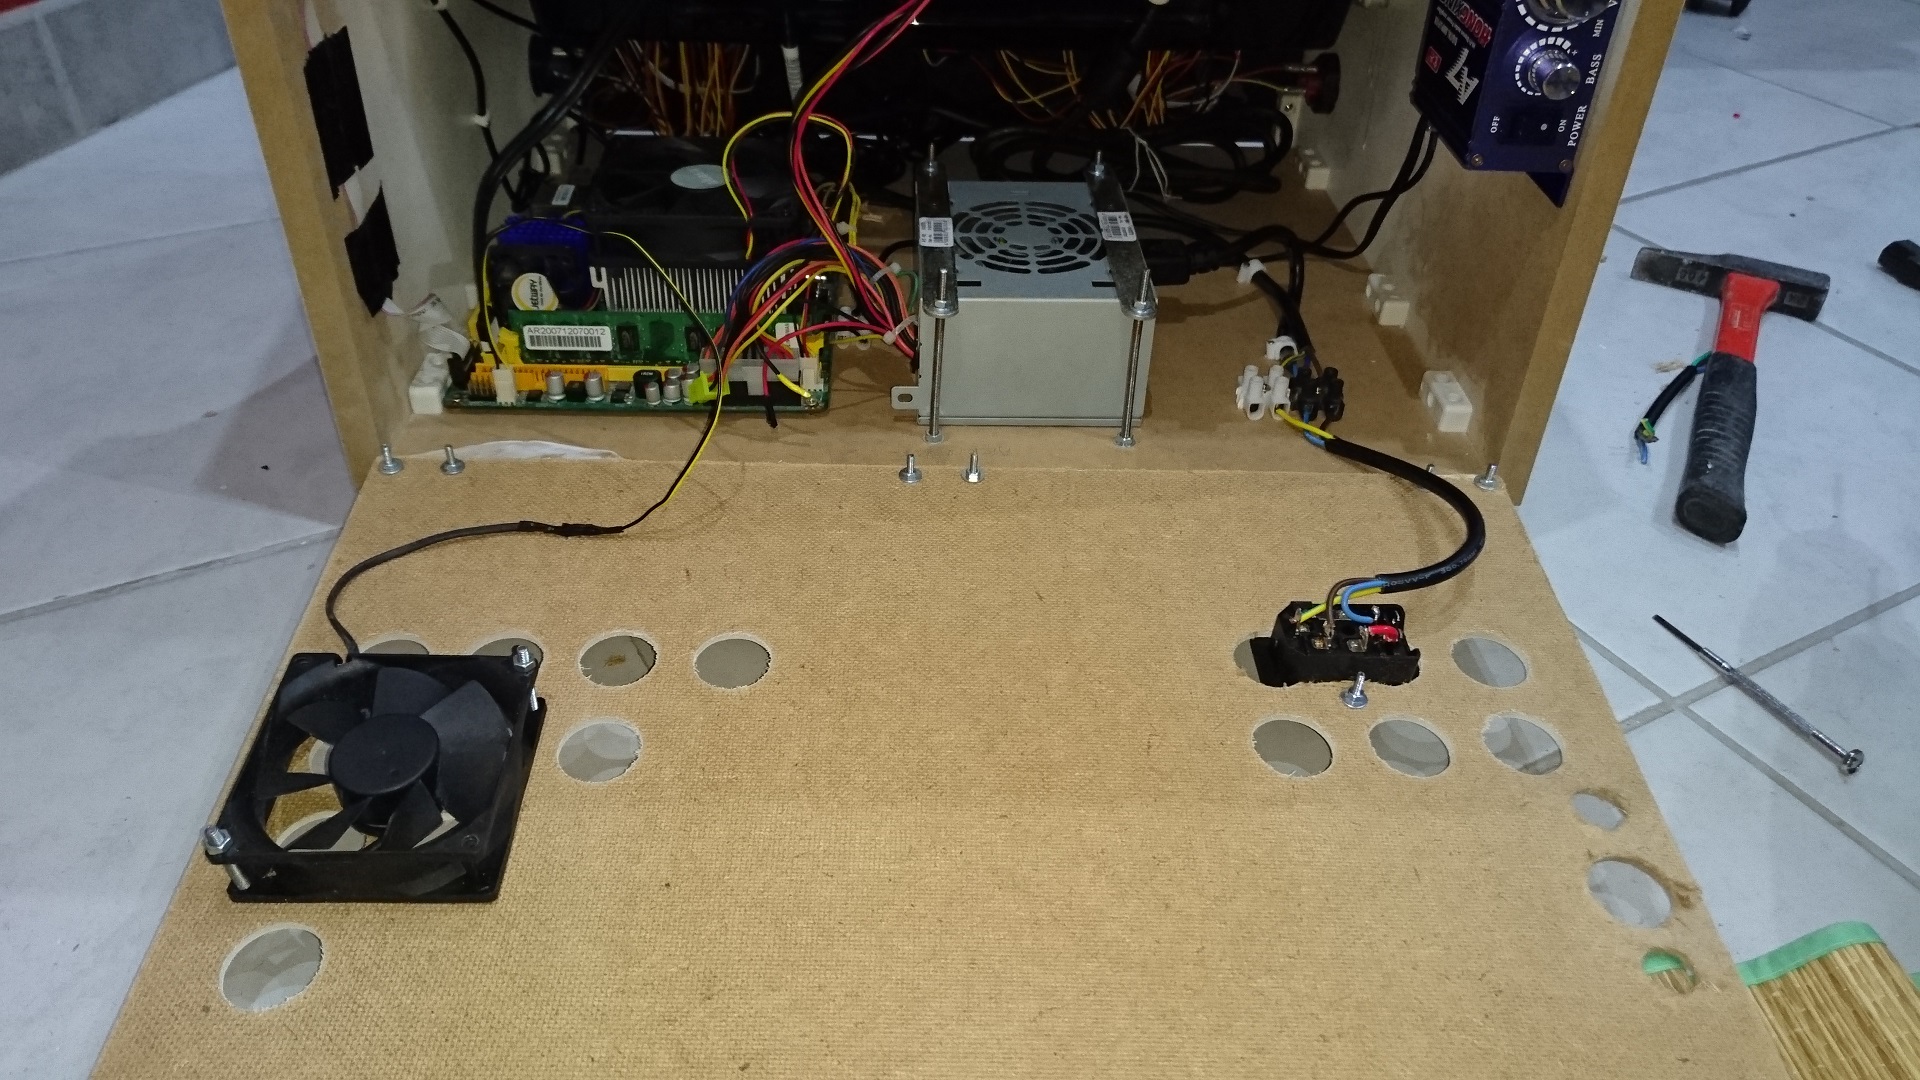
Before finalizing the assembly, I started to install some internal parts that would have been more difficult to mount later: motherboard, marquee and bottom leds, power supply, ssd, and external USB connectors.
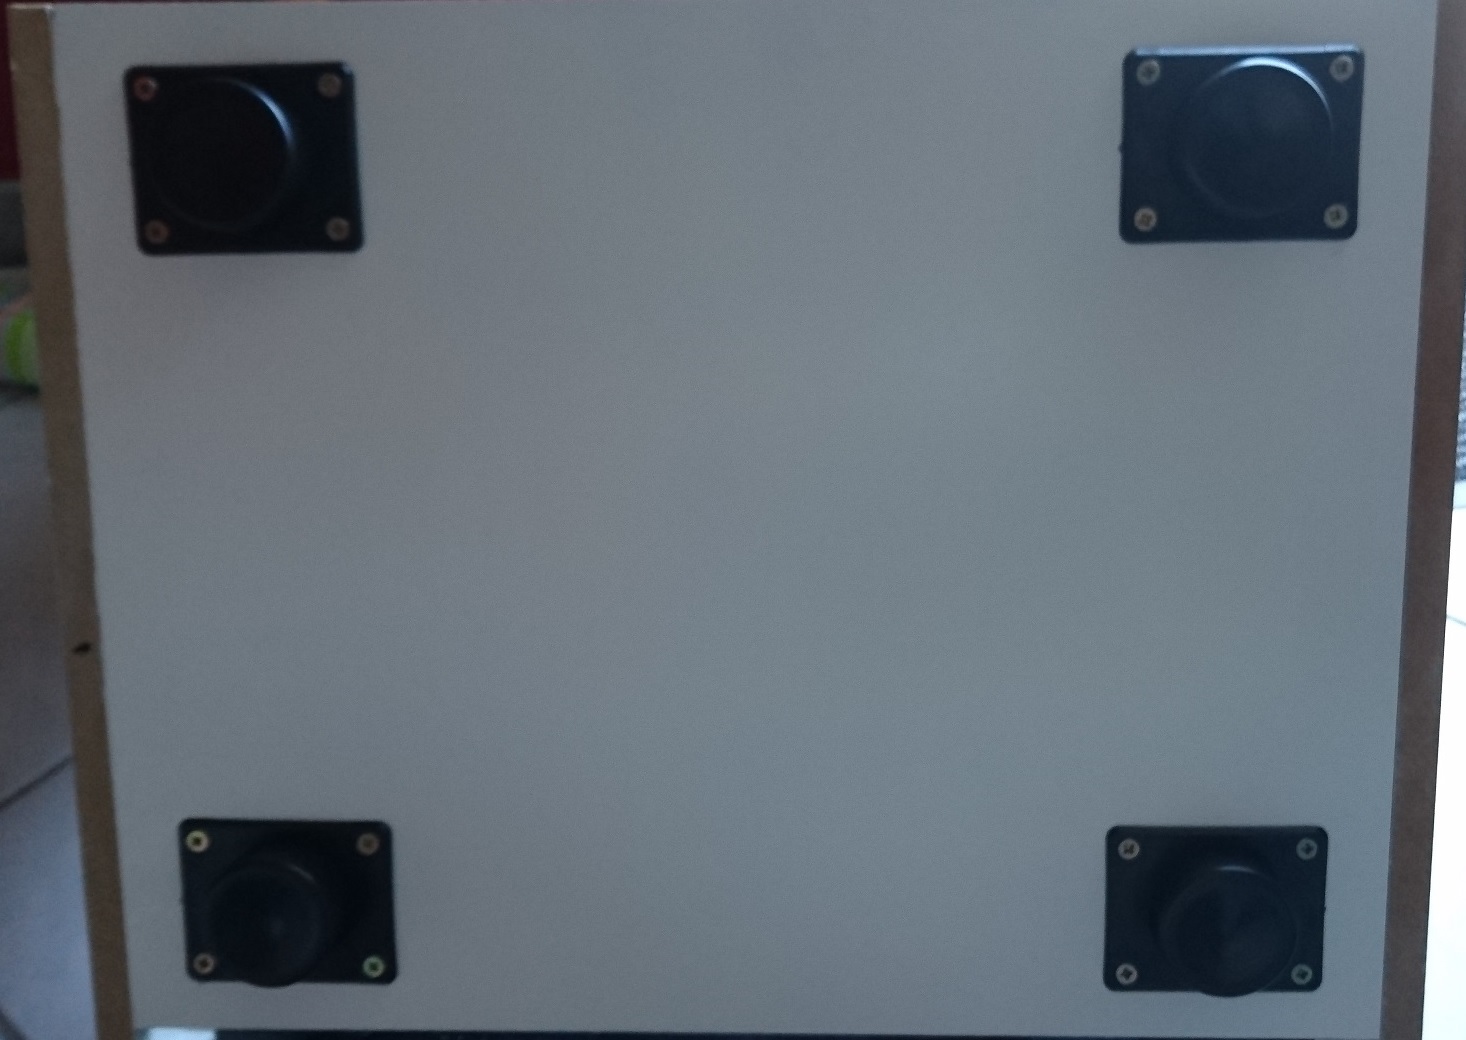
Assembly part 2
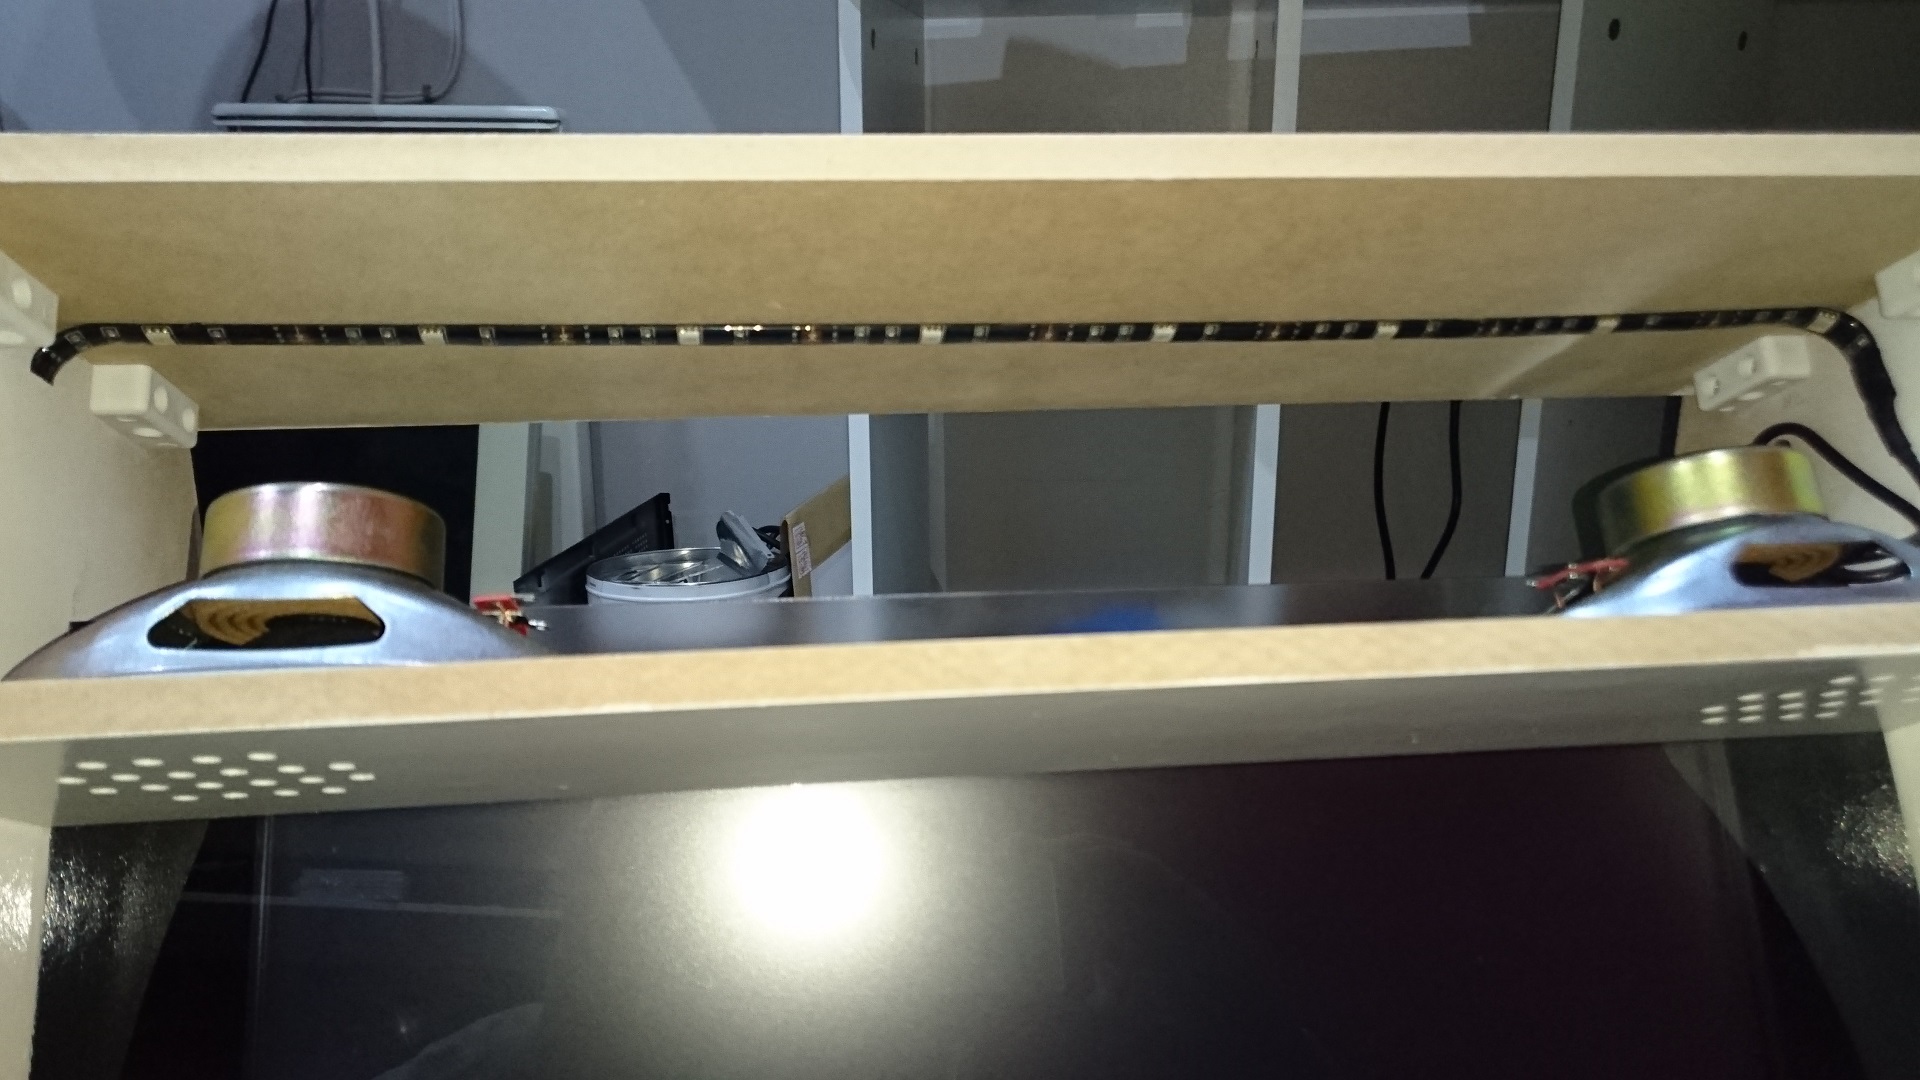
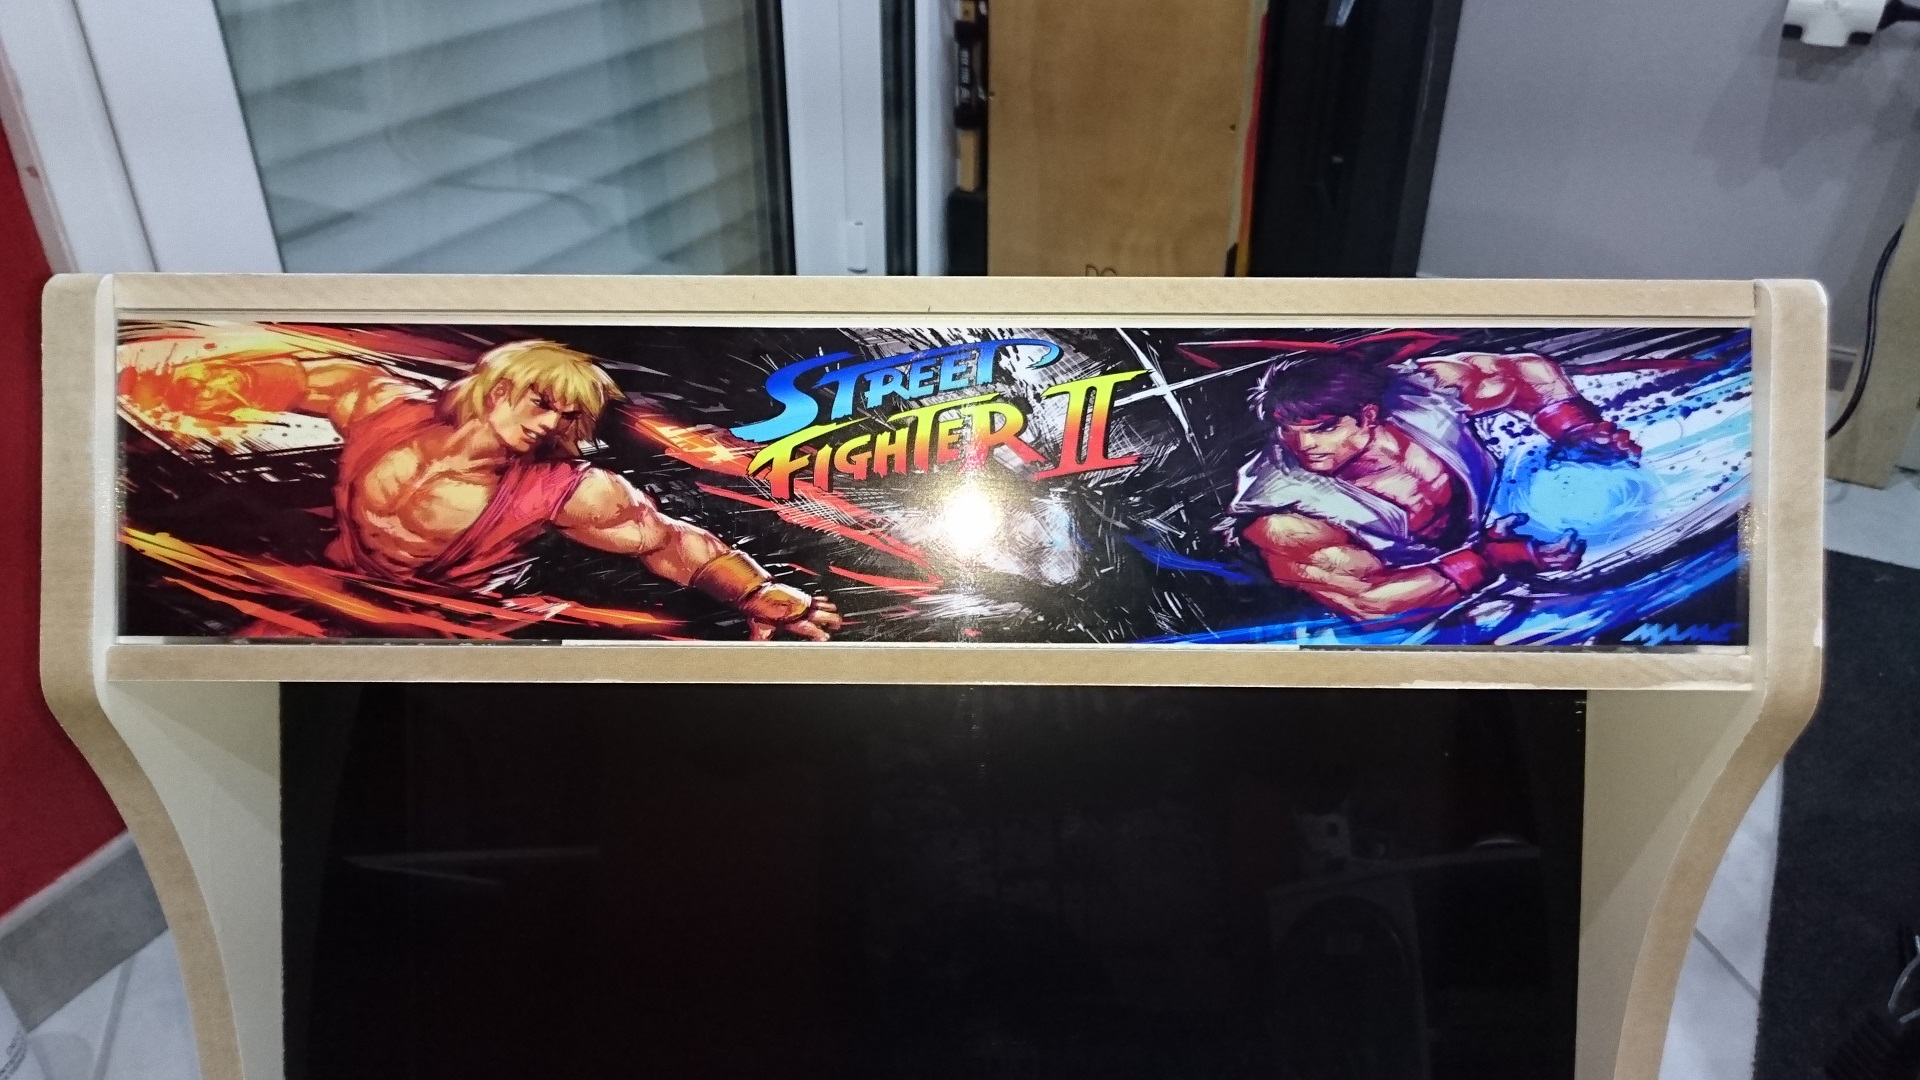
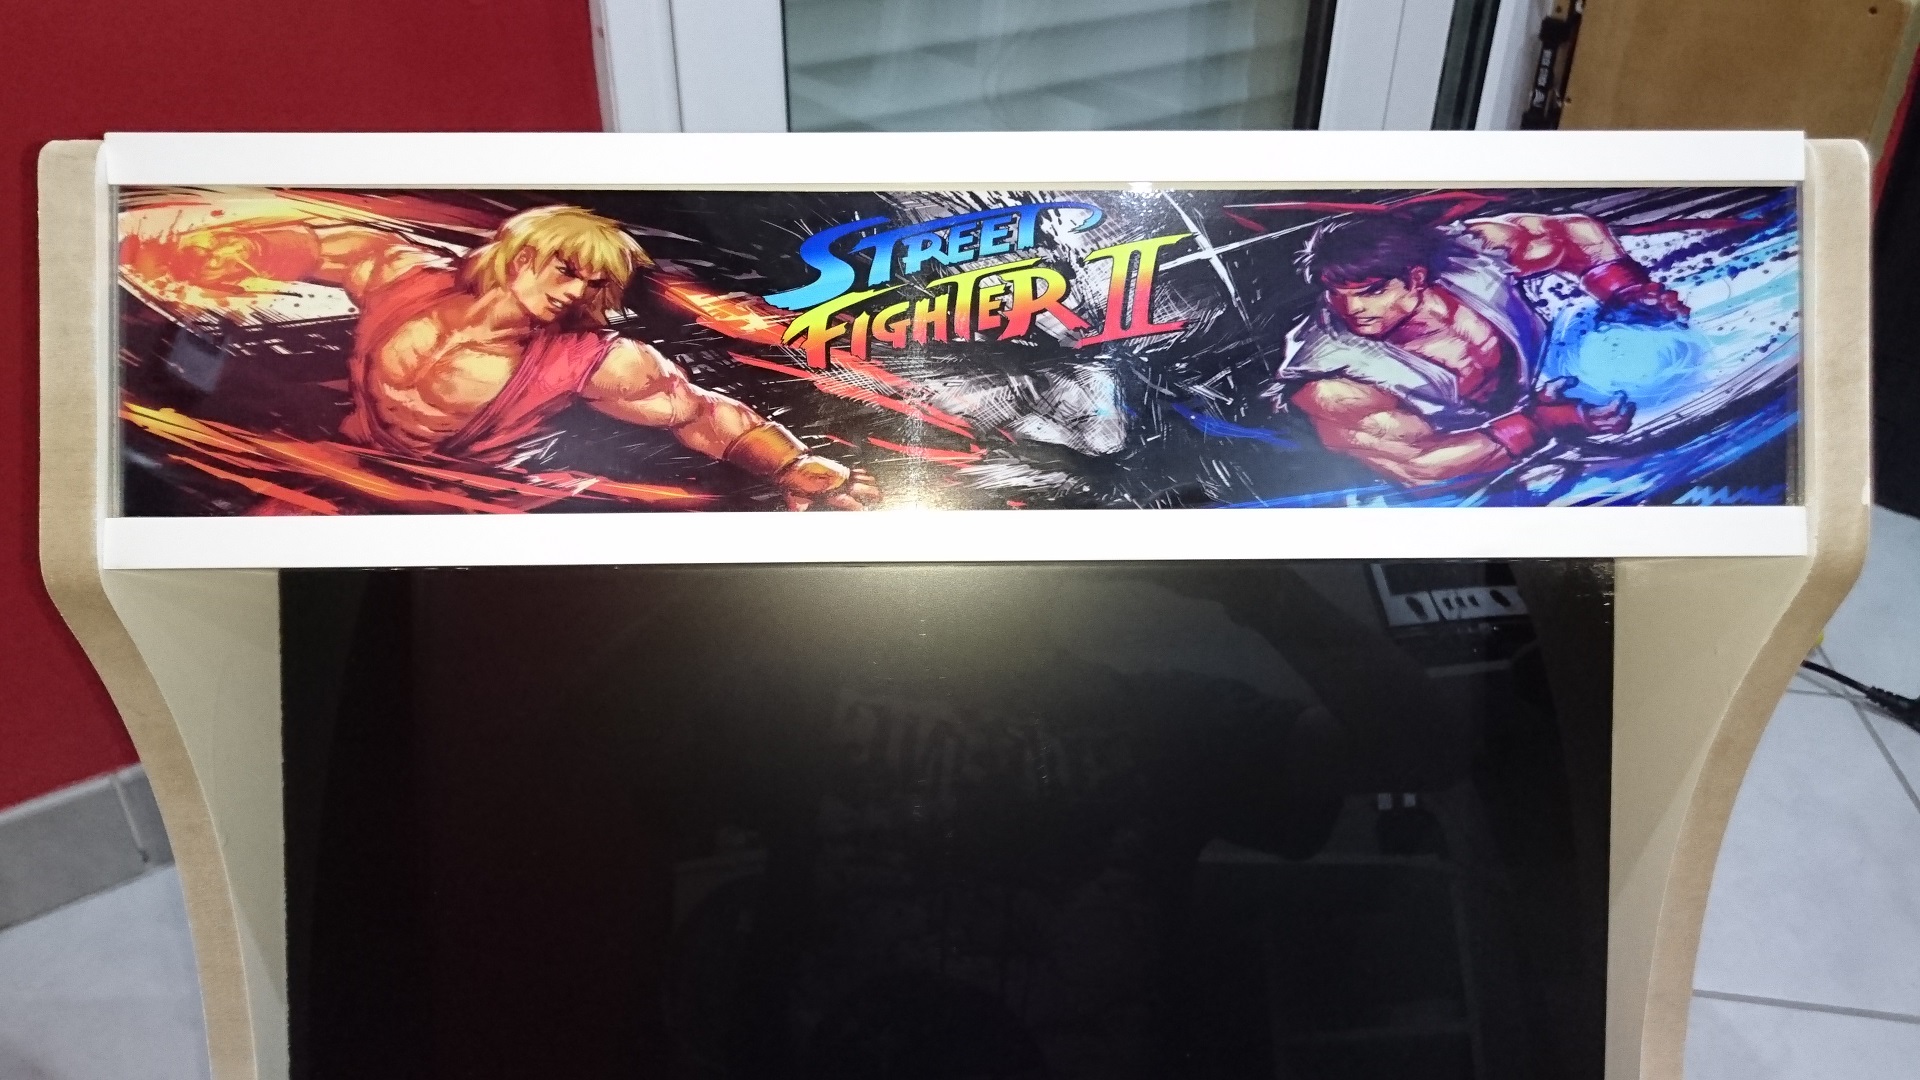
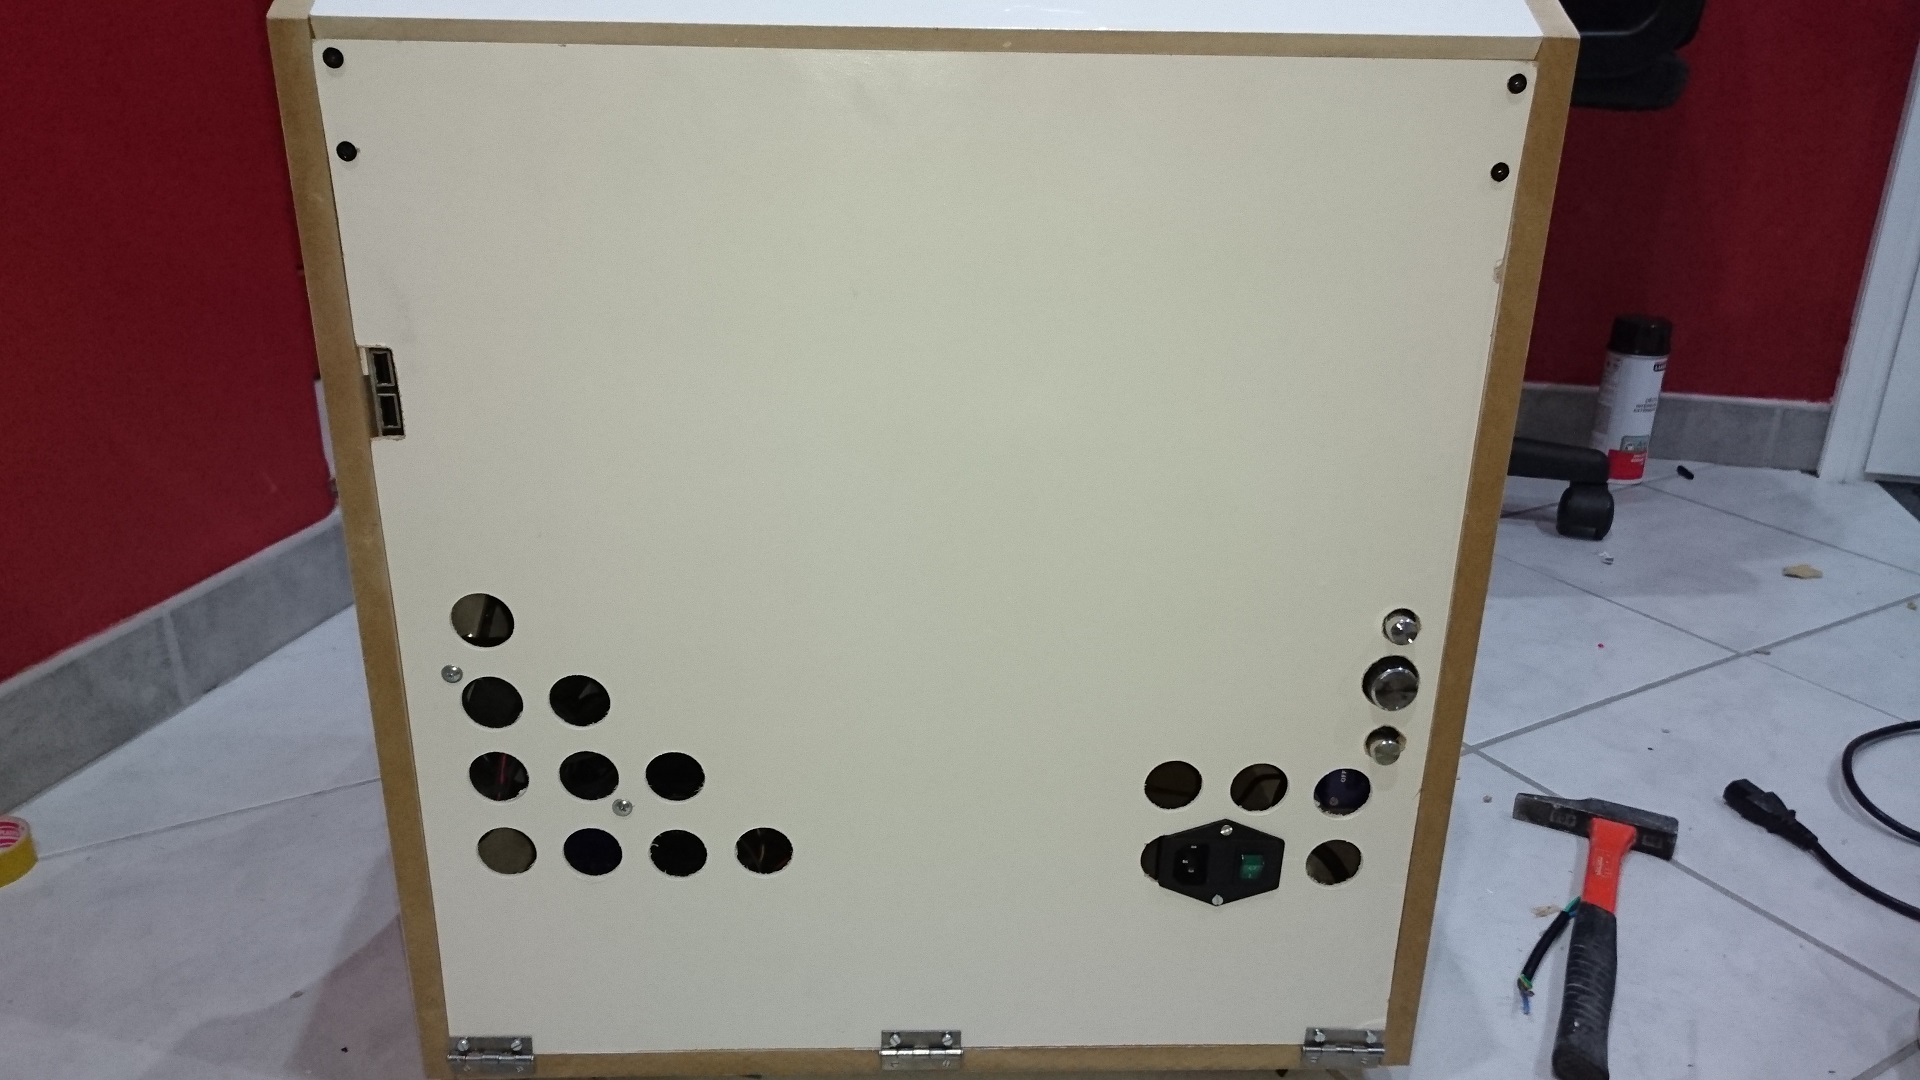
The final assembly part consisted in mounting the marquee, the backdoor, the power plug, the fan, the wii sensors and a small straight lug to make the control panel more aesthetic.
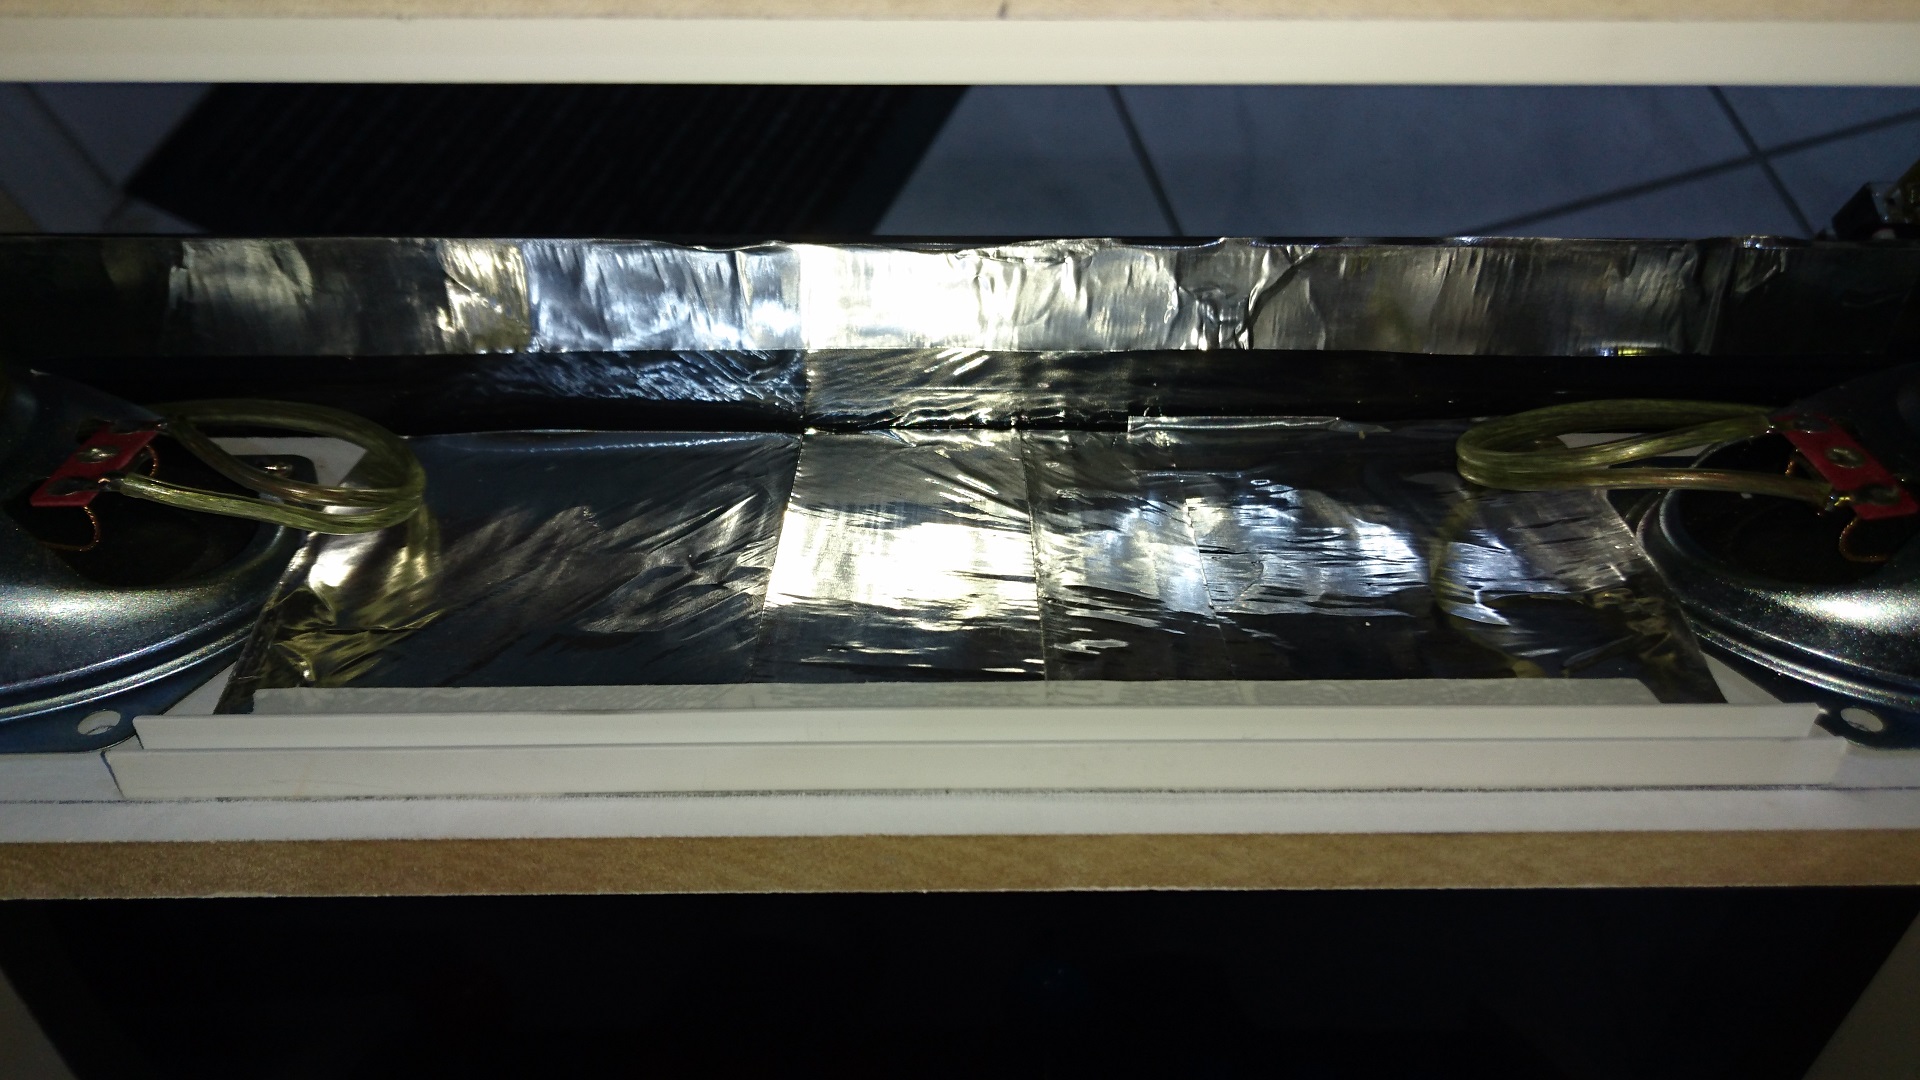
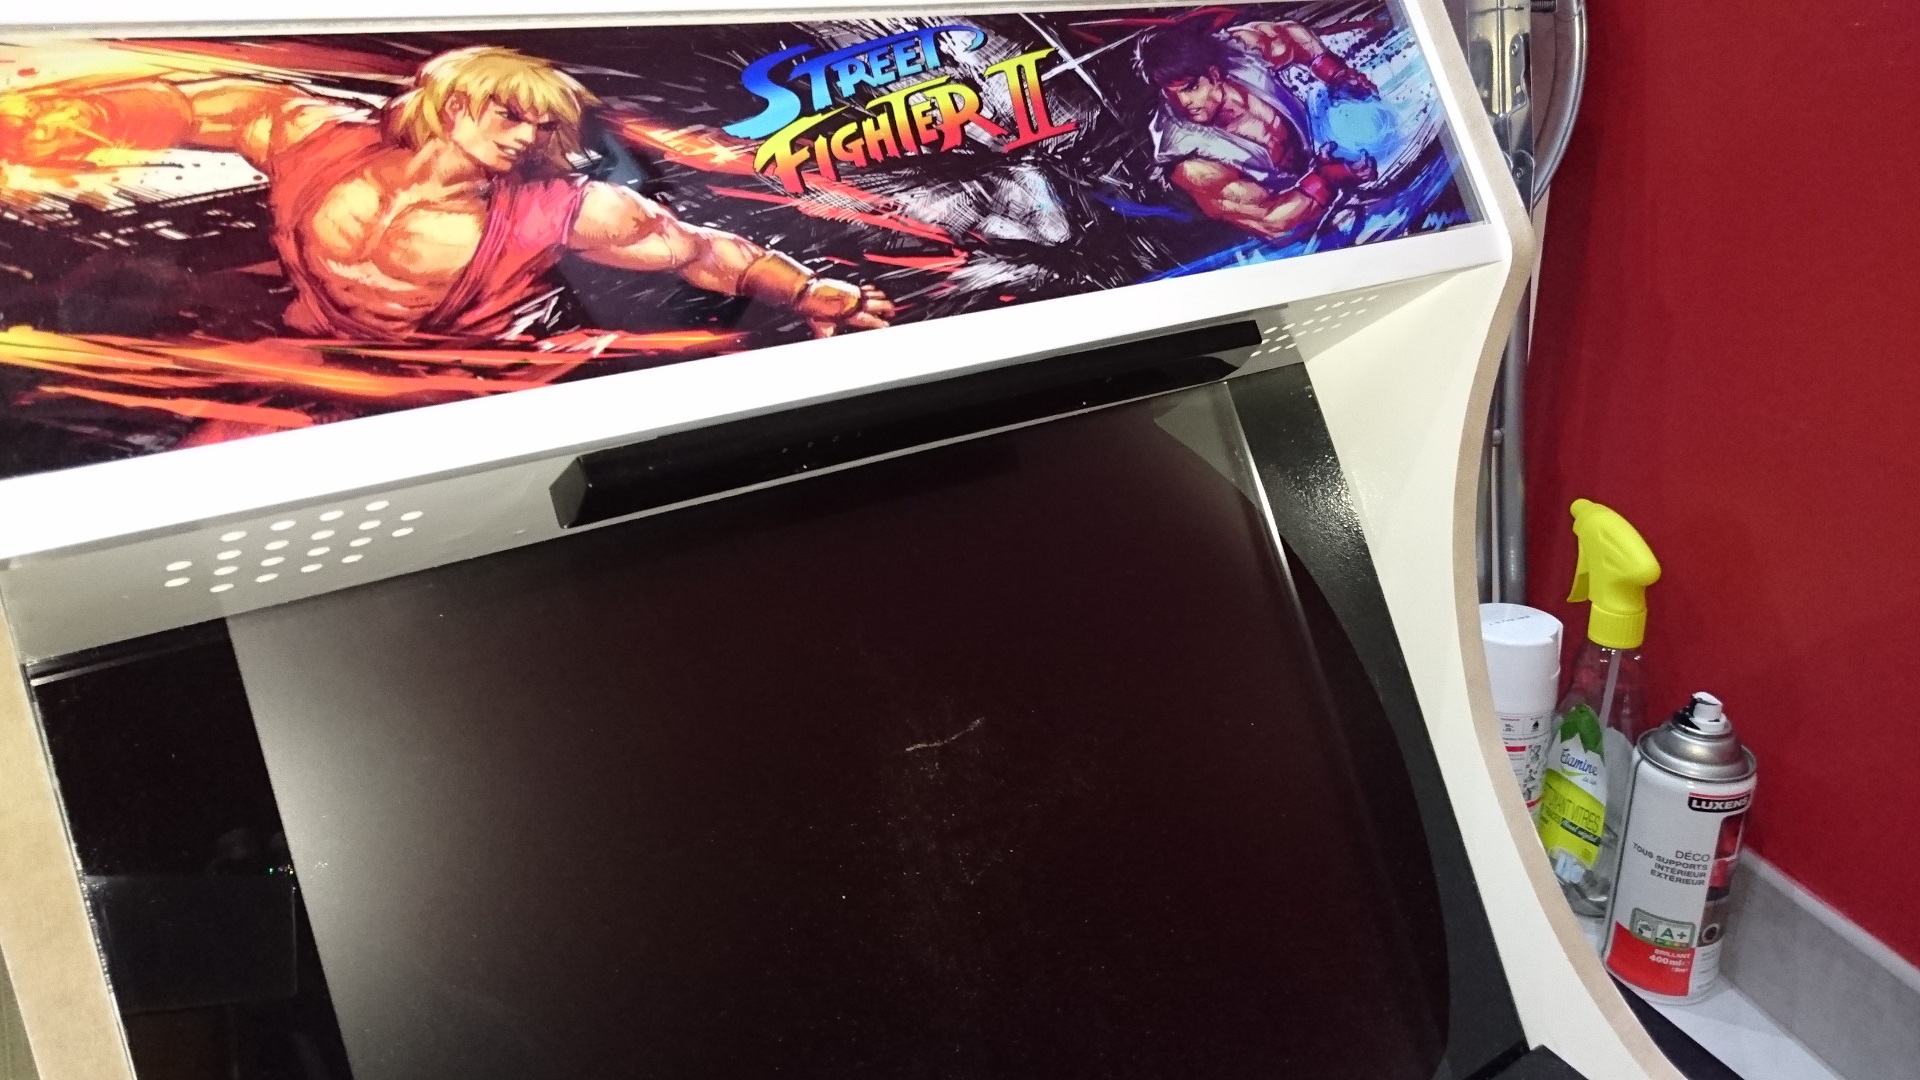
Regarding the marquee, I put some aluminium adhesive tape all around the led strip in order to increase luminosity, and to have a better light diffusion behind the graphic and the plexiglass. I used corner and straight lugs to fix the marquee graphic, which is sandwitched beetween two sheets of plexiglass.
For the Backdoor, I fixed the power plug and the fan directly on it, then I attached 3 cupboard’s door hinges as well as two magnets on the upper side to maintain it closed.
I also fixed the audio amplifier on the right side and made some holes to keep volume and tone buttons accessible when the backdoor is closed.
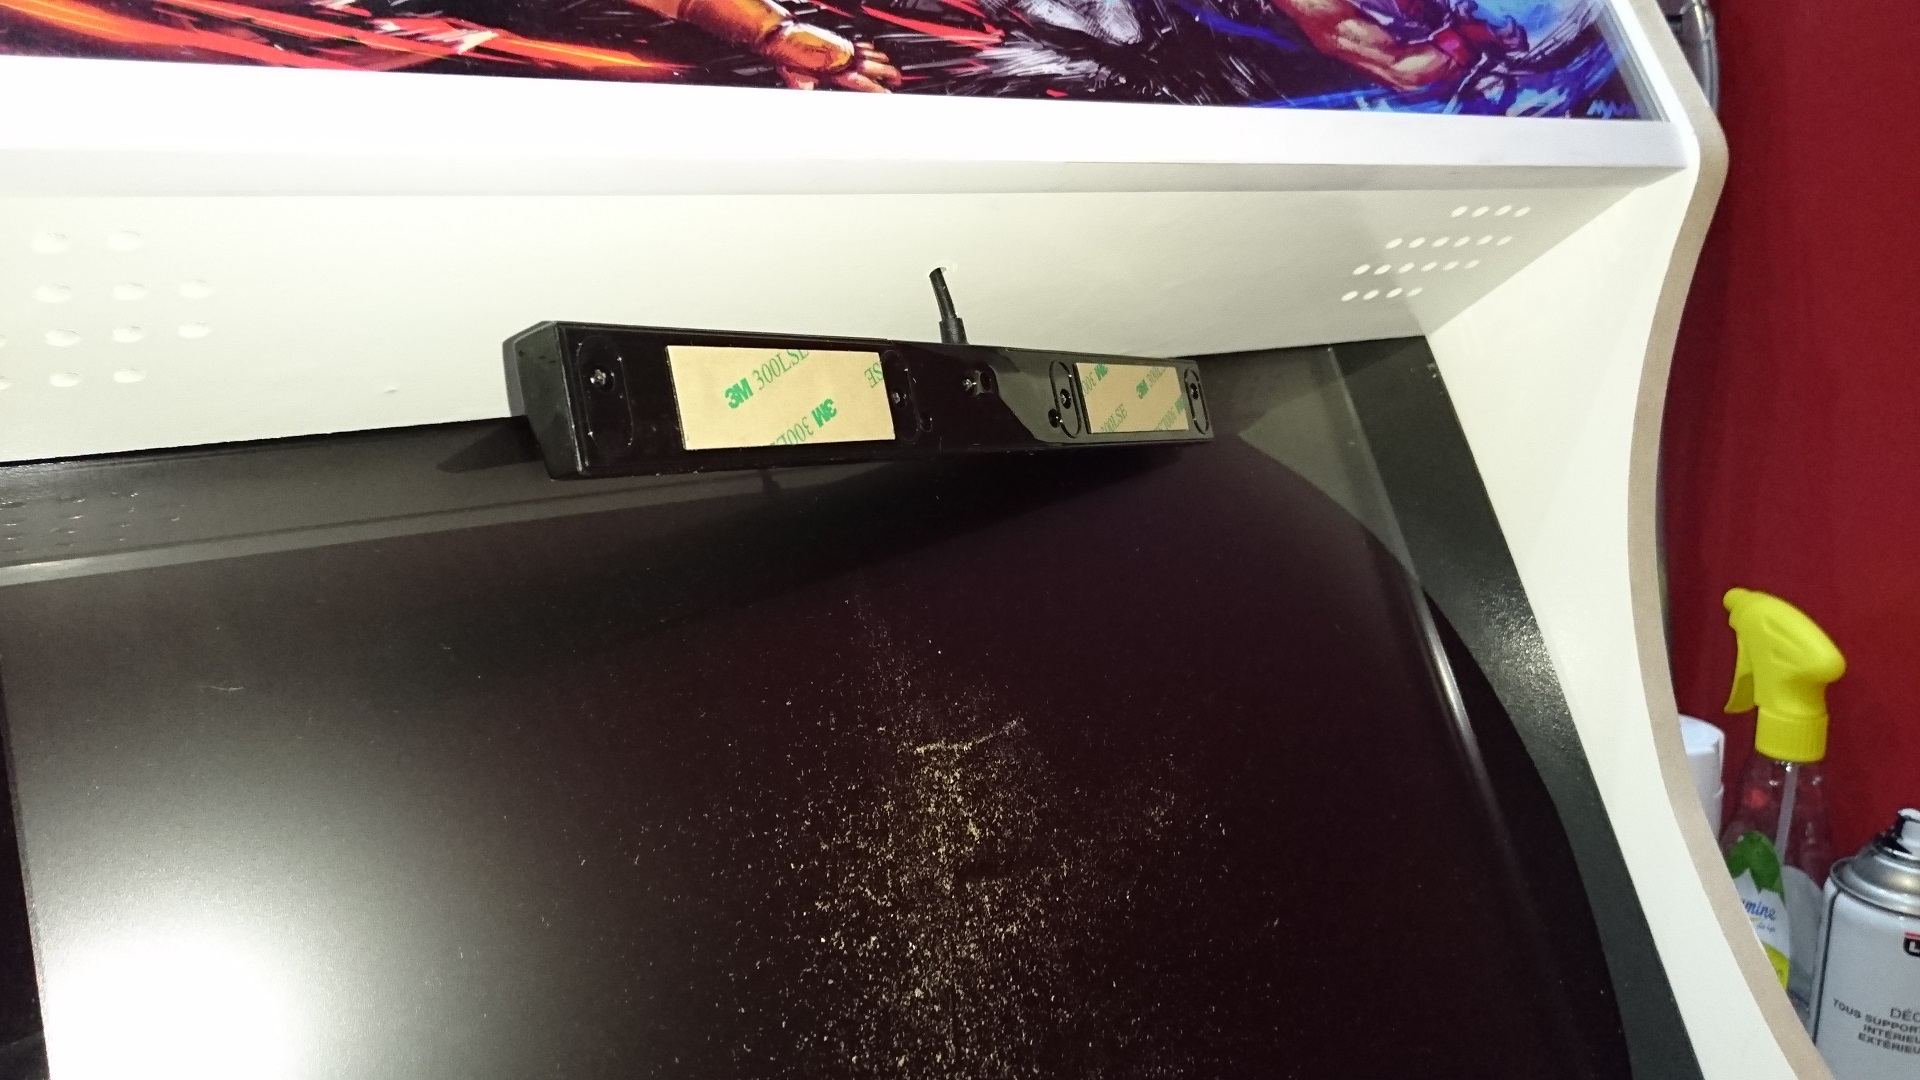
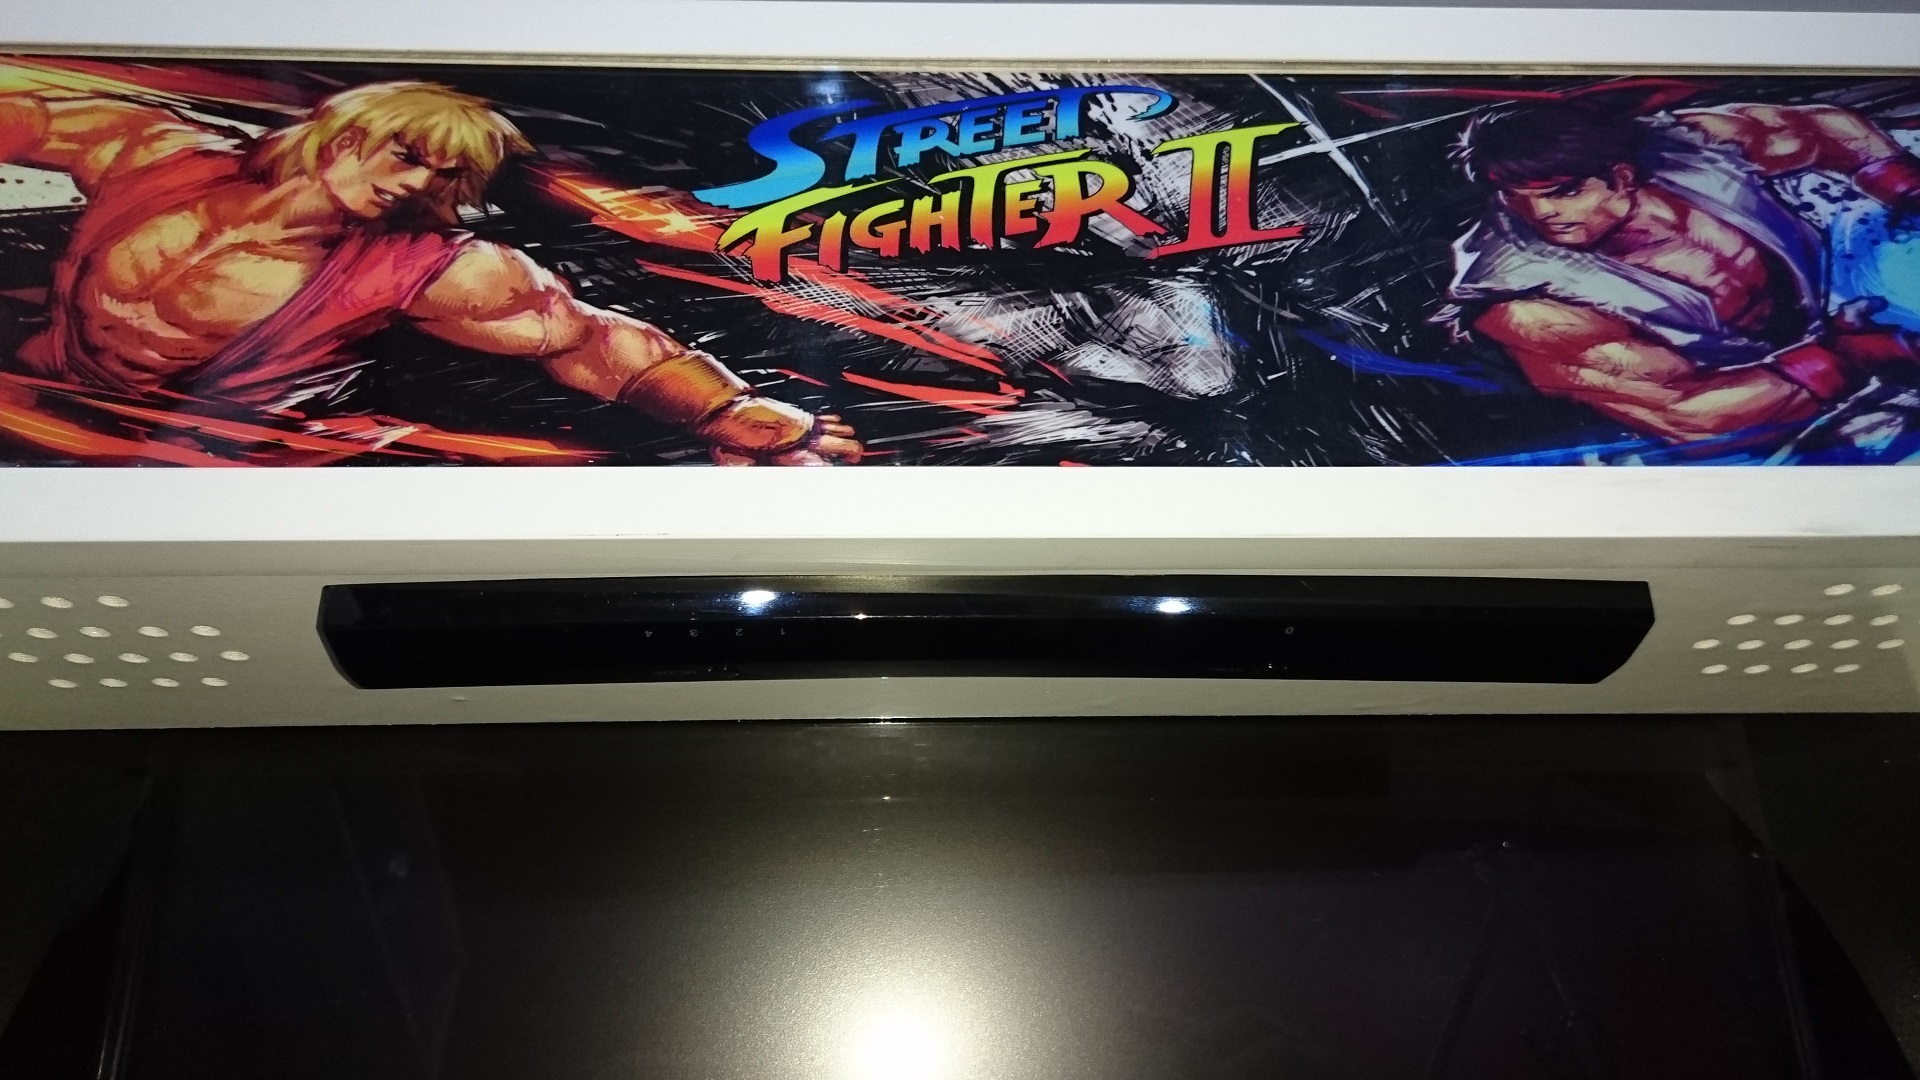
Finaly, I fixed the dolphin bar just below the marquee, and I added a straight lug on the front egde of the control panel to make it looks better, more polished.
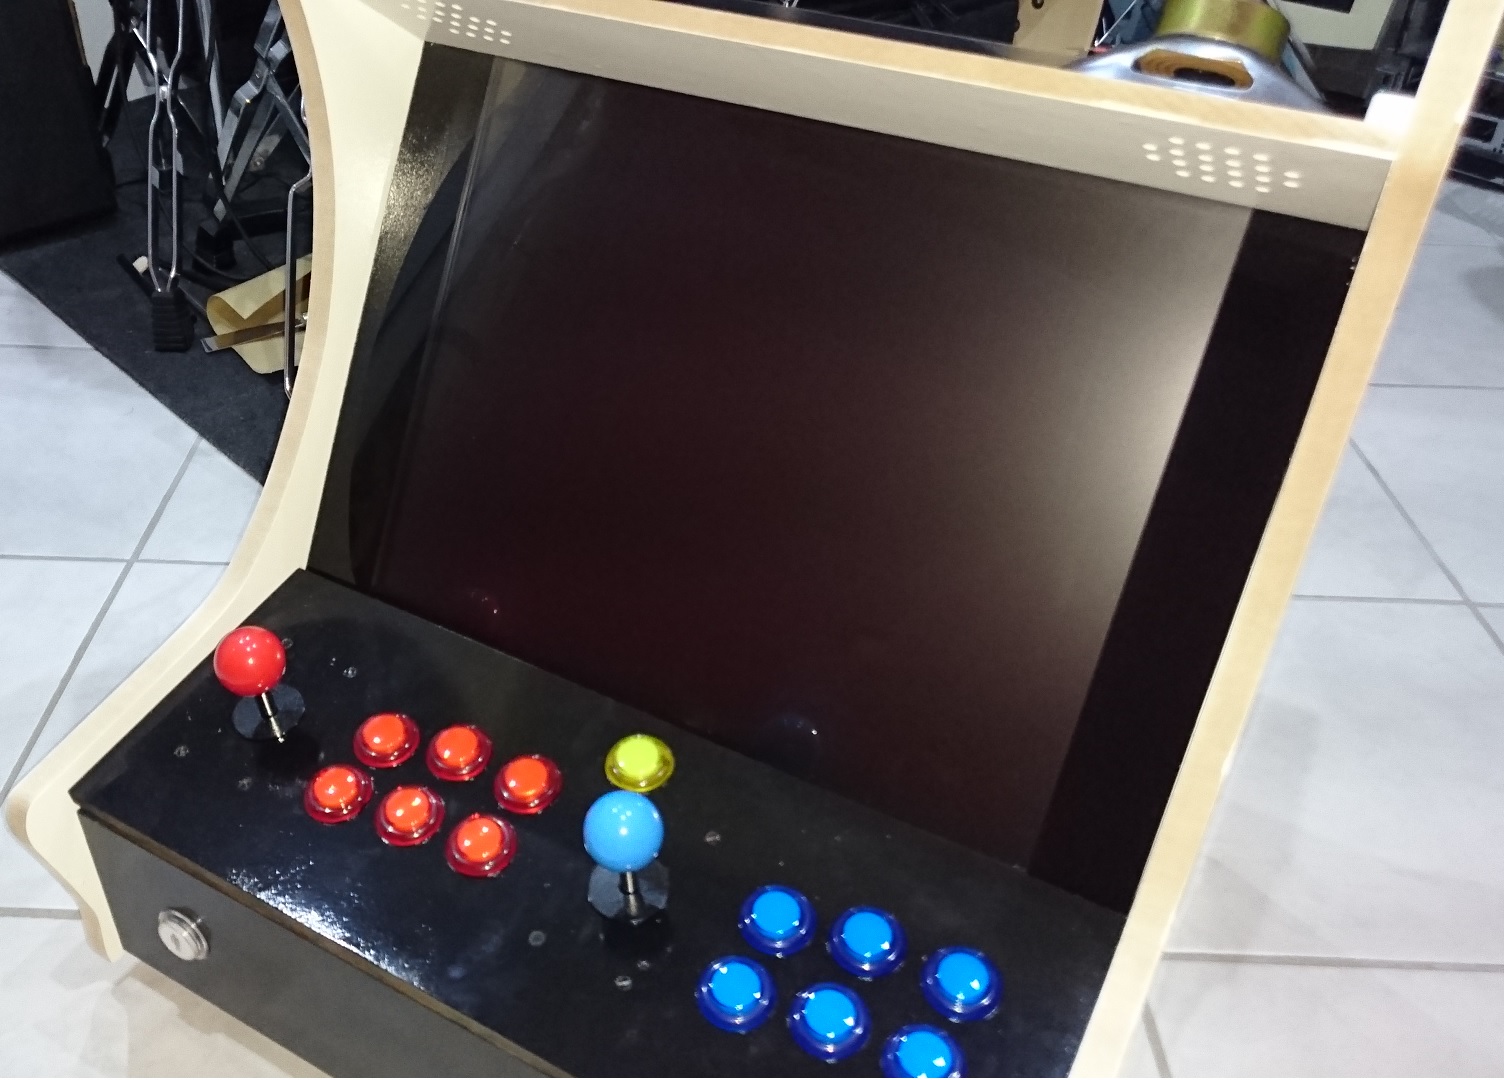
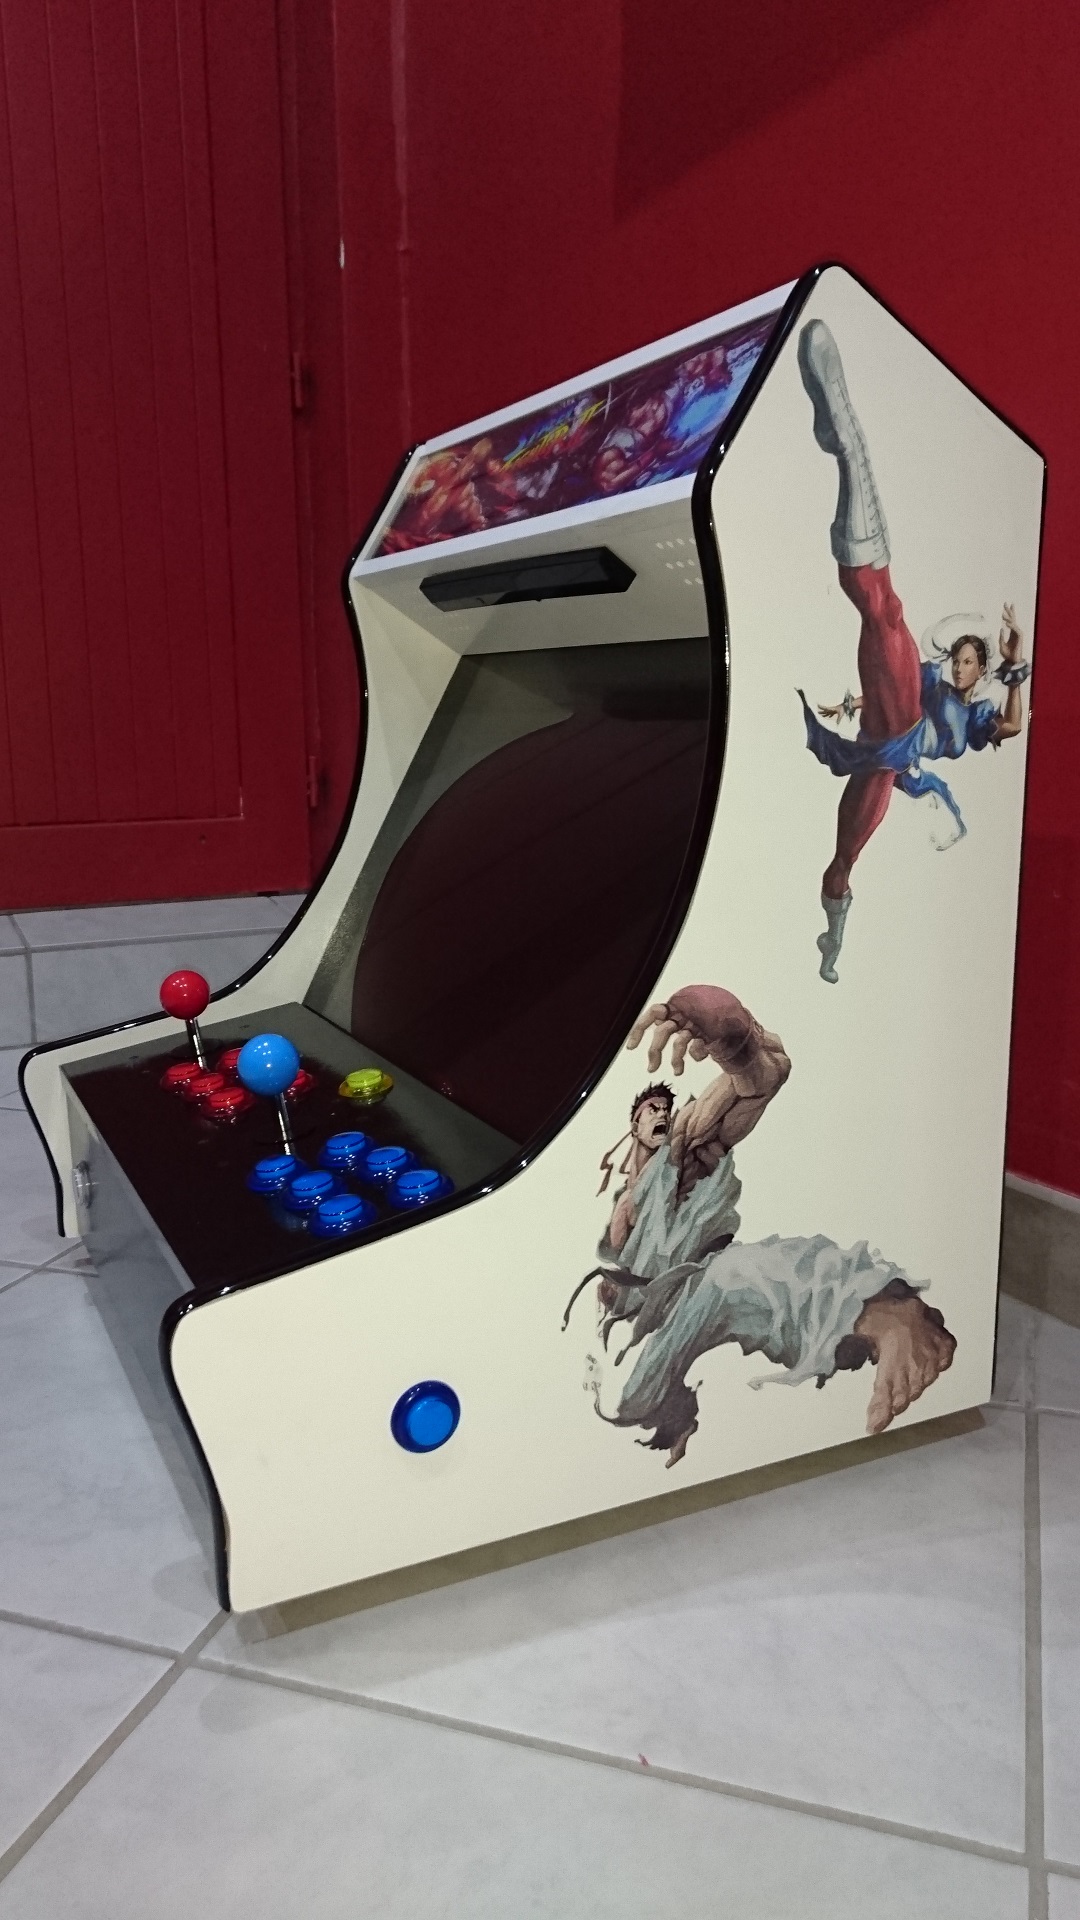
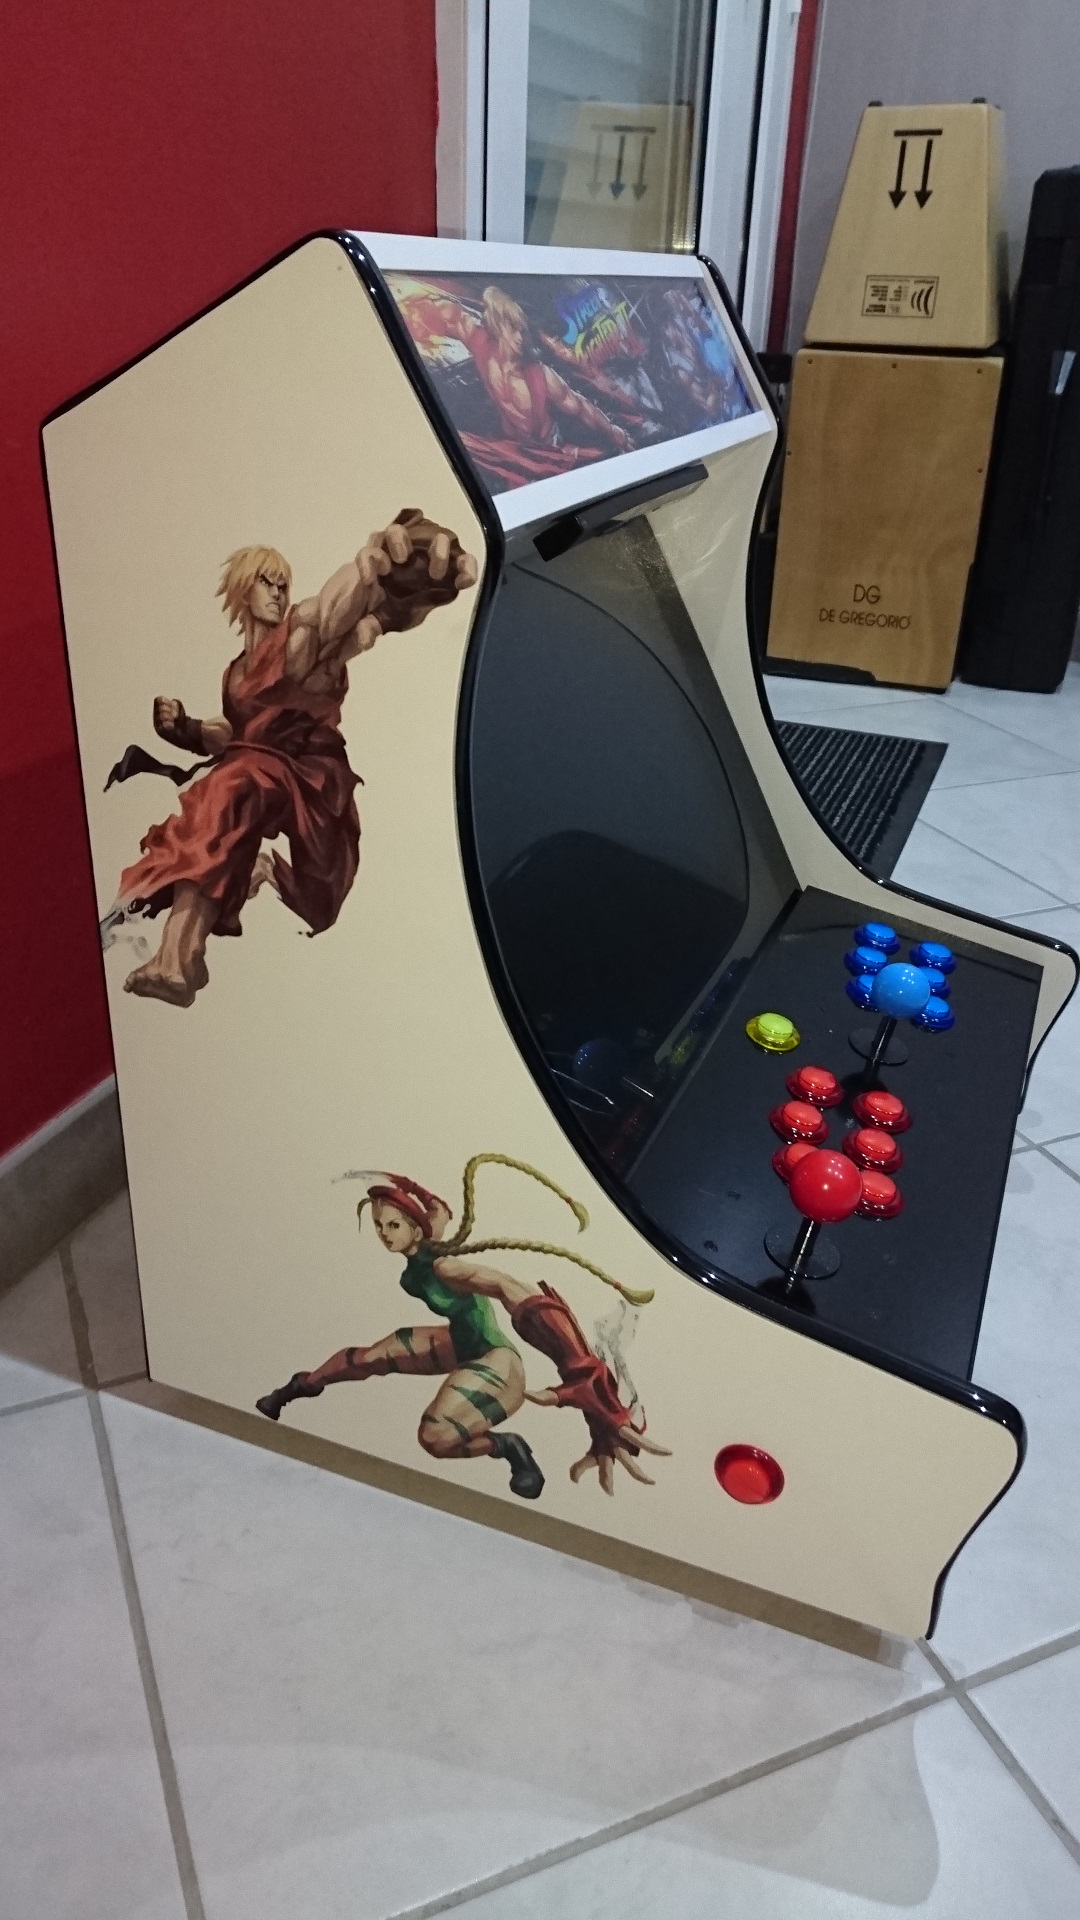
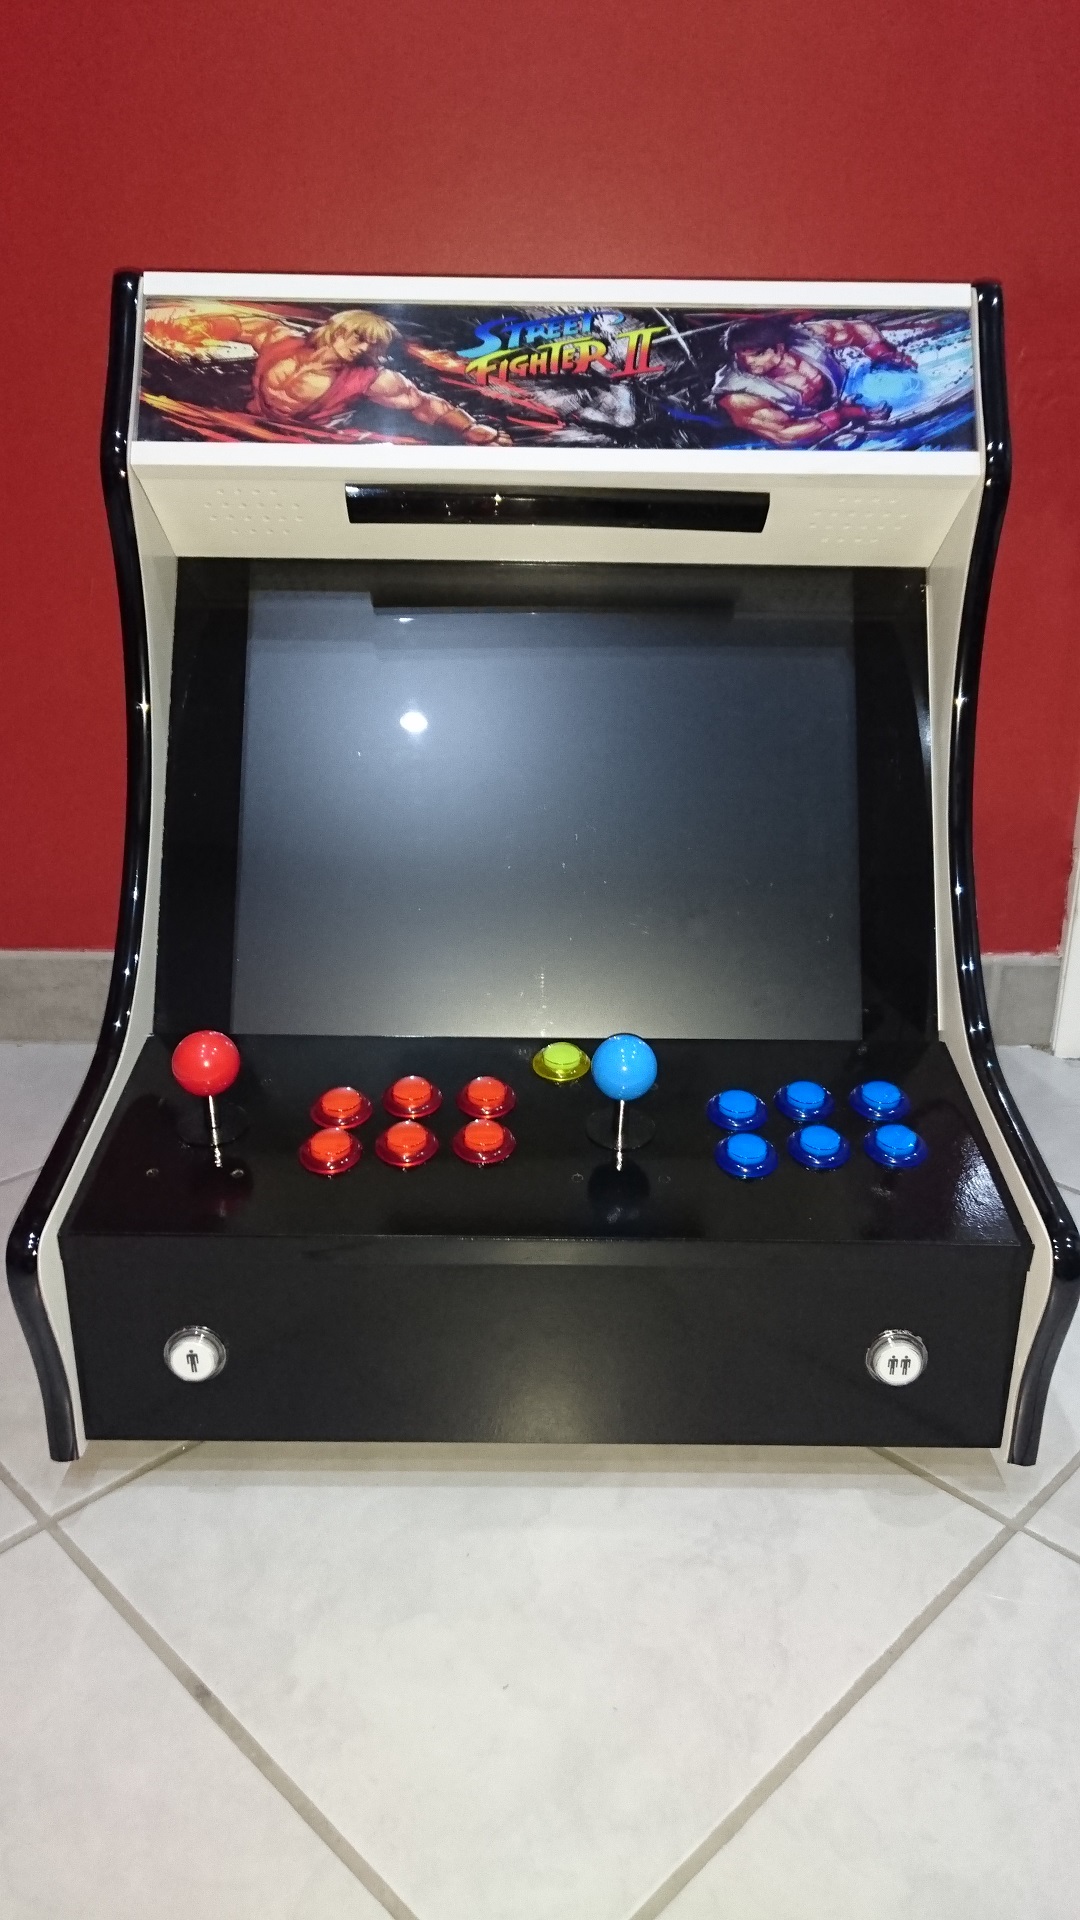
Full view
After I put the adhesive molding on edges, the finished product was there !
Software Part
For the software part, I used a tuned Windows 7, Hyperspin as front-end and the following 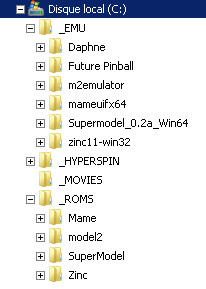 emulators :
I also used Touchmote and JoyToKey to customize controls as well as some custom shell scripts to launch emulators.
The picture on the right show how I structured the data.
Tutorials and documentation sources
There is a lots of information and tutorials on the internet for both optimizing Windows and configuring Hyperspin. Below are just links on sites that have inspired me:
- http://www.gamoover.net/Forums/index.php?topic=28411.0
- http://www.techrepublic.com/blog/10-things/10-ways-to-speed-up-windows-7/
- https://www.poweradmin.com/blog/how-to-optimize-and-speed-up-windows-7-performance/
- http://www.disk-partition.com/kb/tips-ssd-optimization-windows7-1.html
- http://dsync.blogspot.fr/2015/05/extended-guide-on-setting-up-hyperspin.html
To download videos for ingame previews, I used the chrome plugin “Flash Video Downloader” on www.newsvideo99.com and www.gamesdatabase.org
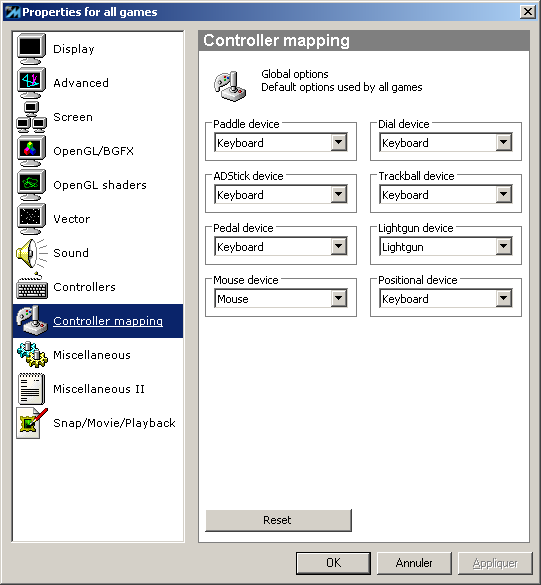
Controls
Wiimote / gun
Dolphin bar support multiple wiimotes, but this seems to only work correctly with the dolphin emulator. Other way of using it for mouse emulation (light gun), works only with one wiimote (afaik).
Here is how I set it up for emulators:
- Use dolphin bar mode 4 : direct input detects it as a standard mouse
- Use Touchmote to simulate a second mouse button (mandatory for SuperModel) by assigning a keyboard key to button A (button B is the left mouse button by default)
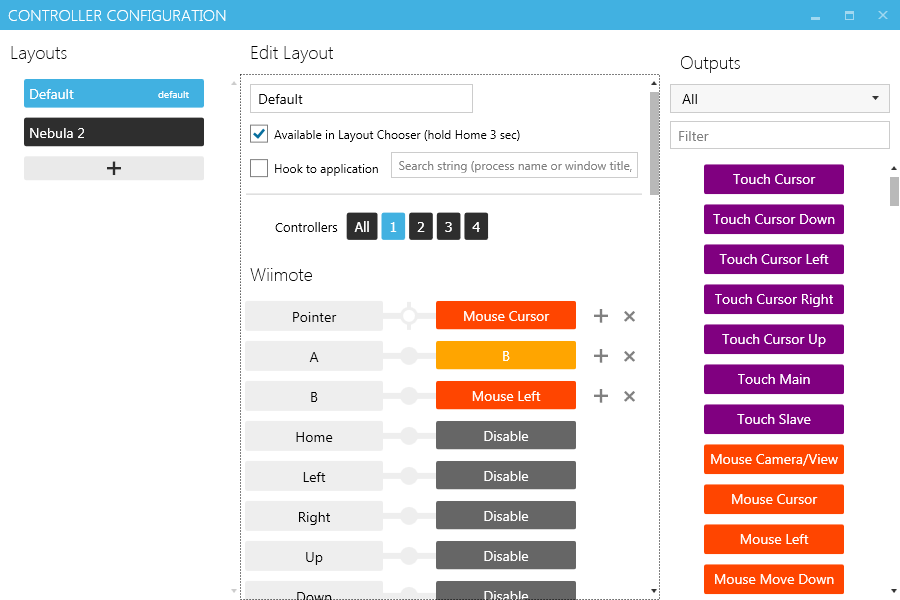
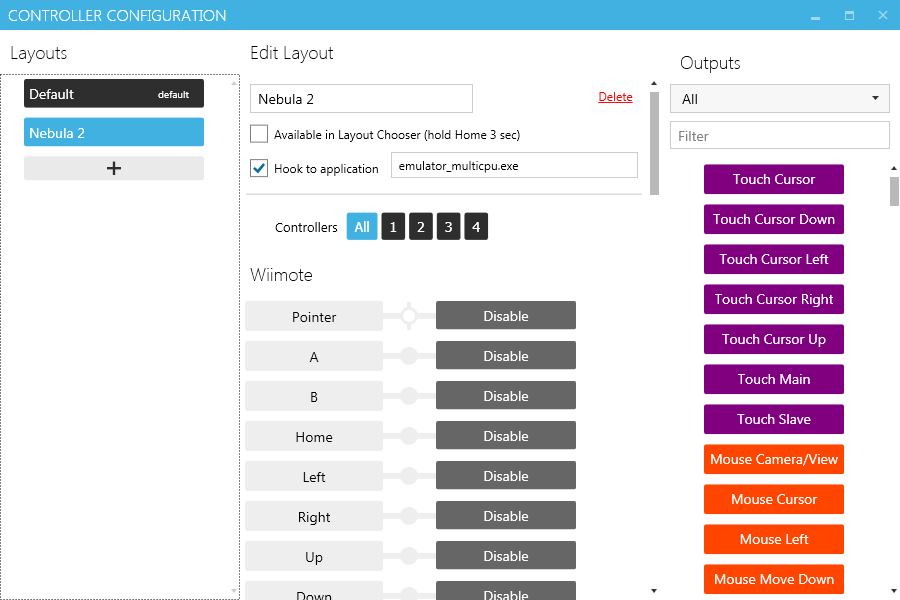
As Nebula emulator recognize both mouse buttons natively, I created a special emtpy Touchmote profil to disable it for Nebula (“emulator_multicpu.exe”):
JoyToKey
I used this soft mainly for 2 reasons :
- Map some non-configurable keys for “futur pinball” (eg: tilt)
- Configure some windows standard keys, like alt+f4 (quit emulators) or alt-tab (to have a workaround for focus problem that appears with futur pinball)
Extract of my JoyToKey configuration (HeavyBox.cfg):
|
1 2 3 4 5 6 7 8 9 10 11 12 13 14 15 16 17 18 19 20 21 22 23 |
... [Joystick 1] ... Button01=1, 09:00:00:00, 0.000, 0, 0 Button02=0 Button03=1, 51:00:00:00, 0.000, 0, 0 Button04=0 Button05=0 Button06=0 Button07=0 Button08=0 Button09=1, 12:00:00:00, 0.000, 0, 0] ... [Joystick 2] ... Button03=1, 51:00:00:00, 0.000, 0, 0 Button04=0 Button05=0 Button06=0 Button07=1, 20:00:00:00, 0.000, 0, 0 Button08=0 Button09=1, 73:00:00:00, 0.000, 0, 0 ... |
Emulators settings
Before configuring Hyperspin, I first configured each emulator to optimize settings for best possible control and rendering without sacrifying fluidity.
As it depends on personnal preferences, I won’t details all controls unless I faced some specific issues.
Daphne
Default video options was ok, but setting up input was a bit tricky. I had to change a part from the GUI (mostly suppress some assigned keys) and assign joystick buttons directly in the config file.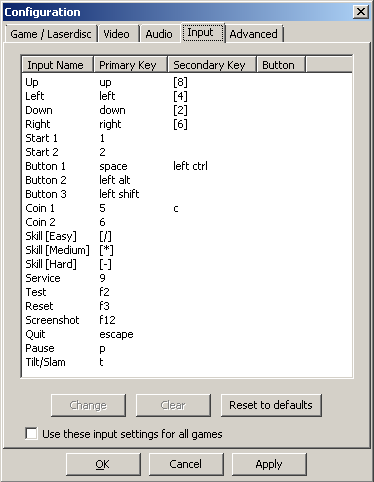
|
1 2 3 4 5 6 7 8 9 10 11 12 13 14 15 16 17 18 19 20 21 22 23 |
[KEYBOARD] KEY_UP = 273 264 0 KEY_LEFT = 276 260 0 KEY_DOWN = 274 258 0 KEY_RIGHT = 275 262 0 KEY_START1 = 49 0 9 KEY_START2 = 50 0 0 KEY_BUTTON1 = 32 306 2 KEY_BUTTON2 = 308 0 3 KEY_BUTTON3 = 304 0 6 KEY_COIN1 = 53 99 1 KEY_COIN2 = 54 0 0 KEY_SKILL1 = 267 0 4 KEY_SKILL2 = 268 0 5 KEY_SKILL3 = 269 0 7 KEY_SERVICE = 57 0 0 KEY_TEST = 283 0 0 KEY_RESET = 284 0 0 KEY_SCREENSHOT = 293 0 0 KEY_QUIT = 27 0 0 KEY_PAUSE = 112 0 0 KEY_TILT = 116 0 0 END |
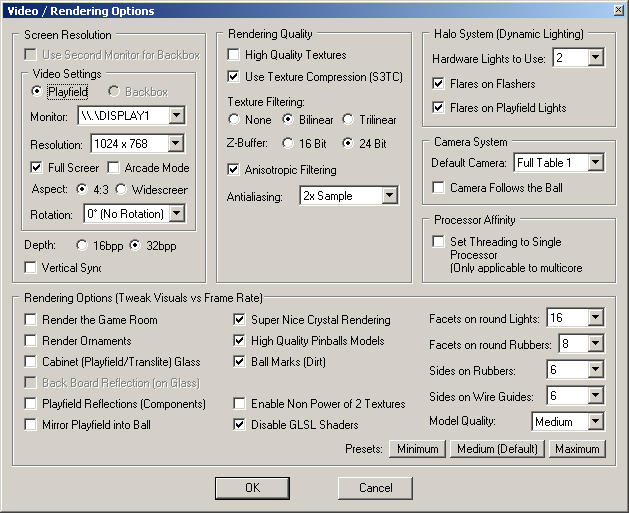
Future pinball
Despite the fact that some controls are not customizable (but JoyToKey helped here), input settings was easy with futur pinball.
It took me some time to find the best suited video settings to get the best out of my hardware:
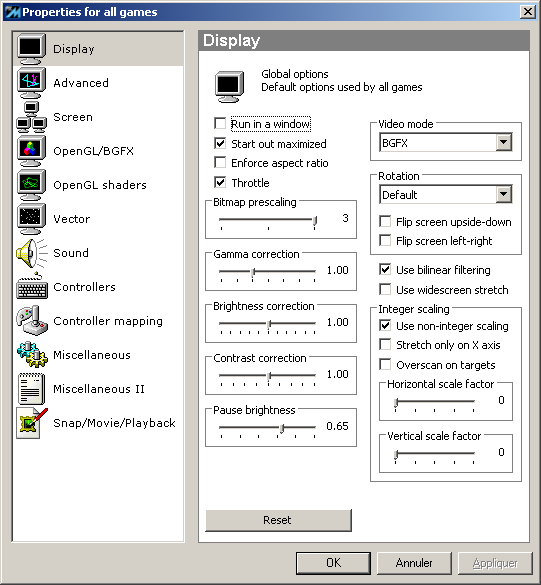
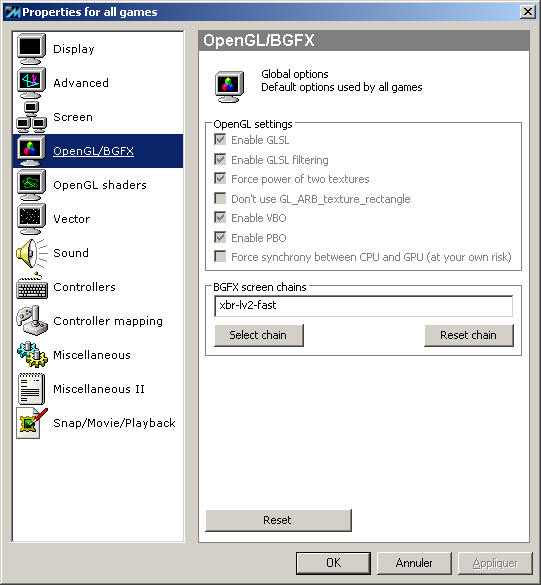
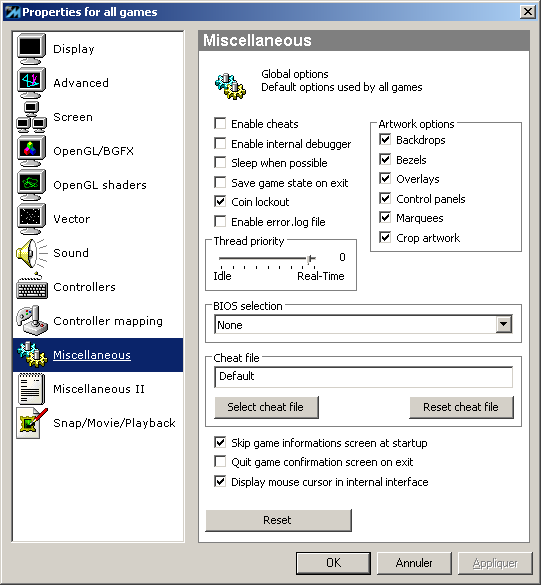
Mame
Here again, settings up Mame was not difficult, but having something that provides the best experience possible was tricky at some points.
So I made general settings for 80% of my games, then I fine tuned settings for some slow and/or vertical games.
I also tried all possible settings to get no or very few tearing with my configuration.
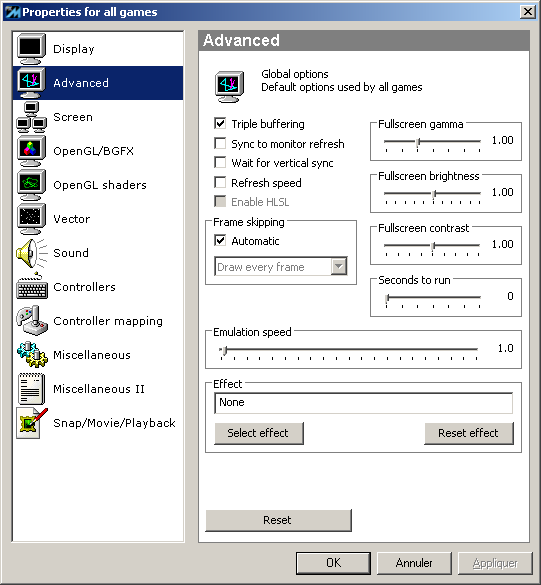
For slightly slow but yet playable games (eg. Deathsml), the autoframeskip works correctly, but I had to change audio latency in game’s specific ini file (eg. deathsml.ini):
|
1 |
audio_latency 4 |
Finaly, for vertical game, I downloaded bezel graphics when I found them and I used specific game’s ini file to (eg: dkong.ini):
|
1 2 |
keepaspect 1 unevenstretch 1 |
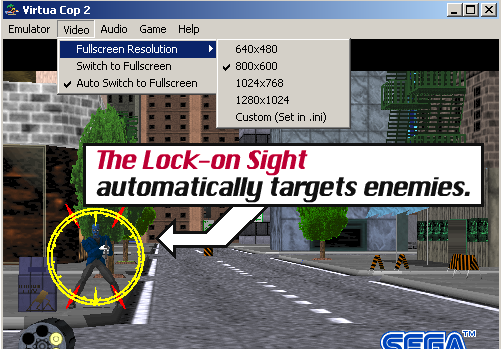
Nebula
Nothing special here. I juste used the “multicpu” exe and set the resolution to 800×600 as there was no real visual enhencement to go with more pixels…
SuperModel
This emulator run some Sega Model 3 games surprisingly well. Setting up input is quite easy, but all must be done in the config file. I just searched and set correct input everytime I saw “JOY1_XX” or “JOY2_XX”.
Nevertheless, I did not manage to make “off screen” gun detection with my WiiMote. That’s why I used Touchmote to assign a specific button (Key B) on the WiiMote’s A button and then configured consequently the emulator :
|
1 2 |
InputOffscreen = "KEY_B,JOY2_BUTTON2,MOUSE_RIGHT_BUTTON" ; point off-screen InputAutoTrigger = 0 ; automatic reload when off-screen |
Zinc
Zinc run perflectly smooth, with no problem on input. Below the rederer.cfg file I used. After multiple tests, using higher resolutions were not better looking together with filtering and blending.
|
1 2 3 4 5 6 7 8 9 10 11 12 13 14 15 16 17 18 19 |
; ogl/d3d renderer settings XSize = 640 ; Window/fullscreen X size YSize = 480 ; Window/fullscreen Y size FullScreen = 1 ; Fullscreen mode: 0/1 ColorDepth = 32 ; Fullscreen color depth: 16/32 ScanLines = 0 ; Scanlines: 0=none, 1=black, 2=bright Filtering = 3 ; Texture filtering: 0-3 (filtering causes glitches!) Blending = 2 ; Enhanced color blend: ogl: 0/1; D3D: 0-2 Dithering = 0 ; Dithering: 0/1 (only needed in 16 bit color depths) ShowFPS = 0 ; FPS display on startup: 0/1 FrameLimitation = 1 ; Frame limit: 0/1 FrameSkipping = 0 ; Frame skip: 0/1 FramerateDetection = 1 ; Auto framerate detection: 0/1 FramerateManual = 60 ; Manual framerate: 0-1000 TextureType = 3 ; Textures: 0=card's default, 1=4 bit, 2=5bit, 3=8bit TextureCaching = 2 ; Caching type: 0-3, def=2, mode 3 is not available on most cards EnableKeys = 1 ; Enable renderer keys: 0/1, def=1 (enables keys for the fps menu/pause) FastExcel = 0 ; Speed hack for SF 'excel' modes. Will cause glitches if enabled! |
Hyperspin settings
Hyperspin is a very nice front-end with lot of arcade style animations and beautiful themes for games. I used the version 1.4 which correct some issues with joystick control.
However, like many others front-end, Hyperspin has been made to be organized on a per emulator basis… Which is, IMHO, not very practical with lot of arcade games. I personally prefer a “game gender” organization (excepted for Daphne game, but don’t ask why, its just a matter of personnal taste !).
Such organization is possible with Hyperspin but it implies 2 things:
- Main menu and gender themes (wheel) must be created manually
- Game launcher must be a custom one, because all emulator games are mixed
For the 2nd point, I created some scripts (see Custom scripts below). As for the first point, it was just a matter of time and some file editions.
Custom main menu & games list
The main menu is easy to create : a simple XML file in <hyperspin dir>/Databases/Main Menu/Main Menu.xml, here is mine :
|
1 2 3 4 5 6 7 8 9 10 11 12 13 |
<menu> <game name="Beat em all"/> <game name="Daphne"/> <game name="Driving"/> <game name="Fighting"/> <game name="Gun"/> <game name="Hack & Slash"/> <game name="Pinball"/> <game name="Platform"/> <game name="Puzzle"/> <game name="Shoot em up"/> <game name="Sports"/> </menu> |
Then, for each entry, a directory with the exact same name must be created both in <hyperspin dir>/Databases and <hyperspin dir>/Medias for respectively gender game list and game theme.
I used Don’s HyperSpin Tools to build game list files, and then put each xml file in the correct gender’s directory. Eg for “beat em all” in my case : C:\_HYPERSPIN\Databases\Beat em all\Beat em all.xml
Games & Gender themes
Games themes has to be put directly in <hyperspin dir>/Databases/<main menu entry>. Eg, for “beat em all” in my case : C:\_HYPERSPIN\Media\Beat em all\Themes
A lot of game themes can be found on Hyperspin website if you create an account.
As for gender themes, I had to build them myself based on:
- mame gender for background and wheel titles (<hyperspin dir>/Media/MAME/Images/Genre)
- emulator themes for zip file structure and video preview container (eg. <hyperspin dir>/Media/SNK Neo Geo/Themes/Default.zip
Each zip file must be named like the gender in the <hyperspin dir>/Media/Main Menu/Themes. Eg. for “beat em all” in my case: Beat em all.zip
Custom scripts
Main launcher
As explained previously, mixing games from multiple emulators required to build a custom script to launch games.
The purpose of this script is to determine the emulator to execute depending on the path where the rom file is (because on the filesystem I organized rom files on a per emulator basis, then gender).
|
1 2 3 4 5 6 7 8 9 10 11 12 13 14 15 16 17 18 19 20 21 22 23 24 25 26 27 28 29 30 31 32 33 34 35 36 37 |
@echo off for /f "delims=" %%A in ('dir C:\_ROMS\ /s /b ^| find /I %1') do set "fullpath=%%A" echo "full path is: %fullpath%" for %%f in (%1) do set game=%%~nf echo "game's name: %game%" REM does not work inside zinc condition... so I put it there for /F %%B in ('find "%game%" C:\_EMU\zinc11-win32\gamelist.txt') do set "number=%%B" echo %fullpath% | find /I "Mame" > nul && ( cd C:\_EMU\mameuifx64 echo "starting mame: mameuifx64-175.exe %game%" mameuifx64-175.exe %game% ) echo %fullpath% | find /I "Model2" > nul && ( cd C:\_EMU\m2emulator echo "starting m2 emu: emulator_multicpu.exe %game%" emulator_multicpu.exe %game% ) echo %fullpath% | find /I "SuperModel" > nul && ( cd C:\_EMU\Supermodel_0.2a_Win64 echo "starting super model emu: start_super.bat "%fullpath%"" start_super.bat "%fullpath%" ) echo %fullpath% | find /I "Zinc" > nul && ( cd C:\_EMU\zinc11-win32 echo "Zinc game number found: %number%" start_zinc.bat %number% ) cd C:\_HYPERSPIN cscript.exe focus.vbs "HyperSpin" |
As you can see, I used other custom scripts to launch SuperModel and Zinc emulator as well as a special “focus.vbs” script to launch Hyperspin.
This “focus.vbs” script allows to force the focus to a specific task giving its name. This helps to bypass some lost of focus bugs with hyperspin during startup and when an emulator exits.
|
1 2 3 4 5 6 7 8 |
if WScript.Arguments.Count = 0 then WScript.Echo "windows name to activate" end if Dim shl Set shl = CreateObject("WScript.Shell") shl.AppActivate WScript.Arguments(0) |
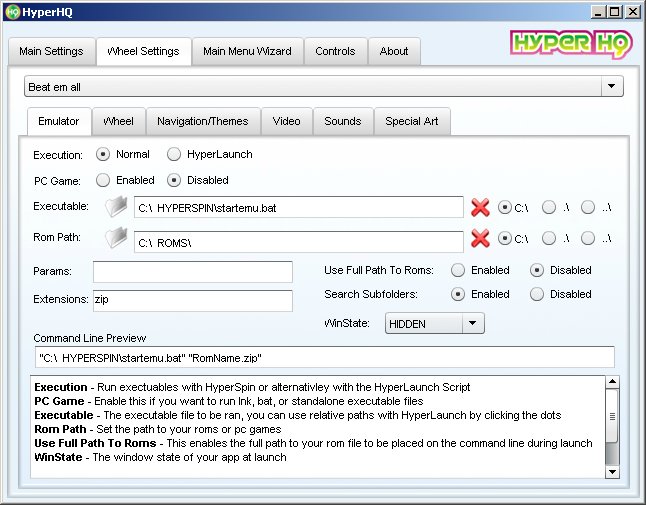
Here is how I configured HyperSpin to launch games :
Specific emulator launcher
Excepted for Mame and Nebula which get all their parameters from config files, I had to create specific scripts to launch other emulators.
Daphne:
|
1 2 3 4 |
for %%f in (%1) do set game=%%~nf echo "game's name: %game%" daphne.exe %game% vldp -framefile C:\_EMU\Daphne\vldp\%game%\%game%.txt -fullscreen -noserversend -opengl |
Supermodel:
|
1 |
Supermodel.exe -res=800,600 -fullscreen %1 |
Zinc:
|
1 |
zinc.exe %1 --roms-directory=C:\_ROMS\Zinc --use-sound=yes --sound-filter-enable=yes --sound-filter-cutoff=44100 --sound-surround-lite-enable=yes --sound-surround-lite-multiplier=40 --sound-stereo-exciter=yes --use-slow-geometry=yes --use-stackinram-hack=no --use-mem-predict=no |
Future pinball launcher
As futur pinball do not use “.zip” I made a specific launcher script and a dedicated Hyperspin config:
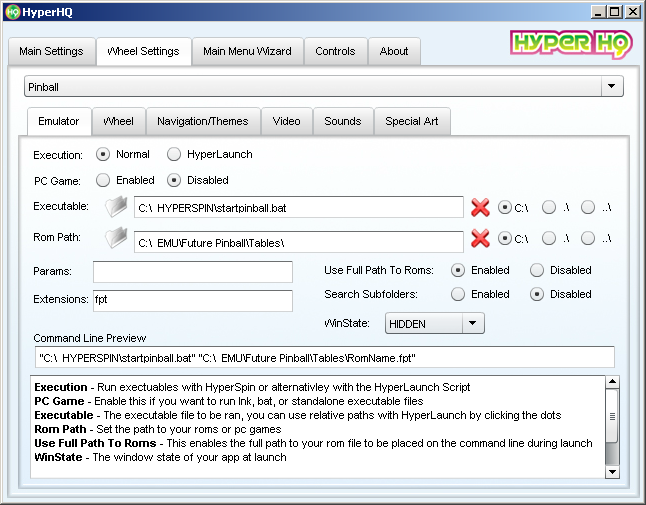 The script :
|
1 2 3 4 5 6 7 |
@echo off CD "C:\_EMU\Future Pinball" "future pinball.exe" /open %1 /play /exit cd C:\_HYPERSPIN cscript.exe focus.vbs "HyperSpin" |
Unfortunately, I still have focus problem with Future pinball : it is launched correctly, but controls does not work even when I try to force focus on it. The only way I found is to use “CTRL+TAB”. So again, I used JoyToKey to map CTRL and TAB key to two differents buttons.
Starting HyperSpin
To launch Hyperspin instead of the standard Windows shell I modified the registry key “HKLM\SOFTWARE\Microsoft\Windows NT\CurrentVersion\Winlogon” with the following :
|
1 |
C:\Windows\System32\cmd.exe /C /Q C:\_HYPERSPIN\hyperspin_startup.bat |
Yet another custom script ! It allows to start everything (Hyperspin, JoyToKey, touchmote) without focus problem nor lagging interface:
|
1 2 3 4 |
@echo off start C:\_HYPERSPIN\Joy2key\JoyToKey.exe timeout 10 cscript.exe focus.vbs "HyperSpin" |